
What's inside
- 1. What Is an Electric Sander for Walls?
- 2. Types of Electric Sanders for Walls
- 3. What to Look for When Buying an Electric Wall Sander
- 4. Choosing the Right Electric Sander for Different Wall Projects
- 5. How to Use an Electric Sander for Walls
- 6. Safety Tips When Using an Electric Sander for Walls
- 7. Common Mistakes to Avoid When Sanding Walls
- 8. Electric Sander Maintenance and Storage
- 9. Frequently Asked Questions
- Conclusion
- 1. What Is an Electric Sander for Walls?
- 2. Types of Electric Sanders for Walls
- 3. What to Look for When Buying an Electric Wall Sander
- 4. Choosing the Right Electric Sander for Different Wall Projects
- 5. How to Use an Electric Sander for Walls
- 6. Safety Tips When Using an Electric Sander for Walls
- 7. Common Mistakes to Avoid When Sanding Walls
- 8. Electric Sander Maintenance and Storage
- 9. Frequently Asked Questions
- Conclusion
As an Amazon Associate I earn from qualifying purchases. This post may contain affiliate links at no extra cost to you.
An electric sander for walls can make drywall finishing, plaster preparation, and repainting projects faster and less physically demanding. However, choosing the wrong type of sander can leave swirl marks, damage soft joint compound, or create excessive dust throughout your home. The right tool depends on the surface, the size of the project, and the finish you want to achieve.
For large drywall surfaces and ceilings, a dedicated drywall sander with an extendable handle and vacuum dust extraction is generally the most practical option. For small repairs, patched areas, and localized surface preparation, a random orbital sander offers better control and easier handling.
This guide explains the different types of electric wall sanders, what features matter when buying one, how to use them correctly, and how to achieve a smooth surface without creating unnecessary mess.
1. What Is an Electric Sander for Walls?
An electric wall sander is a power tool designed to smooth wall surfaces by moving an abrasive sanding pad across drywall, plaster, joint compound, or suitable painted surfaces.
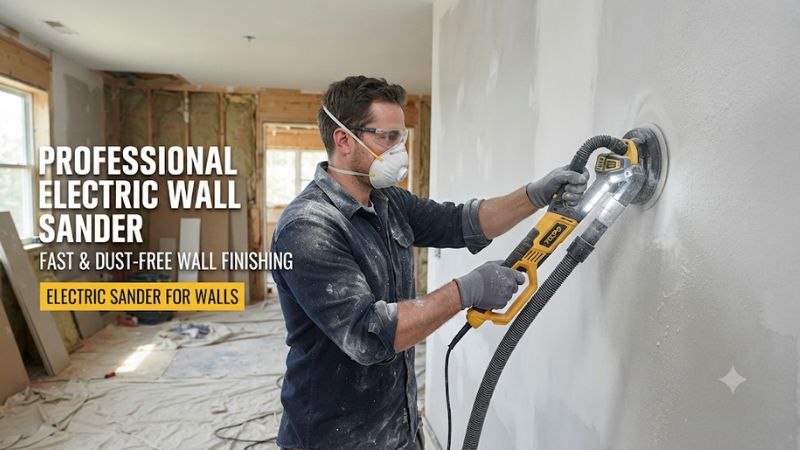
Unlike manual sanding blocks, electric sanders use a motor to produce continuous rotational or orbital movement. This reduces repetitive hand work and helps cover larger areas more efficiently.
Most wall sanders are designed around three important features:
- Large sanding surface: A wider sanding head covers more material with each pass.
- Dust extraction: A connected vacuum or integrated collection system captures dust generated during sanding.
- Adjustable handling and speed: Variable-speed controls and extendable handles help users adapt the tool to different surfaces and working heights.
Electric wall sanders are particularly useful when preparing newly installed drywall, smoothing joint compound, removing minor surface imperfections, and getting walls ready for primer or paint.
However, they are not suitable for every wall preparation task. Loose plaster, damaged drywall, peeling paint, and thick surface coatings may require repair, scraping, or specialized removal methods before sanding begins.
2. Types of Electric Sanders for Walls
Different sanding tools are designed for different workloads. Understanding their differences helps prevent unnecessary purchases and poor finishing results.
Dedicated Drywall Sanders
A drywall sander is specifically designed for sanding large wall and ceiling surfaces.
Most models feature a round sanding head, a long handle, and a connection for a dust extractor. Some include telescoping extensions, allowing users to reach higher areas without constantly moving ladders.
Professional drywall sanders may also incorporate adjustable speed controls, flexible sanding heads, and suction-assisted operation.
Best applications:
- Sanding drywall joint compound across large surfaces.
- Smoothing seams between drywall panels.
- Preparing entire rooms before painting.
- Sanding ceilings and upper wall sections.
- Removing minor surface irregularities from suitable plaster finishes.
Their main advantage is productivity. A larger sanding head covers more area than a handheld finishing sander.
However, dedicated drywall sanders require practice. Excessive pressure, incorrect speed, or holding the head in one position can remove too much joint compound and expose the drywall paper underneath.
Random Orbital Sanders
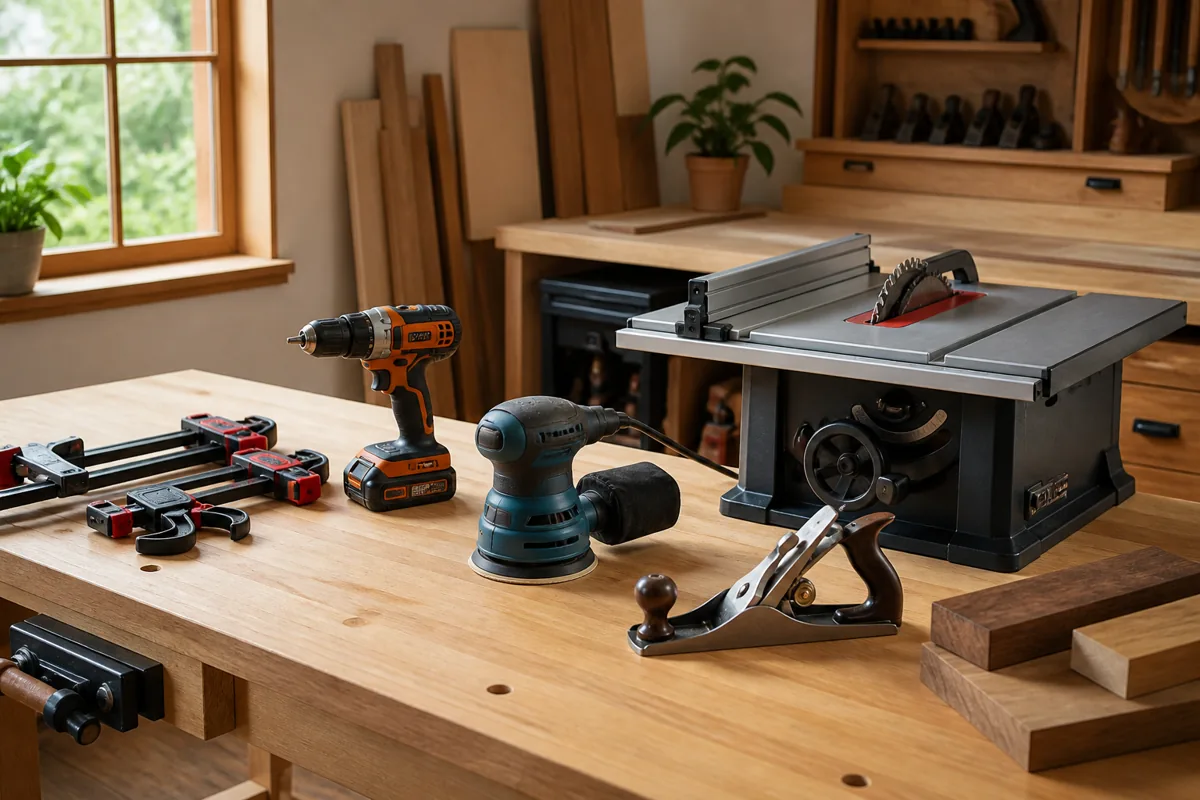
Random orbital sanders use a circular sanding pad that moves in an orbital pattern while rotating.
This combination helps reduce repetitive scratch patterns compared with conventional rotary sanding. Their smaller size also makes them easier to control around localized repairs.
They are useful for:
- Small drywall patches.
- Sanding repaired nail and screw holes.
- Smoothing isolated areas of joint compound.
- Preparing suitable painted surfaces.
- Working around areas where a large drywall sander is difficult to maneuver.
A random orbital sander is generally more practical for occasional household repairs than a full-size drywall machine.
Its limitation is coverage. A smaller pad requires more passes when working across an entire room.
Sheet Sanders
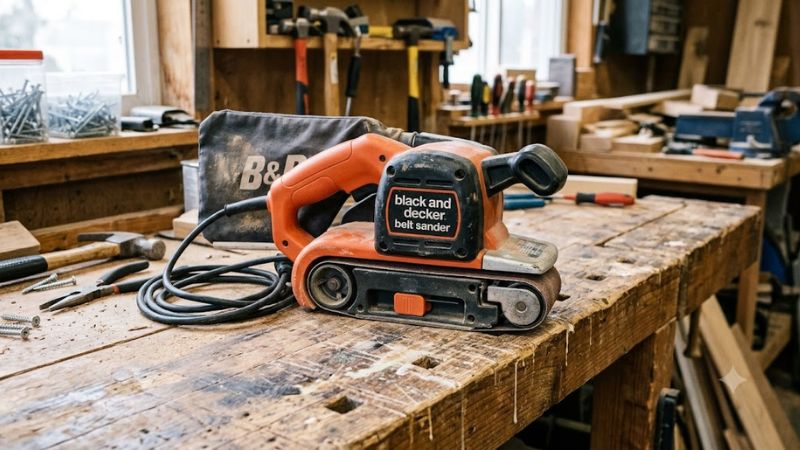
Sheet sanders use rectangular or square sanding sheets attached to a vibrating base.
They are commonly used for flat woodworking surfaces, but some models can also handle suitable wall-finishing applications.
Their rectangular shape can help with certain flat sections and edges. However, they are not specifically designed to replace dedicated drywall sanders.
Use them cautiously on soft joint compound because excessive pressure or prolonged contact can create uneven areas.
Detail Sanders
Detail sanders feature compact triangular or specially shaped sanding pads.
They are intended for tight spaces, corners, and areas that larger sanding heads cannot reach.
For wall preparation, they can help with:
- Small corners and edges.
- Narrow spaces around trim.
- Localized repairs.
- Areas near architectural details.
They should be considered supplementary tools rather than the primary choice for sanding entire walls.
3. What to Look for When Buying an Electric Wall Sander
Selecting an electric sander involves more than comparing motor power. The following features have a direct effect on handling, surface quality, and overall project efficiency.
Sanding Head Size
Sanding head diameter determines how much surface the tool can cover during each pass.
Dedicated drywall sanders commonly use sanding discs around 8–9 inches in diameter, although exact dimensions vary by model.
Larger heads are useful for extensive wall and ceiling work because they reduce the number of passes required.
Smaller sanding pads offer better control around localized repairs and restricted spaces.
Check the manufacturer’s specifications before purchasing replacement sanding discs. Diameter alone does not establish compatibility; attachment type, hole pattern, backing arrangement, and approved abrasive materials also matter.
Motor Power and Speed Control
Motor power affects how the machine operates under load, but higher wattage does not automatically mean better finishing performance.
Variable-speed control is particularly useful when working with different surface conditions.
Lower speeds can help reduce aggressive material removal when smoothing delicate joint compound. Higher settings may be appropriate for more demanding surface preparation when permitted by the manufacturer.
Always begin with a conservative setting and follow the tool’s instructions. Do not assume that the highest available speed is appropriate for every wall material.
Dust Collection System
Dust management is one of the most important considerations when choosing an electric sander for walls.
Drywall sanding produces fine particles that can spread throughout a room and irritate the eyes, nose, throat, and respiratory system.
Look for a model with:
- A dedicated dust extraction port.
- A compatible vacuum hose connection.
- A sanding head designed to capture dust.
- A suitable external dust extractor.
- Replacement filters and collection bags that are readily available.
An integrated dust bag can be convenient for small jobs, but a properly matched vacuum extraction system is generally more practical for extensive sanding.
Do not assume that connecting an ordinary household vacuum automatically provides adequate dust protection. Check the sander and extractor manufacturers’ compatibility and filtration requirements.
Handle Length and Ergonomics
A long-reach handle is particularly valuable when sanding high walls and ceilings.
Telescoping designs allow users to adjust the tool’s length for different working positions. A flexible head can also help maintain contact with the surface.
Consider the following:
- Overall tool weight.
- Weight distribution when extended.
- Grip comfort.
- Handle adjustment mechanism.
- Power-cord or vacuum-hose management.
- Ease of reaching corners and ceiling edges.
A lightweight tool is not automatically comfortable. Balance and handling become especially important during extended overhead work.
Abrasive Compatibility
Check which sanding discs, sheets, and abrasive screens the manufacturer supports.
For drywall finishing, abrasive selection depends on the condition of the joint compound and the desired finish.
Coarse abrasives remove material faster but increase the risk of gouging. Fine abrasives produce a smoother finish but are less effective at removing substantial imperfections.
Never choose an abrasive solely because its diameter matches the sanding head.
4. Choosing the Right Electric Sander for Different Wall Projects
The most suitable sander depends on how much material needs to be removed and how large the working area is.
| Project | Recommended Tool | Main Consideration |
|---|---|---|
| Entire drywall room | Dedicated drywall sander | Large sanding head and dust extraction |
| High walls and ceilings | Long-reach drywall sander | Handle adjustment and overhead control |
| Small drywall patches | Random orbital sander | Precision and manageable size |
| Screw and nail hole repairs | Random orbital or hand sander | Avoid removing surrounding compound |
| Tight corners | Detail sander or sanding sponge | Access and control |
| Minor plaster imperfections | Suitable drywall or orbital sander | Confirm surface compatibility |
| Delicate finishing work | Fine abrasive with controlled sanding | Avoid damaging the underlying surface |
For most homeowners renovating an entire room, a dedicated drywall sander offers the most practical combination of coverage and reach.
For occasional repairs, purchasing a full-size machine may not be necessary. A smaller random orbital sander or manual sanding tool can handle localized work without the additional setup.
5. How to Use an Electric Sander for Walls
Correct sanding technique is essential for achieving an even surface. The following process is suitable for ordinary drywall joint-compound finishing when the material is fully dry and the work area is safe.
Step 1: Inspect and Prepare the Wall
Before starting, inspect the surface for loose material, protruding fasteners, damaged drywall paper, and large imperfections.
Repair significant defects before sanding.
Make sure joint compound has dried according to the product manufacturer’s instructions. Sanding wet or partially cured compound can produce poor results and clog the abrasive.
Remove furniture where possible and cover remaining items with suitable protective sheeting.
Seal off the work area and protect ventilation openings to limit dust migration.
Step 2: Select the Appropriate Abrasive
Choose an abrasive suitable for the material and the amount of correction required.
Common drywall finishing options include:
- 100–120 grit: Removing noticeable ridges and rough compound when appropriate.
- 150 grit: Smoothing previously leveled areas.
- 180–220 grit: Fine finishing and light surface refinement.
These are general selection ranges rather than universal requirements. Follow the joint-compound and sanding-tool manufacturers’ recommendations.
Avoid unnecessarily coarse abrasives. They can damage drywall facing paper and create defects that require additional repairs.
Step 3: Connect the Dust Extraction System
Attach the approved vacuum hose or collection system to the sander.
Check that:
- Connections are secure.
- Hoses are not obstructed.
- Filters are correctly installed.
- Collection bags are not full.
- The extractor is suitable for the dust being generated.
Test the extraction system before beginning the main sanding operation.
A vacuum connection reduces airborne dust but does not guarantee that all particles will be captured.
Step 4: Start With a Low, Controlled Setting
Set the tool to a conservative speed recommended by the manufacturer.
Hold the sanding head flat against the surface before beginning a controlled pass, following the tool’s starting instructions.
Avoid pressing the machine hard against the wall. Let the abrasive perform the work.
Excessive pressure can increase surface damage, reduce sanding consistency, and place unnecessary strain on the tool.
Step 5: Sand Using Consistent Movements
Move the sander gradually across the surface using overlapping passes.
Maintain steady movement instead of holding the sanding head over one area for too long.
Pay particular attention to:
- Joint-compound ridges.
- Drywall seams.
- Screw and nail repairs.
- Transition areas between compound and drywall.
- Uneven patches.
Do not aggressively sand the drywall paper. If the paper becomes exposed, stop and repair the damaged area before continuing.
For corners and tight edges, switch to an appropriate hand-sanding tool if the electric sander cannot maintain proper control.
Step 6: Inspect the Finish
Stop periodically and inspect the surface under good lighting.
A work light positioned at an angle can reveal ridges, scratches, and shallow depressions that are difficult to see under normal room lighting.
Check the wall from different viewing angles.
If significant defects remain, correct them with additional joint compound rather than repeatedly sanding the surrounding surface.
Step 7: Clean the Surface Before Painting
Turn off the machine and disconnect its power source before changing abrasives or performing maintenance.
Remove remaining dust using an appropriate vacuum and cleaning method.
Follow the primer manufacturer’s surface-preparation instructions before applying primer.
Do not paint over loose sanding dust, as it can interfere with coating adhesion and surface appearance.
6. Safety Tips When Using an Electric Sander for Walls
Wall sanding can produce substantial airborne dust, particularly during extended drywall-finishing projects.
The National Institute for Occupational Safety and Health (NIOSH) identifies drywall sanding dust as a potential respiratory hazard. Joint compounds can contain gypsum, talc, mica, calcite, and, in some formulations, crystalline silica.
Follow these precautions:
Wear appropriate personal protective equipment.
Use suitable eye protection and respiratory protection selected for the expected dust exposure. A properly fitted respirator is important when respiratory protection is required; ordinary disposable face coverings should not be treated as equivalent protection.
Control dust at the source.
Use an appropriate extraction system and maintain the work area enclosure. Avoid relying on open windows or general household ventilation as the only dust-control measure.
Protect other occupants.
Keep children, pets, and people not involved in the work away from the sanding area.
Check older painted surfaces.
In the United States, homes built before 1978 may contain lead-based paint. Power sanding painted surfaces without appropriate lead-safe controls can create hazardous lead dust. The EPA recommends lead-safe renovation practices, including suitable HEPA-equipped dust extraction and containment. Hire a qualified lead-safe professional when necessary.
Inspect electrical equipment.
Check power cords, plugs, switches, hoses, and attachments before use. Keep electrical connections away from dust accumulation and follow the manufacturer’s electrical safety instructions.
Avoid unsafe working positions.
Do not overreach while operating an extended sander. Use an appropriate platform when necessary and maintain stable footing.
Stop immediately if the tool vibrates abnormally, overheats, produces unusual noise, or develops an electrical fault.
7. Common Mistakes to Avoid When Sanding Walls
Even a suitable electric sander can produce poor results when used incorrectly.
| Common Mistake | Why It Causes Problems | Better Approach |
|---|---|---|
| Applying excessive pressure | Creates grooves and uneven surfaces | Use controlled, light contact |
| Using overly coarse abrasives | Damages drywall paper | Select grit based on surface condition |
| Sanding wet compound | Clogs abrasives and damages the finish | Allow complete drying |
| Staying in one position | Removes too much material | Maintain consistent movement |
| Ignoring dust extraction | Increases airborne dust | Use suitable vacuum extraction |
| Using the wrong sander | Reduces control or productivity | Match the tool to the project |
| Skipping surface inspection | Leaves defects under paint | Check using angled lighting |
One particularly common mistake is attempting to correct deep depressions by sanding surrounding areas. Sanding removes material; it does not fill low spots. Apply additional joint compound where necessary, allow it to dry, and finish the area again.
8. Electric Sander Maintenance and Storage
Regular maintenance helps preserve sanding performance and reduces the risk of equipment problems.
After each project:
- Switch off and disconnect the sander before cleaning or inspecting it.
- Remove accumulated dust from approved external areas.
- Check the sanding pad for wear, damage, and loose attachment points.
- Inspect the dust hose and extraction connections for blockages.
- Empty the collection system and clean or replace filters according to the manufacturer’s instructions.
- Check power cords and plugs for visible damage.
- Store the tool in a dry, protected location.
Do not use compressed air to blow dust into motor openings unless the manufacturer specifically permits that cleaning method.
Replace damaged sanding pads and worn accessories with compatible parts.
For corded equipment, do not open the motor housing or attempt electrical repairs unless qualified to do so. Professional servicing is appropriate when the machine develops persistent electrical, mechanical, or overheating problems.
9. Frequently Asked Questions
Can You Use a Regular Electric Sander on Drywall?
Yes, a regular electric sander can be used on suitable drywall surfaces, particularly for small repairs and localized joint-compound finishing. A random orbital sander offers better control for these tasks, while a dedicated drywall sander is generally more practical for large walls and ceilings.
What Grit Sandpaper Is Best for Sanding Walls?
The appropriate grit depends on the wall material and finishing stage. Common drywall finishing options range from 100–120 grit for appropriate rough corrections to 150–220 grit for finer finishing. Always check the compound manufacturer’s recommendations and avoid abrasives that are unnecessarily aggressive.
Do Electric Wall Sanders Create a Lot of Dust?
Yes, electric wall sanders can generate significant dust, especially when sanding drywall joint compound or removing surface coatings. Models connected to suitable dust extractors can reduce airborne particles, but they do not eliminate exposure. Proper containment, extraction, cleaning, and respiratory protection remain important.
Is a Drywall Sander Better Than a Random Orbital Sander?
A drywall sander is generally better for extensive wall and ceiling work because it has a larger sanding head and longer reach. A random orbital sander is more convenient for small patches, localized repairs, and detailed surface preparation. The better choice depends on the project rather than motor power alone.
Conclusion
An electric sander for walls can significantly simplify drywall finishing, plaster preparation, and suitable repainting projects. However, the right choice depends on the size of the surface, the material being sanded, and the level of finish required.
For extensive wall and ceiling preparation, consider a dedicated drywall sander with variable-speed control, an adjustable handle, and a compatible dust extraction system. For smaller repairs, a random orbital sander provides more manageable handling, while detail sanders and sanding sponges help finish corners and restricted areas.
Most importantly, use the correct abrasive, avoid excessive pressure, and control dust throughout the project. With appropriate equipment and careful technique, you can prepare walls more efficiently and achieve a smooth, consistent surface ready for primer and paint.
FAQ
1. What Is an Electric Sander for Walls?
Can You Use a Regular Electric Sander on Drywall?
What Grit Sandpaper Is Best for Sanding Walls?
Do Electric Wall Sanders Create a Lot of Dust?
Is a Drywall Sander Better Than a Random Orbital Sander?
Related guides
More from Amazon
Programs that pair well with the guide above. Offers and eligibility are set by Amazon and may change.
A free business account with business pricing and bulk-buying tools for work, shop or home office.
Create a business accountFree shipping on eligible items, Prime Video and more. Eligible new members can start with a free trial.
Start a Prime free trialAudiobooks and podcasts to listen to on the go. Eligible new members can start with a free trial.
Try Audible freeAd-free music streaming. Eligible new subscribers can start with a free trial.
Try Music Unlimited freeAs an Amazon Associate we earn from qualifying purchases.


Write Your Review
No reviews yet. Be the first to share your experience!