What's inside
As an Amazon Associate I earn from qualifying purchases. This post may contain affiliate links at no extra cost to you.
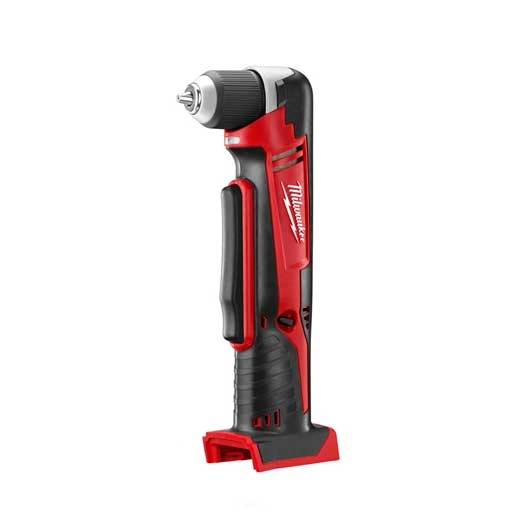
A cordless right-angle drill is useful when a standard drill cannot fit between studs, joists, or other framing. It can also make a cramped job slower if the head is too large, the bit is poorly chosen, or the tool is pushed beyond its limits. The goal is to match the drill and accessory to the hole, then keep control of the tool as the bit breaks through.
Check the space and hole
Measure the clear distance around the planned hole, not just the gap between framing members. The drill head, chuck, bit, and your hand all need room. A compact right-angle drill may fit where a full-size model will not, but “compact” does not guarantee that its head clears a pipe or neighboring wire.
Also check what is behind the work. Locate plumbing and electrical runs before drilling, and follow local code for hole placement, size, and protective plates. In many standard wood-framing situations, holes must stay centered in the stud or joist and leave enough wood at the edges; requirements vary by member type, size, and jurisdiction. Do not use a framing hole as permission to cut through a structural member beyond code limits.
Choose a tool for the work
For occasional holes in softwood, a lower-cost right-angle drill or a right-angle attachment on a compatible drill can be enough. An attachment is often cheaper, but it adds length and may be harder to control in a narrow bay. For repeated large holes, dense lumber, or overhead work, a dedicated right-angle drill with a side handle and a clutch or electronic control is easier to manage.
Before buying, compare head height, overall length, speed range, chuck capacity, and battery fit. A tool that takes the batteries you already own can save money, but check whether the battery makes the complete setup too bulky. A 2.0Ah pack is lighter for short work; a 4.0Ah or larger pack usually runs longer but adds weight. If you need a dedicated tool, browse cordless right-angle drills and compare the stated head dimensions against your actual bay.
| Setup | Best fit | Main trade-off |
|---|---|---|
| Right-angle attachment | Occasional small holes; existing drill platform | Often longer and less balanced; check attachment speed and torque limits |
| Compact dedicated drill | Small bays and intermittent framing work | May slow down on larger bits or long runs |
| High-torque right-angle drill | Repeated large holes in framing lumber | Heavier, costlier, and capable of a stronger reaction if a bit binds |
Pick the right bit
Use a sharp bit intended for wood and for the hole diameter you need. Auger bits clear chips well and work efficiently in framing lumber, but their screw tips can pull aggressively into the wood. Self-feed bits are useful for larger holes, though they can produce a hard twist if the cutters catch. Spade bits are inexpensive and fine for modest holes when speed and clean edges matter less, but they tend to vibrate more and leave rougher exits. For smoother holes, a hole saw may work, but it can load the drill heavily and retain a wood plug.
Check the drill’s manual for maximum bit diameter and speed. Do not assume that a tool capable of spinning a bit can safely drive it through a full-depth hole. If you need a set for mixed framing tasks, compare wood auger bit sets by shank size and stated use, not by the number of pieces alone. A sharp single bit is often better than a large, dull assortment.
Set up and drill
Remove the battery while fitting the bit. Tighten the chuck fully, then confirm the bit runs straight. Put the drill in low gear for large bits or tough material, and use a higher speed only when the manual recommends it for that bit. Set the clutch, if available, to drilling mode for boring; the clutch is not a substitute for holding the tool securely.
Mark the hole and keep the bit square to the face of the member. Brace the drill with both hands where possible, using the side handle if supplied. Start slowly until the cutters are centered, then apply steady pressure. Let the bit clear chips: withdraw it partway if progress slows or the flutes pack with sawdust. For a deep hole, drilling in short passes reduces heat and binding. Keep the tool and battery clear of loose clothing, cords, and the other side of the framing bay.
As the bit nears the far face, ease off pressure. Breakthrough is a common point for the bit to grab, especially with self-feed and auger bits. If access permits, drill from both sides to reduce tear-out. Never lean your body into the drill or hold the work with a hand near the bit.
Avoid kickback and overheating
A stalled bit can twist the drill suddenly. Keep a firm grip, stand so a reaction will not pull you into a sharp edge, and use the auxiliary handle. Stop if the bit binds; release the trigger, remove the battery if you need to clear the bit, and back it out carefully. Do not keep pulling the trigger against a jam. Repeated stalls can overheat the motor, battery, or connection points.
If the drill slows noticeably, the battery gets unusually hot, or the tool’s protection shuts it down, let it cool and inspect the bit. A larger battery may extend runtime, but it will not fix a dull bit, an oversized hole, or an unsuitable speed. For frequent high-load drilling, choose a platform with available batteries that suit the job and a charger that can keep pace; for a few holes, the battery and charger already on your platform are usually adequate.
After drilling, remove chips from the tool’s vents and inspect the bit for damage. Store batteries dry and at a moderate temperature, and use only chargers approved for that battery platform. A right-angle drill is a specialized convenience, not a shortcut around checking the framing, choosing the right bit, or controlling the tool through breakthrough.
Related guides
- Longest Lasting Lawn Mower Battery: AGM vs Lithium vs Flooded Lifespan and Cost per Season
- Duralast Gold Lawn Mower Battery Review: U1 Fit, CCA and When to Pay for AGM
- Greenworks Pro 80V 21-Inch Mower Review: Runtime Math, Push vs Self-Propelled and Yard Fit
- Bosch High Pressure Washer Gun Replacement: Fittings, Adapters and What Fits Your Model