
What's inside
- 1. Understanding Chicago Electric Miter Saws
- 2. How to Identify Your Chicago Electric Miter Saw
- 3. Setting Up a Chicago Electric Miter Saw
- 4. How to Adjust Miter and Bevel Angles
- 5. How to Use a Chicago Electric Miter Saw
- 6. Common Chicago Electric Miter Saw Problems
- 7. Maintaining a Chicago Electric Miter Saw
- 8. Essential Safety Precautions
- 9. Is a Chicago Electric Miter Saw Worth Buying?
- 10. Frequently Asked Questions
- Final Thoughts
- 1. Understanding Chicago Electric Miter Saws
- 2. How to Identify Your Chicago Electric Miter Saw
- 3. Setting Up a Chicago Electric Miter Saw
- 4. How to Adjust Miter and Bevel Angles
- 5. How to Use a Chicago Electric Miter Saw
- 6. Common Chicago Electric Miter Saw Problems
- 7. Maintaining a Chicago Electric Miter Saw
- 8. Essential Safety Precautions
- 9. Is a Chicago Electric Miter Saw Worth Buying?
- 10. Frequently Asked Questions
- Final Thoughts
As an Amazon Associate I earn from qualifying purchases. This post may contain affiliate links at no extra cost to you.
A Chicago Electric miter saw can be a practical option for DIY woodworking, home improvement, trim installation, and general workshop projects. Sold through Harbor Freight, these saws come in different configurations, including standard compound, sliding compound, and double-bevel sliding models. Understanding the differences is important before purchasing a used saw, replacing parts, selecting a blade, or attempting repairs. This guide explains how to identify a Chicago Electric miter saw, prepare it for operation, adjust cutting angles, make accurate cuts, and maintain it safely. Because specifications and procedures vary by model, always identify the item number and consult its matching owner’s manual before working on the machine.
1. Understanding Chicago Electric Miter Saws
Chicago Electric Power Tools is a Harbor Freight tool brand. Its miter saw range includes several generations and configurations, so the brand name alone is not enough to establish a saw’s cutting capacity, electrical requirements, or replacement-part compatibility.
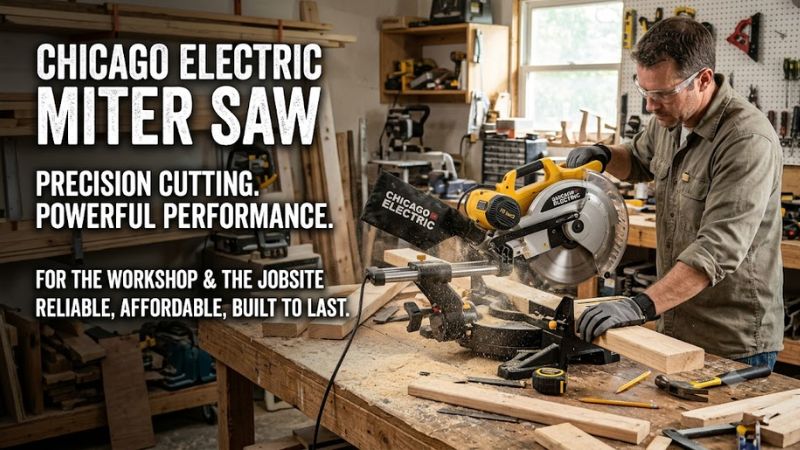
A useful example is the Chicago Electric 10-inch sliding compound miter saw, Item 61971. Harbor Freight’s product documentation identifies a 15-amp, 120-volt AC motor, a maximum no-load speed of 5,000 RPM in its current product specifications, a 10-inch blade, and a 5/8-inch arbor.
The same product family has appeared under multiple item numbers and revisions. Consequently, owners should check the identification label rather than relying on a generic online description.
Common Chicago Electric miter saw configurations
Standard compound miter saw
A standard compound saw rotates its table to create miter angles and tilts its blade to create bevel angles. It is suitable for many basic woodworking applications, including trim, framing components, and smaller boards.
Sliding compound miter saw
A sliding model adds rails that allow the blade assembly to move forward and backward. This increases crosscut capacity compared with a conventional saw of similar blade diameter.
The Chicago Electric 61971 is an example. Its published specifications list a maximum horizontal cutting capacity of 12 inches for a straight cut.
Double-bevel sliding compound miter saw
A double-bevel model can tilt the blade to either side, reducing the need to turn the workpiece when making opposite bevel cuts. Some older Chicago Electric models, including Item 69684, belong to this category.
However, a double-bevel saw should not be confused with a single-bevel model simply because both have sliding rails.
Specifications of the Chicago Electric 61971
| Specification | Published information |
| Model | Item 61971 |
| Saw type | Sliding compound miter saw |
| Blade diameter | 10 inches |
| Electrical rating | 120V AC |
| Motor current | 15 amps |
| Maximum listed speed | 5,000 RPM |
| Arbor diameter | 5/8 inch |
| Bevel direction | Left |
| Maximum straight crosscut width | 12 inches |
| Maximum straight-cut depth | 2-3/4 inches |
| Approximate tool weight | 32.56 lb |
These figures apply to the identified 61971 product listing, not every Chicago Electric miter saw. Earlier manuals and revised product documentation may contain different specifications. In particular, check the manual supplied with the exact item before selecting accessories or determining cutting limits.
2. How to Identify Your Chicago Electric Miter Saw
Identifying the exact model is the first step when buying a used machine, finding replacement components, or downloading operating instructions.
Start by checking the manufacturer’s identification label. Look for:
- Item or model number.
- Electrical rating.
- Blade diameter.
- Serial number or manufacturing information, if provided.
- Manufacturer or distributor information.
The item number is especially important because Harbor Freight may list multiple revisions of a product under a similar product name.
For example, Item 61971 is a 10-inch sliding compound miter saw. Item 69684 identifies an older 12-inch double-bevel sliding compound model with a laser guide.
These machines have different blade dimensions, cutting capacities, and component designs. A replacement blade or electrical component intended for one model should not automatically be assumed compatible with another.
Finding the correct manual
Search for the exact item number in Harbor Freight’s product-support documentation. The manual normally contains:
- Assembly instructions.
- Electrical specifications.
- Blade requirements.
- Cutting-capacity information.
- Miter and bevel adjustments.
- Operating procedures.
- Maintenance instructions.
- Exploded diagrams and component references.
Keep the manual with the saw whenever possible. If purchasing a secondhand machine, ask the previous owner for its documentation and inspect the identification label before agreeing to the purchase.
3. Setting Up a Chicago Electric Miter Saw
Correct installation affects cutting accuracy, stability, and operator safety. Before using a Chicago Electric miter saw for the first time, inspect the machine and prepare a suitable working area.
Prepare the workbench
Place the saw on a flat, rigid surface capable of supporting its weight and the material being cut. If the saw has mounting holes, use appropriate fasteners to secure it to the workbench or compatible saw stand.
Check that:
- The saw cannot rock or shift during operation.
- The fence is clean and properly positioned.
- The table is free of loose objects and wood scraps.
- There is sufficient clearance for the sliding rails, if fitted.
- Long boards have adequate support on both sides.
- The power cord cannot contact the blade or moving components.
Never operate the machine on an unstable surface. A long board can create considerable leverage against the saw table, particularly when its weight is unsupported.
Inspect the blade and guard
The blade is one of the most important components affecting cutting quality. Check that it is appropriate for the material and compatible with the saw.
For the 61971, the published specifications identify a 10-inch blade and 5/8-inch arbor. The owner’s manual also identifies a general-purpose carbide-tipped blade as the recommended type.
Before installation, verify:
- Blade diameter matches the saw’s maximum permitted size.
- Arbor diameter and any required adapter match the manufacturer’s instructions.
- The blade’s rated speed is suitable for the saw.
- The blade is designed for the intended material.
- Teeth are sharp and free from visible damage.
- The blade is installed in the correct rotational direction.
Disconnect the saw from electrical power before changing the blade. Follow the model-specific manual for spindle-lock operation, blade removal, washer placement, and arbor-bolt tightening.
Do not improvise with incompatible blades or mounting adapters.
Choose suitable accessories
A miter saw may require additional equipment depending on the project.
| Accessory | Purpose |
| Carbide-tipped blade | Cutting suitable wood products |
| Workpiece clamp | Holding material securely |
| Saw stand | Providing stable support |
| Extension supports | Supporting long boards |
| Dust collection bag | Collecting some cutting debris |
| Shop vacuum | Collecting compatible workshop dust |
| Combination square | Checking alignment |
| Hearing protection | Reducing exposure to cutting noise |
| Safety glasses | Protecting the eyes |
A dust collection bag does not capture all airborne dust. Use appropriate dust extraction and respiratory protection based on the material and working conditions.
4. How to Adjust Miter and Bevel Angles
A miter saw produces different cuts by changing the angle of the table, the blade, or both.
Understanding these adjustments helps prevent incorrect cuts and unnecessary material waste.
Adjusting the miter angle
The miter angle controls the horizontal direction of the cut.
For example, a 45-degree miter cut is commonly used when joining two pieces of trim to form a 90-degree corner.
The general adjustment procedure is:
- Switch off the saw and disconnect its power supply.
- Loosen the miter-locking knob according to the owner’s manual.
- Release the table lock if the model uses a separate mechanism.
- Rotate the table toward the required angle.
- Align the indicator with the intended setting.
- Engage the locking mechanism and tighten it securely.
- Check that the workpiece and fence remain properly supported.
On the Chicago Electric 61971, the published specifications list positive miter stops at 0, 15, 22.5, 30, and 45 degrees.
These preset positions help with common woodworking angles, but they should not replace measurement when precise joinery is required.
Adjusting the bevel angle
The bevel angle controls the tilt of the blade relative to the table.
A bevel cut creates an angled surface along the thickness of the material. It is useful for trim installation, edge work, and compound joints.
For the 61971, the manufacturer’s specifications identify a left-bevel design with a maximum listed bevel angle of 45 degrees.
To adjust it:
- Disconnect electrical power.
- Locate the bevel-locking mechanism.
- Release the lock following the manual.
- Tilt the blade assembly toward the desired angle.
- Check the bevel indicator.
- Secure the locking mechanism.
- Perform an interference check with the motor off and blade stationary.
Do not assume every Chicago Electric model has the same bevel adjustment arrangement. A double-bevel model requires different handling from a single-bevel model.
Checking cutting accuracy
Factory indicators and preset stops can become misaligned through transportation, wear, or previous adjustments.
Use a reliable square to check the relationship between the blade and table. Follow the manual’s calibration procedure if an adjustment is necessary.
For an initial accuracy check, use scrap material:
- Make a straight crosscut.
- Check the cut surface with a square.
- Make a test miter cut.
- Check the resulting angle with an appropriate measuring tool.
- Inspect whether the workpiece shows signs of movement or blade deflection.
If the results are inconsistent, investigate the fence, blade condition, workpiece support, and adjustment locks before making further cuts.
5. How to Use a Chicago Electric Miter Saw
Once the machine is installed, inspected, and adjusted, follow a controlled cutting procedure.
Step 1: Prepare the material
Measure the board and mark the intended cutting line with a pencil.
Inspect the material for nails, screws, staples, cracks, or other foreign objects. Check for warping that could prevent the board from sitting securely against the fence.
Position the workpiece so the cutting line matches the blade path.
Step 2: Secure the workpiece
Place the material firmly against the fence and flat on the table.
Use the supplied clamp or another suitable work-holding fixture whenever possible. Long boards should receive additional support to prevent tipping.
Never hold a small or unstable workpiece close to the blade with your fingers.
Step 3: Check the cutting path
Before starting the motor, move the saw head through the intended cutting path with the machine disconnected from power.
Confirm that:
- The blade will not strike the fence.
- The guard moves correctly.
- The workpiece remains stable.
- The sliding mechanism has sufficient clearance.
- No accessories interfere with the blade assembly.
Step 4: Start the saw
Stand in a balanced position and wear suitable eye and hearing protection.
Keep your hands away from the blade path. Start the motor and allow the blade to reach full speed before contacting the workpiece.
For a sliding miter saw, follow the manufacturer’s specified cutting sequence. The 61971 manual instructs the operator to position the raised head over the workpiece, start the motor, lower the head, and push the saw through the material.
Do not pull the rotating blade toward yourself through the workpiece.
Step 5: Complete the cut
Apply controlled pressure without forcing the blade.
Allow the blade to complete the cut rather than pushing excessively hard. If the motor slows noticeably, the blade binds, or the material moves, release the switch and investigate after the blade stops completely.
Step 6: Wait before removing the material
Release the switch and keep the saw head down until the blade has stopped.
Only then should you remove the cut pieces or clear debris.
Never reach near a moving blade, even when the motor has been switched off.
6. Common Chicago Electric Miter Saw Problems
Older machines can develop mechanical, electrical, and alignment problems. A symptom alone does not establish the cause, so begin with safe external checks.
| Problem | Possible causes | Recommended response |
| Saw will not start | Power supply, damaged cord, switch fault | Disconnect and inspect externally |
| Rough or uneven cuts | Dull blade, incorrect blade, unstable material | Inspect blade and workpiece support |
| Excessive vibration | Damaged blade, loose mounting, mechanical wear | Stop operation and inspect |
| Inaccurate angles | Misaligned fence, incorrect calibration | Check alignment using the manual |
| Sliding movement feels rough | Dust buildup, damaged rails or bearings | Inspect and clean as permitted |
| Dust collection is poor | Full bag, blocked outlet, unsuitable extraction | Disconnect and clear accessible debris |
| Blade binds during cutting | Workpiece movement, unsuitable blade, incorrect technique | Stop immediately and investigate |
The saw does not start
First, verify that the outlet has power and that the plug and cord show no visible damage.
If the supply is working but the saw remains unresponsive, the switch, internal wiring, motor, or other electrical components may require inspection.
Do not open energized equipment or bypass electrical protection. Internal electrical repairs should be handled by qualified service personnel.
The saw produces rough cuts
A rough surface may indicate a dull, damaged, or unsuitable blade.
It can also result from insufficient workpiece support, incorrect feed technique, blade deflection, or inaccurate alignment.
Disconnect the machine before inspecting the blade. Replace damaged cutting accessories rather than continuing to operate with them.
The sliding mechanism becomes difficult to move
Dust and debris can accumulate around sliding components. However, resistance may also indicate worn bearings, damaged rails, or mechanical misalignment.
Clean accessible areas according to the manual. Do not apply lubricant indiscriminately because some sliding systems have specific maintenance requirements.
If the mechanism remains stiff or uneven, arrange a professional inspection.
7. Maintaining a Chicago Electric Miter Saw
Regular maintenance helps preserve cutting accuracy and reduces the risk of mechanical problems.
Because Chicago Electric models have different designs, maintenance should follow the instructions for the exact item number.
Clean the saw after use
Disconnect the power cord before cleaning.
Remove accumulated sawdust from accessible areas around the table, fence, blade housing, and dust outlet. Use a suitable brush or vacuum rather than blowing debris into internal components with compressed air.
Pay particular attention to the lower blade guard. It must move freely and return to its protective position as designed.
Never operate the saw if the guard is damaged, missing, or sticking.
Inspect mechanical components
Periodically inspect:
- Blade teeth and mounting hardware.
- Fence alignment and mounting points.
- Table extensions and clamps.
- Miter and bevel locking mechanisms.
- Sliding rails and associated components.
- Power cord and plug.
- Switch operation.
- Blade guard movement.
Stop using the machine if you notice unusual vibration, burning smells, damaged wiring, or abnormal mechanical noises.
Maintain the cutting blade
A dull blade can produce rough surfaces, increase cutting resistance, and place additional strain on the motor.
Clean resin buildup using a cleaning product specifically suitable for the blade. Replace blades with cracked plates, missing teeth, or other structural damage.
Always check the replacement blade’s diameter, arbor compatibility, tooth configuration, intended material, and maximum rated speed.
Store the saw correctly
When the machine is not being used:
- Disconnect the power cord.
- Clean accumulated dust and debris.
- Lower and secure the saw head according to the manual.
- Protect the blade from accidental contact.
- Store the machine in a dry location.
- Keep the power cord away from sharp edges and excessive bending.
Avoid storing the saw where moisture can damage electrical components or cause corrosion.
8. Essential Safety Precautions
A Chicago Electric miter saw uses a rapidly rotating circular blade. Incorrect operation can cause serious injuries, including deep cuts and amputations.
The following precautions are important for both experienced woodworkers and occasional DIY users.
Wear appropriate protective equipment.
Use safety glasses or goggles, suitable hearing protection, and respiratory protection appropriate for the dust exposure. Avoid loose clothing, jewelry, and anything that could become caught in moving components.
Keep your hands away from the blade.
The 61971 manual specifies keeping hands at least 100 mm from either side of the blade when manually supporting material. Use the supplied clamp whenever possible.
Never disable the blade guard.
The lower guard must operate correctly throughout the cutting cycle. Do not tie it open, remove it for convenience, or continue working if it becomes damaged.
Do not cut unsuitable materials.
The 61971 manual identifies the saw for wood and wood-like products. It specifically prohibits using abrasive cutoff wheels to cut ferrous materials because sparks and abrasive dust can damage the guard and other components.
Avoid unsupported workpieces.
Long or wide boards require adequate support. Unstable material can shift, bind against the blade, or be thrown during operation.
Disconnect before maintenance.
Always unplug the machine before changing blades, adjusting components that require isolation, cleaning internal accessible areas, or investigating a jam.
Wait for the blade to stop.
Never remove offcuts while the blade is rotating. Keep the saw head controlled until the blade has completely stopped.
Use an appropriate electrical supply.
The 61971 is rated for 120V AC, 60Hz, and 15A. Owners outside the United States should not assume that their local electrical supply is compatible. Do not improvise with plug adapters or unsuitable voltage converters.
If the saw has electrical damage, a malfunctioning switch, or a defective guard, stop using it and seek qualified repair.
9. Is a Chicago Electric Miter Saw Worth Buying?
Whether a Chicago Electric miter saw is a sensible purchase depends on its exact model, condition, intended workload, and replacement-part availability.
For occasional home improvement and basic woodworking, a properly maintained machine with a suitable blade can provide useful crosscutting and angled-cutting capabilities.
The 61971 offers a sliding design, a 10-inch blade, and a published 12-inch maximum straight crosscut capacity. These specifications make it relevant to projects involving wider boards than a typical non-sliding saw can accommodate.
However, buyers should consider several limitations.
Advantages
- Multiple configurations are available on the used market.
- Sliding models provide greater crosscut capacity than comparable non-sliding designs.
- Common woodworking angles can be selected using preset stops.
- Replacement-part documentation exists for several models.
- The machines can suit occasional workshop and DIY applications.
Limitations
- Older machines may have worn mechanical or electrical components.
- Replacement-part availability varies by item number.
- Different revisions may use different components.
- Some models have single-bevel rather than double-bevel functionality.
- A blade may need to be purchased separately.
- A used machine’s previous maintenance history may be unknown.
What to check before buying a used model
Inspect the saw in person whenever possible.
Check the identification label, power cord, switch, guard, blade mounting area, fence, table, and adjustment locks.
If the seller permits a demonstration, verify that the machine starts and stops normally and that the sliding mechanism moves without binding. Check for unusual vibration or mechanical noise.
Do not purchase a machine with a missing safety guard, damaged electrical components, cracked structural parts, or an unexplained history of malfunction unless it has first been professionally assessed.
Also check Harbor Freight’s current replacement-parts listings using the exact item number. The existence of an exploded parts diagram does not guarantee that every listed component remains available.
10. Frequently Asked Questions
Is Chicago Electric a good brand for miter saws?
Chicago Electric can be a reasonable option for occasional DIY woodworking, depending on the model and its condition. Buyers should evaluate cutting capacity, mechanical condition, safety features, and replacement-part availability rather than judging every machine by its brand name.
What size blade does a Chicago Electric miter saw use?
The required blade size depends on the model. For example, the Chicago Electric 61971 uses a 10-inch blade, while the older Item 69684 is a 12-inch model. Always verify the blade diameter and arbor requirements in the correct owner’s manual.
Where can I find replacement parts for a Chicago Electric miter saw?
Harbor Freight provides a replacement-parts service for supported Chicago Electric models. Search by the exact item number or UPC and confirm the part diagram matches your machine. Not every component shown in an older manual will necessarily be available.
Can a Chicago Electric miter saw cut metal?
The 61971 manual identifies wood and wood-like materials as the intended cutting applications and prohibits using abrasive cutoff wheels for ferrous metal. Do not assume a wood miter saw can safely cut metal by simply changing its blade. Use a machine specifically designed and approved for the intended material.
Final Thoughts
A Chicago Electric miter saw can be a useful workshop machine when its specifications, condition, and intended applications are properly understood. The most important first step is identifying the exact item number because blade requirements, cutting capacities, adjustment mechanisms, and replacement components vary across models.
For owners of the 10-inch sliding compound 61971, its 15-amp electrical rating and published 12-inch straight crosscut capacity provide a useful starting point for evaluating its capabilities.
Before every cutting session, inspect the blade, guard, fence, workpiece support, and electrical components. Follow the matching owner’s manual for setup, operation, and maintenance.
A properly identified, safely maintained miter saw is a more dependable foundation for accurate woodworking than relying on assumptions about an entire product range.
Related guides
- DEWALT 10-Inch Table Saw Review: Price, Specifications, Performance, and Is It Worth Buying?
- Dado Blade for Table Saw: How It Works, Types, Compatibility, and Safe Use
- Diamond Blade for Circular Saw: How to Choose the Right Blade for Every Cutting Job
- DeWalt 12 Inch Miter Saw Review: Is the DWS780 Worth Buying?




Write Your Review
No reviews yet. Be the first to share your experience!