What's inside
As an Amazon Associate I earn from qualifying purchases. This post may contain affiliate links at no extra cost to you.
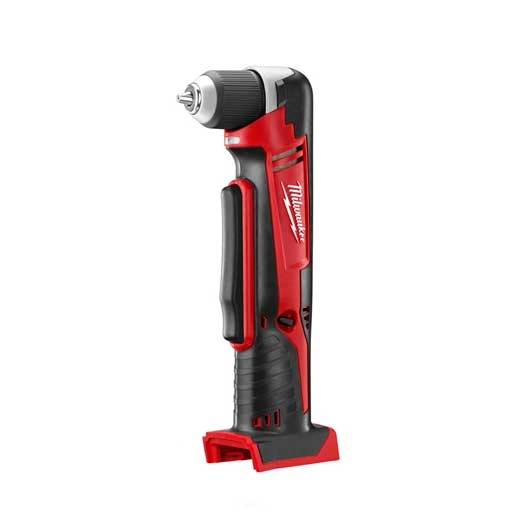
A cordless right-angle drill is useful when a standard drill cannot fit between studs, joists, cabinets, or pipework. It is also easier to misuse. The short body and offset gearbox put high loads through a compact gear train, especially when a large hole saw or self-feed bit catches. Used correctly, the tool will drill quickly and last for years. Used like a demolition tool, it can strip gears, damage the chuck, overheat the motor, or twist your wrist.
Choose the right tool for the job
Not every right-angle drill is built for the same work. Compact models are convenient for small holes and screwdriving, while high-torque models are intended for plumbing, electrical, and framing work. A compact drill may be the better buy if you mainly drill holes up to about 1/2 inch in wood and occasionally drive screws. It is lighter, easier to control, and usually less expensive.
For repeated holes with auger bits, self-feed bits, or hole saws, look for a tool with a two-speed gearbox, a side handle, and a stated capacity appropriate to the bit sizes you use. A tool’s maximum advertised hole size is not a promise that it can make that hole continuously in dense material. It is often a best-case limit with the correct bit, a fully charged battery, and controlled feed pressure.
If you already own batteries from a cordless platform, staying within that system is often sensible. The battery, charger, and spare packs may cost more than the bare tool, but sharing packs across lights, impact drivers, saws, and other tools can reduce the total cost. If you are starting from zero, compare the price and availability of batteries, not just the drill.
Cordless right-angle drill bare tools are usually the best value for users who already have compatible batteries. A kit is more practical if you need a charger and at least one battery immediately.
Understand what overloads the gear train
The gears are overloaded when the bit demands more torque than the motor and transmission can safely deliver. The most common causes are a large bit run too slowly, excessive feed pressure, a bit that is dull or pinched, and sudden binding at the bottom of a hole. A large hole saw can also load the tool when its teeth clog with wet wood or the plug jams inside the cup.
Gear damage is not always dramatic. Early signs include a new grinding or clicking noise, uneven rotation, excessive chuck runout, or a gearbox that becomes unusually hot. A stripped gear may still turn under no load but slip when the bit contacts the work. Continuing to use it can spread the damage to other gears and bearings.
Keep both hands on the tool when using aggressive bits. The side handle is not decoration; it gives you leverage to resist reaction torque and keeps the drill square. Do not brace the tool against your body, a nearby pipe, or a temporary piece of framing. If the bit catches, the tool can rotate suddenly or knock the workpiece loose.
Use the speed selector and clutch correctly
Use low gear for large holes and high gear for small bits and light work. Low gear increases available torque but does not make a jam safe. If the bit stops, release the trigger immediately. Holding the trigger against a stalled bit sends high current through the motor and leaves the gears carrying peak load.
| Task | Typical setting | Primary risk |
|---|---|---|
| Small twist bits, pilot holes, and screws | High gear; low clutch setting for screws | Breaking small bits or stripping fasteners |
| Spade bits up to about 1 inch | Low or medium speed; steady feed | Bit grabbing as it exits the material |
| Auger or self-feed bits | Low gear; side handle installed | Sudden reaction torque and gear shock |
| Large hole saws | Low speed; clear chips frequently | Binding, overheating, and motor stall |
The numbered clutch is mainly for driving screws, not for controlling heavy drilling loads. On many drills, the clutch can slip repeatedly under a large bit, creating heat without protecting the transmission from every shock. For drilling, use the drill setting or the manufacturer’s designated drilling mode, then control the load with speed, pressure, and bit choice.
Drill with less stress on the transmission
Mark the hole and start slowly so the bit does not skate. Once the cutting edges are engaged, increase speed only as needed. Let the bit cut rather than leaning your full weight into the tool. Heavy pressure can reduce motor speed, which increases current draw and makes the bit more likely to bind.
Withdraw the bit periodically to clear chips, particularly in deep holes. For a large hole saw, stop before the cup fills completely. With spade bits, easing off as the bit approaches the far side helps prevent breakout and reduces the sudden catch that occurs when the center spur and cutting edges break through at different rates.
Use sharp bits designed for the material. A dull bit creates friction instead of removing material and can make a modest job feel like an overload. For a hole saw, use the correct pilot bit and avoid forcing the cup sideways. If the pilot exits before the saw has cut deeply enough, back out and finish from the opposite side when appearance and breakout matter.
Quality wood auger bits and hole saws cost more than bargain sets but can reduce binding and wasted battery time. The cheaper option is fine for occasional softwood holes if the bits are kept sharp and you work slowly.
Manage battery power and heat
A weak or cold battery can make a drill feel underpowered, encouraging you to push harder. Let a cold pack warm indoors before heavy work. Conversely, stop if the battery, motor housing, or gearbox becomes very hot. Remove the battery and allow the tool to cool; do not keep drilling until an electronic protection circuit shuts it down.
High-capacity batteries can improve runtime and reduce voltage sag, but they also add weight in awkward spaces. A compact pack may be easier to control for overhead or cabinet work. For repeated large holes, use a higher-output battery recommended by the tool platform, while recognizing that more available power can also make a bind more violent.
A compatible battery and charger kit makes sense when you need a second pack for continuous work. For a few holes, one properly sized pack is enough; buying the largest battery available will not fix a dull bit or poor technique.
Inspect the drill after demanding work
Before storage, check the chuck, side handle, gearbox housing, and battery contacts. Look for a loose chuck, cracked housing, grease leaking from the gearbox, or a new change in operating noise. Clean chips from vents and wipe dust from the battery interface. Never immerse the tool or spray cleaner into the gearbox.
If the drill stalls hard, stop and inspect the bit before continuing. A bent arbor, damaged pilot bit, or loose chuck can create vibration that accelerates bearing and gear wear. When the tool begins slipping under loads it previously handled easily, have it serviced rather than compensating with more pressure. A replacement gear or bearing is usually cheaper than the collateral damage caused by running a failing transmission.
Related guides
- Longest Lasting Lawn Mower Battery: AGM vs Lithium vs Flooded Lifespan and Cost per Season
- Duralast Gold Lawn Mower Battery Review: U1 Fit, CCA and When to Pay for AGM
- Greenworks Pro 80V 21-Inch Mower Review: Runtime Math, Push vs Self-Propelled and Yard Fit
- Bosch High Pressure Washer Gun Replacement: Fittings, Adapters and What Fits Your Model