What's inside
As an Amazon Associate I earn from qualifying purchases. This post may contain affiliate links at no extra cost to you.
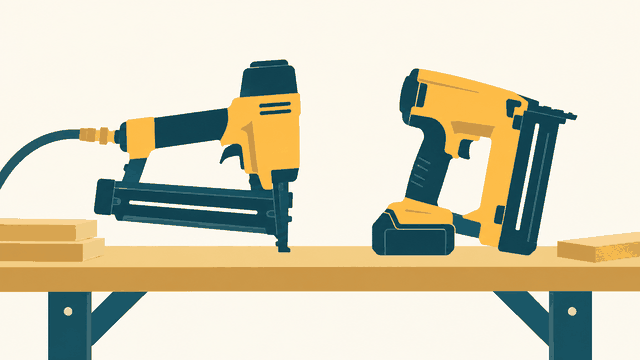
Delicate trim calls for control more than raw power. An 18-gauge cordless brad nailer is usually the right tool for attaching door and window casing, small crown molding, base shoe, panel molding, and lightweight decorative trim. It leaves a smaller hole than a 16-gauge finish nailer, and the thin brads are less likely to split narrow stock.
The trade-off is holding power. An 18-gauge brad is not a substitute for adhesive, a longer finish nail, or a screw when you are fastening heavy hardwood trim. For most interior trim, though, a good cordless brad nailer removes the compressor, hose, and setup time from the job.
As an Amazon Associate we earn from qualifying purchases at no extra cost to you.


What matters when attaching delicate trim
Choose a nailer that accepts 18-gauge brads from roughly 5/8 to 2-1/8 inches. That range covers thin lattice and shoe molding at the short end, and most casing and small crown at the long end. Some models top out at 2 inches, which is still adequate for common trim, but check the specifications before buying.
Depth adjustment is essential. A nailer that drives every fastener to the same depth can leave proud heads in soft pine or punch through thin molding. Look for a tool-free depth wheel and test it on scrap from the actual trim. Start slightly shallow, then increase depth until the head sits just below the surface without creating a crater.
A selectable firing mode is also useful. Sequential firing, where you pull the trigger for each nail, gives the best control near corners and fragile edges. Contact or bump firing is faster for long runs but makes it easier to double-fire, skid off the work, or place a nail too close to the end of a narrow piece.
A narrow nose, an LED work light, and a no-mar contact tip help more than high advertised driving power. The tip should let you see exactly where the brad will enter. If the tool has a large, awkward nose, it can be difficult to place a nail close to a profile or inside a tight corner.
Best cordless platforms for trim work
If you already own cordless tools, staying with that battery platform is usually the cheapest and most practical choice. A bare tool may cost less than starting a new system, and one charger can serve your drill, impact driver, saw, and nailer.
| Platform choice | Best fit | Advantages | Limitations |
|---|---|---|---|
| Ryobi 18V ONE+ | Occasional DIY trim work | Low bare-tool cost, broad battery range, easy availability | Often bulkier and less refined than premium tools |
| DeWalt 20V MAX | Frequent remodeling and mixed trim jobs | Strong service network, good balance, large ecosystem | Tool and battery kits cost more |
| Milwaukee M18 | Heavy use and professional trim installation | Good driving consistency, durable platform, extensive accessories | Higher purchase price and noticeable tool weight |
| Makita 18V LXT | Users already invested in LXT | Comfortable ergonomics and broad battery compatibility | Some models are less common locally than DeWalt or Ryobi |
For a homeowner who will use the nailer a few times per year, a Ryobi 18V ONE+ brad nailer is often enough. It may be heavier and slower than a professional model, but those drawbacks matter less when installing one room of casing. Buy the bare tool if you already have a compatible battery and charger.
For regular renovation work, a DeWalt 20V MAX brad nailer is a sensible middle-ground choice. DeWalt’s 18-gauge model is widely supported, has useful depth and mode controls, and is suitable for both delicate molding and ordinary casing. It is not light, so fatigue can become noticeable during a full day of overhead work.
Milwaukee’s M18 18-gauge nailer makes more sense when the tool will earn its keep. A Milwaukee M18 brad nailer has the driving authority for dense hardwood trim and repeated installation, but the package is expensive and relatively heavy. Do not pay for it solely to install a few feet of pine shoe molding.
Battery and charger cost
Battery size affects handling. A compact 1.5Ah or 2.0Ah pack makes an overhead nailer easier to control, while a 4.0Ah or 5.0Ah pack adds runtime but increases weight at the handle. For a trim project, one charged 2.0Ah pack commonly handles several hundred brads, depending on material, driving depth, and how often the tool cycles.
Do not buy an oversized battery to solve a feeding or depth problem. If the nailer stops after a short period, check for a jam, incorrect brad length, cold battery, or poor seating of the magazine. A second compact battery is usually more useful than one very large pack.
How to avoid split trim and ugly holes
Keep the nail at least 1/2 inch from the end of narrow trim, and move farther back on brittle hardwood. On pieces under 1-1/2 inches wide, stagger nails rather than driving a straight row down the center. For delicate profiles, drive into the thicker flat portion, not the thin decorative edge.
Use brads long enough to penetrate the trim and enter the framing by about 1/2 to 3/4 inch. For 3/4-inch casing over drywall, 1-1/4 or 1-1/2-inch brads are common. For thicker casing, 2-inch brads may be appropriate. Excessively long nails can strike wiring, plumbing, or a hard obstruction, while short nails leave loose trim and visible gaps.
Apply adhesive where appropriate, but do not depend on it to pull badly bowed molding flat. Use a few longer brads into studs or framing, and add shorter brads where you are only securing a mitered return. If the first nail leaves a crater, reduce depth and inspect the contact tip for damage or missing rubber.
Failures worth checking before returning the tool
Misfires often come from the wrong brad type, an empty magazine, or nails loaded upside down. Double-firing usually results from bump mode or releasing the nose too quickly. Proud nails can indicate insufficient depth, a weak battery, or driving into unusually hard material. Repeated jams may mean bent brads, mixed nail lengths, or a magazine packed with debris.
Before installing finished trim, fire 10 to 20 brads into scrap. Confirm the hole size, depth, angle, and whether the nose marks the surface. That short test prevents a cordless nailer from turning expensive painted or stained trim into a line of repairs.
Related guides
- Longest Lasting Lawn Mower Battery: AGM vs Lithium vs Flooded Lifespan and Cost per Season
- Duralast Gold Lawn Mower Battery Review: U1 Fit, CCA and When to Pay for AGM
- Greenworks Pro 80V 21-Inch Mower Review: Runtime Math, Push vs Self-Propelled and Yard Fit
- Bosch High Pressure Washer Gun Replacement: Fittings, Adapters and What Fits Your Model