Our Top Picks


What's inside
- 1. The 18-Gauge Brad Nailer: Buy This One First
- 2. The 16-Gauge Finish Nailer: When Brads Are Not Holding
- 3. The 23-Gauge Pin Nailer: A Specialist Worth Owning Third
- 4. Framing Nailer: Real Capability, Rarely The Right First Buy
- What To Skip
- Nails, Depth, And The Two Mistakes That Ruin Trim
- Frequently Asked Questions
- 1. The 18-Gauge Brad Nailer: Buy This One First
- 2. The 16-Gauge Finish Nailer: When Brads Are Not Holding
- 3. The 23-Gauge Pin Nailer: A Specialist Worth Owning Third
- 4. Framing Nailer: Real Capability, Rarely The Right First Buy
- What To Skip
- Nails, Depth, And The Two Mistakes That Ruin Trim
- Frequently Asked Questions
As an Amazon Associate I earn from qualifying purchases. This post may contain affiliate links at no extra cost to you.
Most homeowners buy the wrong nailer first. They see a framing nailer on sale, picture a deck, and end up with a heavy tool that is useless for the trim, baseboard, and shoe molding jobs that actually come up every year. Picking a cordless nail gun for homeowners is less about brand loyalty and more about matching nail size to the projects sitting on your list right now.
This is a ranking by buying order, not by price. The tool at position one is the one that earns its keep the fastest for a typical house. Positions two through four unlock progressively bigger jobs. At the bottom is a blunt list of what to skip, because a few popular categories are genuinely a bad first purchase.
As an Amazon Associate we earn from qualifying purchases at no extra cost to you.








| Rank | Nailer type | Nail range | Job it unlocks |
|---|---|---|---|
| 1 | 18-gauge brad nailer | 5/8 in to 2 in | Baseboard, casing, shoe molding, small trim |
| 2 | 16-gauge finish nailer | 1 in to 2-1/2 in | Door casing, crown, stair skirts, thicker trim |
| 3 | 23-gauge pin nailer | 1/2 in to 1-3/8 in | Delicate molding, glue-ups, no visible holes |
| 4 | Framing nailer | 2 in to 3-1/2 in | Decks, framing, sheathing, fence structure |
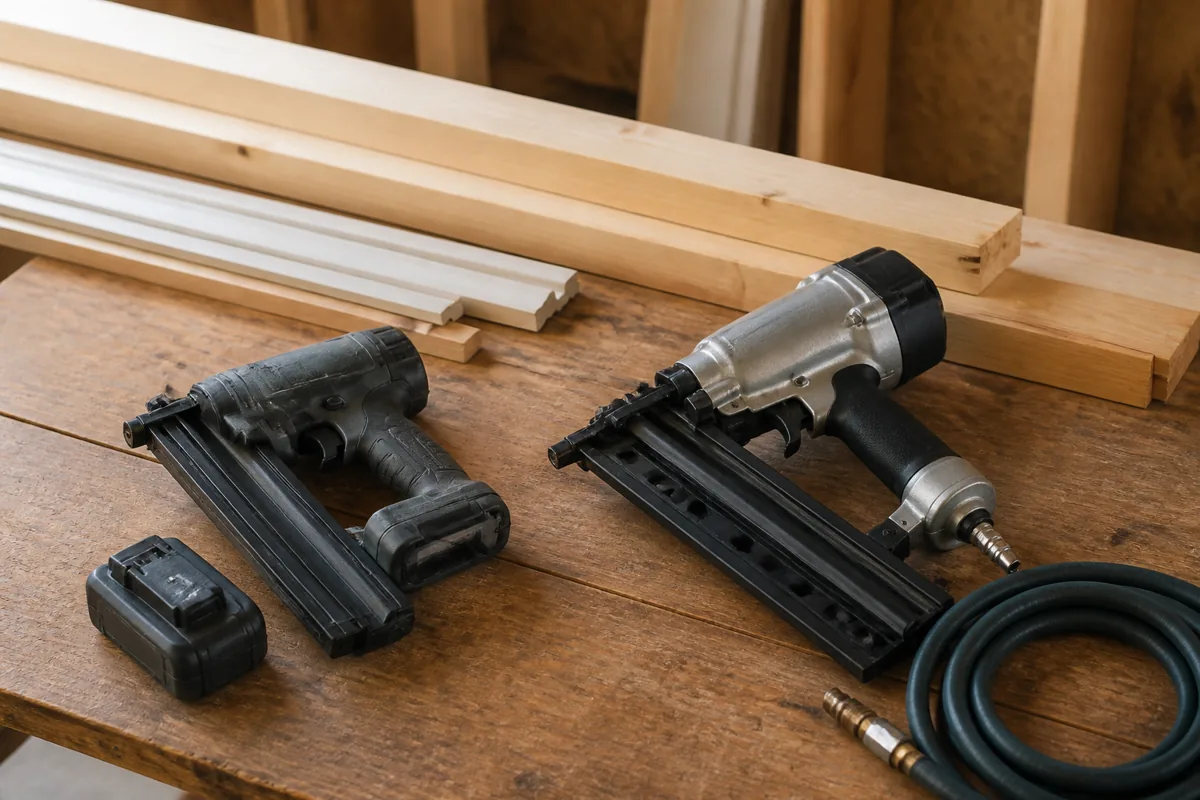
1. The 18-Gauge Brad Nailer: Buy This One First
If you own only one cordless nailer, it should be an 18-gauge brad nailer. The reason is simple math on project frequency. Baseboard, door and window casing, shoe molding, closet shelving, picture frames, small cabinet trim, and light furniture repair all fall inside the brad nailer’s range. A brad leaves a hole small enough that a dab of filler and a swipe of sandpaper hides it, which is exactly what you want on painted trim.
Cordless brad nailers come in two flavors. Battery-and-flywheel or battery-and-gas-spring models fire directly from the pack with no hose and no compressor. Pneumatic brad nailers are lighter and cheaper but drag a hose and a noisy compressor into every room you work in. For homeowner use, where the job is often twenty nails in a bedroom rather than four hours of production trim, cordless wins on setup time alone.
What to look for: tool-free depth adjustment you can actually turn with one hand, a dry-fire lockout so you do not mar trim when the magazine empties, and a jam release that opens without a wrench. Sequential and contact firing modes are nice, but stay in sequential mode for trim work; it is more accurate and much safer.
18-Gauge Cordless Brad Nailer
This is the highest-value nailer for a homeowner, full stop. Buy it on whatever battery platform you already own, because the tool body matters less than not having to manage a second charger and a second set of packs. If you own no cordless tools yet, a kit that pairs the nailer with two batteries and a charger is usually the better deal than a bare tool plus separate battery purchases.
2. The 16-Gauge Finish Nailer: When Brads Are Not Holding
The moment you try to hang a solid-wood door casing or run crown molding, an 18-gauge brad starts to feel like a suggestion rather than a fastener. A 16-gauge finish nailer drives a thicker nail, typically up to 2-1/2 inches, which pulls trim tight against a wall that is not perfectly flat and holds it there while glue or caulk sets.
Buy this second, not first, because the holes are noticeably bigger and the tool is bulkier. On delicate quarter round it is overkill and you will spend more time filling. On thick baseboard, stair skirt boards, jamb extensions, and exterior trim it is the right call. Angled magazines let you reach into corners more easily than straight ones, which matters more than most spec sheets suggest.
A reasonable shortcut: if your project list is heavy on doors and crown and light on small molding, invert the order and buy the 16-gauge first. The rest of the ranking holds.
3. The 23-Gauge Pin Nailer: A Specialist Worth Owning Third
A pin nailer shoots a headless pin so thin the hole is nearly invisible. It has almost no holding power on its own, which confuses people into thinking it is useless. Its real job is clamping. You apply glue, tack the piece with pins, and the pins hold the joint while the adhesive cures. For stain-grade molding, small boxes, jewelry-scale trim, and gluing up cabinet face frames, nothing else does the same thing.
Third place is correct because you can survive without it for years, then find it indispensable the first time you install stained trim where filler would show. Cordless pin nailers exist but the selection is thinner than brad or finish models, so check availability on your battery platform before you commit.
Cordless 16-Gauge Finish Nailer
Get this when brads start bending or failing to pull trim flat. Angled magazine models handle inside corners better. Expect it to weigh noticeably more than your brad nailer, and expect to fill larger holes, so keep the brad nailer for anything under about 1/2 inch thick.
4. Framing Nailer: Real Capability, Rarely The Right First Buy
Cordless framing nailers are legitimately good now. Battery-powered models drive 3-1/2 inch nails into framing lumber without a hose, which is a genuine advantage on a deck or a shed where dragging a compressor outside is miserable. The problem is the use case. Most homeowners frame something once every few years. Between those projects the tool sits in a case, heavy and expensive, doing nothing.
Buy one if you have a specific structural project on the calendar: a deck, a fence, a garage wall, a shed. Otherwise renting a pneumatic framing nailer and a compressor for a weekend costs a fraction of buying, and the rental gear is usually well maintained because it has to survive contractors.
One more note on framing nails: check your local code and inspector requirements for hurricane ties, joist hangers, and structural connectors. Those call for specific connector nails or a dedicated metal-connector nailer, not standard framing nails, and that is a place where getting it wrong has consequences beyond cosmetics.
- ✔ No compressor, no hose, no extension cord to trip over
- ✔ Setup time drops to seconds, which means you actually use it for small jobs
- ✔ Consistent firing depth once dialed in, unlike a compressor cycling on and off
- ✔ Quiet enough to use indoors without hearing protection on every shot
- ✔ Battery platforms let you share packs with drills and saws
- ✘ Heavier and more nose-heavy than comparable pneumatic nailers
- ✘ Higher purchase price than a pneumatic nailer plus a small compressor
- ✘ Battery-and-flywheel models may have a brief spin-up delay before the first shot
- ✘ Fewer bare-tool bargains if you do not already own the battery platform
- ✘ Long trim runs drain packs faster than people expect, so keep a spare charged
What To Skip
Skip the framing nailer as a first purchase. Covered above, but worth repeating because it is the most common mistake. Weight, cost, and low usage frequency all point the same direction.
Skip no-name nailers with no parts support. Nailers jam. That is not a defect, it is physics. What matters is whether you can get a driver blade, a magazine spring, or an O-ring kit two years from now. Established lines like DeWalt XR, Milwaukee FUEL, Makita LXT, Ryobi ONE+, and the major pneumatic brands have parts channels. Unbranded imports often do not.
Skip fuel-cell gas nailers for occasional use. They work, but the fuel cells are a consumable with a shelf life, and if the tool sits for a year you may find yourself buying cells before you can fire a nail. Battery-only designs avoid that entirely.
Skip buying a second battery platform. If you own a drill on one system, buy your nailer on that same system unless the nailer selection there is genuinely poor. Two chargers, two battery types, and two sets of dead packs to track is a real annoyance that spec comparisons never capture.
Skip combo staplers as a trim solution. Brad-and-staple combination tools look like value, but staple crowns show badly on finished trim. They are fine for upholstery, house wrap, and cabinet backs. They are not a substitute for a brad nailer on visible molding.
Nails, Depth, And The Two Mistakes That Ruin Trim
Two errors account for most bad-looking nailer work. The first is wrong nail length. The rule of thumb is that the nail should penetrate the material you are fastening and land at least an inch into solid framing behind it, without punching through the far side. On 1/2 inch trim over 1/2 inch drywall, a 2 inch brad is about right. Going longer does not add strength if the extra length is just wandering through a wall cavity.
The second is skipping the depth test. Every time you change nail length, material, or battery pack, fire one nail into a scrap of the same stock and check whether the head sits just below the surface. Too shallow and you get proud heads that catch sandpaper. Too deep and you blow a crater that needs twice the filler. Thirty seconds of testing saves an hour of patching.
Also match nail material to location. Galvanized or stainless fasteners belong on anything exterior or anywhere near moisture, since plain steel brads will bleed rust stains through paint within a season.
Frequently Asked Questions
Is a cordless nail gun for homeowners worth it over a pneumatic setup? For most homeowners, yes. The value is not raw performance, it is that you will actually pull the tool out for a ten-minute job instead of talking yourself out of hauling a compressor upstairs. If you already own a compressor and mostly do long production runs, pneumatic is lighter and cheaper per tool.
What size battery should I run on a cordless nailer? A compact pack keeps the tool balanced and is fine for short trim jobs. A larger amp-hour pack adds runtime and some welcome nose-down counterweight on heavier finish and framing models, at the cost of bulk. Owning one of each and swapping is the practical answer.
Can one nailer cover both trim and framing? No, and treat any product claim that says otherwise with suspicion. Nail gauge and magazine geometry are physically different between trim nailers and framing nailers. Pick based on the job in front of you and rent the other type when you need it.
The short version: start with an 18-gauge cordless brad nailer on the battery platform you already own, add a 16-gauge finish nailer when trim gets thick, treat a pin nailer as a specialist upgrade, and rent your framing nailer until you have a project that justifies buying one.
Check prices on Amazon →