What's inside
As an Amazon Associate I earn from qualifying purchases. This post may contain affiliate links at no extra cost to you.
The short answer
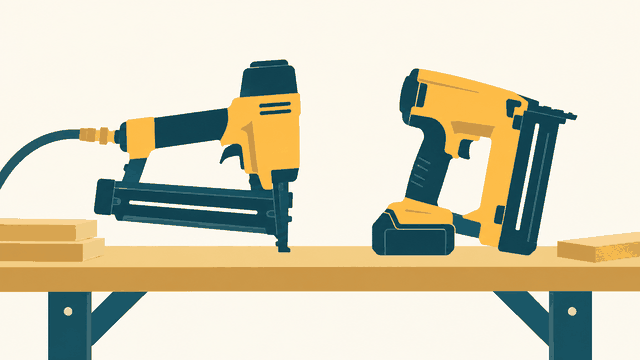
For delicate, narrow trim, a cordless pin nailer is usually the cleaner tool. Its 23-gauge nails leave a hole that is difficult to see and are less likely to split thin stock. A cordless brad nailer is the better all-around choice when the trim needs more holding power, when you are fastening into MDF or hardwood, or when one tool must handle casing, baseboard, and small finish work.
The important distinction is not simply nail length. A pin nailer uses slender, headless 23-gauge fasteners, commonly from 5/8 to 1-3/8 inches long. A brad nailer uses thicker 18-gauge nails, often from 5/8 to 2-1/8 inches. That thicker brad has a much stronger grip, but it also leaves a larger hole and creates more splitting risk near an edge.
As an Amazon Associate we earn from qualifying purchases at no extra cost to you.


Where a cordless pin nailer works best
A pin nailer is ideal for narrow shoe molding, small cove molding, cabinet trim, bead molding, lattice strips, and delicate returns. It is also useful for holding a small piece in place while glue dries. The fastener is so thin that it can often be driven without filling the hole, especially in painted trim.
For trim less than about 1/2 inch wide, a 23-gauge pin is much safer than an 18-gauge brad. A brad driven close to an edge can split the piece or blow out the side. Pins still need sensible placement, but they are forgiving when the material is fragile or the fastening point is close to a corner.
The trade-off is holding power. Pins are not a substitute for adhesive or a larger fastener when the trim is under tension. A 1-inch pin may hold a lightweight decorative strip while glue cures, but it is a poor choice for securing thick casing, a loose baseboard, or trim that will be bumped regularly. The headless fastener also has little resistance to pull-out.
If your work is mainly delicate trim and cabinet details, a cordless 23-gauge pin nailer is the appropriate category to consider. Choose one that shares batteries with tools you already own when possible.
Where a cordless brad nailer wins
An 18-gauge brad nailer is more versatile. It can fasten narrow trim, but it can also handle window stops, small casing, base shoe, cabinet face frames, and many repair jobs. The larger head gives the nail more clamping force, so the joint is less dependent on glue.
For trim around 1/2 to 1 inch wide, brads are often the practical choice. They hold better in drywall-adjacent framing and softwood, and longer 1-1/4- or 2-inch nails can reach through trim into a wood stud or solid backing. In MDF, the extra head area is especially useful because MDF can crumble around a very thin pin.
Brad nailers are not automatically better. Their larger fasteners can split narrow hardwood, leave visible holes in clear-finished work, or emerge from the side if the nose is not held square. On very small molding, the tool’s nose may also cover most of the workpiece, making accurate placement harder.
Cordless pin nailer vs. brad nailer
| Feature | 23-gauge pin nailer | 18-gauge brad nailer |
|---|---|---|
| Typical fastener length | 5/8 to 1-3/8 inches | 5/8 to 2-1/8 inches |
| Hole size | Nearly invisible | Small but usually needs filler |
| Best use | Delicate, narrow, decorative trim | General trim and stronger joints |
| Splitting risk | Low | Moderate, especially near edges |
| Holding power | Low; often paired with glue | Moderate to high |
| Typical tool weight | Often lighter and slimmer | Usually heavier and bulkier |
Battery platform matters more than it first appears
Cordless nailers eliminate the compressor and hose, but the battery adds weight at the handle or base. A compact 12-volt pin nailer can be comfortable for overhead detail work, while a high-voltage brad nailer may feel tiring after several hundred shots. Tool weight, balance, and nose visibility matter when you are working with trim only 1/4 inch wide.
There is also a cost issue. Bare tools can look affordable, but a new battery and charger may add substantially to the purchase. If you already own a compatible platform, staying with it is often cheaper than buying a technically lighter tool from another brand. Check whether the nailer is sold bare, what battery size is recommended, and whether a larger pack blocks access in tight corners.
A cordless 18-gauge brad nailer makes the most sense for a mixed trim workload. For occasional use, the cheaper option is fine if it accepts the battery system you already have and has adjustable depth control. You do not need the newest brushless model to install a few lengths of shoe molding.
Choose the fastener and setting carefully
For a pin nailer, start with a fastener long enough to penetrate the trim and enter the backing by roughly 1/2 inch, without risking pipes, wires, or an exterior surface. For example, a 3/4-inch strip over solid wood may need a 1-inch pin. If the trim is being glued, shorter pins can be enough to hold alignment.
With a brad nailer, avoid choosing the longest nail simply because the tool accepts it. A 2-inch brad through thin trim can strike hidden metal or emerge through the side. A useful rule is to aim for about 1/2 to 3/4 inch of penetration into wood, then test on scrap.
Set depth using a scrap piece of the same material. The fastener should finish just below the surface, not leave a crater. Too shallow means a visible nail head; too deep crushes soft trim and creates a hole that takes more filler. Fire a test shot near the end of scrap because some tools drive differently as the magazine empties.
Common failures and how to prevent them
Splitting usually comes from fastening too close to an end or edge, using an overly long brad, or driving into dry, brittle hardwood. Move the shot slightly inward, reduce fastener length, or predrill when the trim is valuable. On narrow molding, glue provides more reliable long-term support than forcing in a larger nail.
Misfires and jams are commonly caused by the wrong fastener angle, mixed nail lengths, a nearly empty battery, or a magazine that is not fully latched. Keep the nose pressed flat against the workpiece and use the nail brand and size specified by the tool. Clear jams with the battery removed, not merely with the trigger released.
For most homeowners, buy the cordless trim nailer that matches your existing battery platform. Choose a pin nailer when invisible holes and split resistance are the priority. Choose a brad nailer when you need one tool with useful holding power across ordinary trim. If the project includes both delicate molding and heavier casing, the two tools complement each other rather than genuinely replacing one another.
Related guides
- Longest Lasting Lawn Mower Battery: AGM vs Lithium vs Flooded Lifespan and Cost per Season
- Duralast Gold Lawn Mower Battery Review: U1 Fit, CCA and When to Pay for AGM
- Greenworks Pro 80V 21-Inch Mower Review: Runtime Math, Push vs Self-Propelled and Yard Fit
- Bosch High Pressure Washer Gun Replacement: Fittings, Adapters and What Fits Your Model