
What's inside
- 1. What Is an Electric Sander for Wood?
- 2. Different Types of Electric Sanders for Wood
- 3. Comparing Electric Sanders for Wood
- 4. How to Choose the Right Electric Sander for Wood
- 5. Understanding Sandpaper Grit for Wood Sanding
- 6. How to Use an Electric Sander on Wood Properly
- 7. Common Electric Sanding Mistakes to Avoid
- 8. Electric Sander Safety and Wood Dust Protection
- 9. Frequently Asked Questions
- Conclusion
- 1. What Is an Electric Sander for Wood?
- 2. Different Types of Electric Sanders for Wood
- 3. Comparing Electric Sanders for Wood
- 4. How to Choose the Right Electric Sander for Wood
- 5. Understanding Sandpaper Grit for Wood Sanding
- 6. How to Use an Electric Sander on Wood Properly
- 7. Common Electric Sanding Mistakes to Avoid
- 8. Electric Sander Safety and Wood Dust Protection
- 9. Frequently Asked Questions
- Conclusion
As an Amazon Associate I earn from qualifying purchases. This post may contain affiliate links at no extra cost to you.
Choosing the right electric sander for wood can make a major difference in how quickly you complete a project and how smooth the finished surface looks. Whether you are refinishing furniture, preparing cabinets for paint, smoothing rough lumber, or removing an old finish, different sanders are designed for different levels of material removal and surface preparation.
For most homeowners and DIY woodworkers, a 5-inch random orbital sander is the best starting point because it handles a wide range of everyday sanding jobs while producing a relatively consistent finish. However, a belt sander is more effective for aggressive material removal, a finishing sander works well on flat surfaces, and a detail sander helps reach corners and tight spaces.
The right choice depends on the type of wood, the amount of material you need to remove, the desired finish, and how frequently you plan to use the tool. Understanding these differences will help you avoid unnecessary purchases and prevent common sanding mistakes.
1. What Is an Electric Sander for Wood?
An electric wood sander is a powered tool that uses an abrasive surface, usually sandpaper, to remove small amounts of material from wood. Its motor moves the sanding pad or abrasive belt, allowing you to smooth rough surfaces, remove old finishes, eliminate minor imperfections, and prepare wood for staining, painting, or sealing.
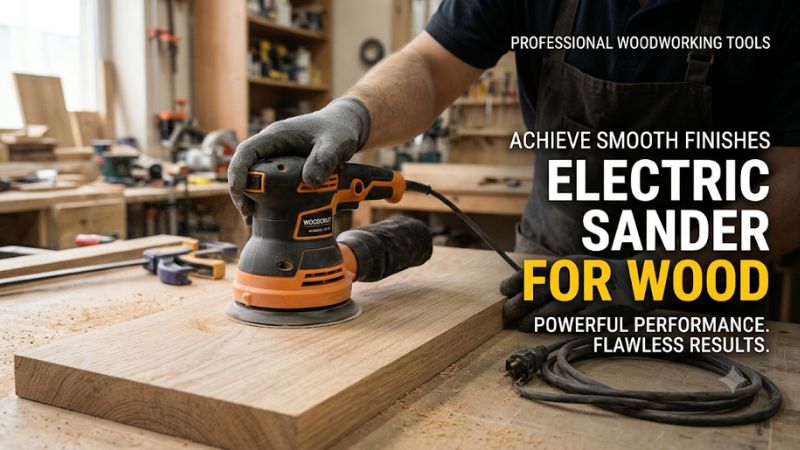
Compared with manual sanding, an electric sander can cover larger areas more efficiently and reduce repetitive physical effort.
Most electric sanders fall into four main categories:
- Random orbital sanders
- Orbital or finishing sanders
- Belt sanders
- Detail sanders
Each category uses a different sanding motion and abrasive configuration. Choosing the wrong type can result in uneven surfaces, visible scratches, excessive material removal, or damage to thin wood veneers.
An important distinction is that electric sanders are not interchangeable simply because they accept sandpaper. Their speed, pad movement, abrasive attachment, and intended applications determine which jobs they handle effectively.
2. Different Types of Electric Sanders for Wood
Understanding how each sander operates is the first step toward selecting the right tool.
Random Orbital Sander
Best for: General woodworking, furniture refinishing, and preparing wood for finishing.
A random orbital sander combines two movements: the sanding pad rotates while also moving in a small orbital pattern. This motion helps distribute sanding marks rather than creating consistent circular scratches in one direction.
Most handheld models use round abrasive discs, commonly available in 5-inch and 6-inch diameters.
A 5-inch model is a practical choice for many DIY projects because it balances working area, maneuverability, and abrasive availability.
Main advantages:
- Suitable for many hardwood and softwood surfaces.
- Effective for removing minor imperfections and old finishes.
- Produces a relatively smooth surface when used with appropriate grit progression.
- Works well on tabletops, cabinet doors, shelves, and furniture panels.
- Hook-and-loop abrasive discs allow relatively quick changes.
Limitations:
- Cannot reach deep corners effectively.
- May remove too much material if held in one position.
- Requires compatible abrasive discs with the correct diameter and dust-hole arrangement.
For someone purchasing their first electric sander, this is generally the most versatile option.
Orbital or Finishing Sander
Best for: Light sanding, flat surfaces, and final preparation.
A traditional orbital finishing sander moves its rectangular or square sanding pad in small orbital movements.
Unlike a random orbital model, it does not combine independent rotation with orbital movement. This makes its sanding pattern more predictable, although it can leave visible swirl marks if used improperly.
Many finishing sanders use quarter-sheet or half-sheet abrasive paper secured with clamps or hook-and-loop attachments.
Main advantages:
- Useful for smoothing flat wooden surfaces.
- Provides controlled material removal.
- Can reach relatively close to edges.
- Uses readily available sheet sandpaper on compatible models.
Limitations:
- Generally removes material more slowly than a belt sander.
- Can leave noticeable sanding patterns.
- Less versatile for aggressive stock removal.
A finishing sander is particularly useful when working on cabinet panels, wooden boards, and surfaces that need relatively light sanding before applying a finish.
Belt Sander
Best for: Aggressive sanding, leveling, and removing old finishes.
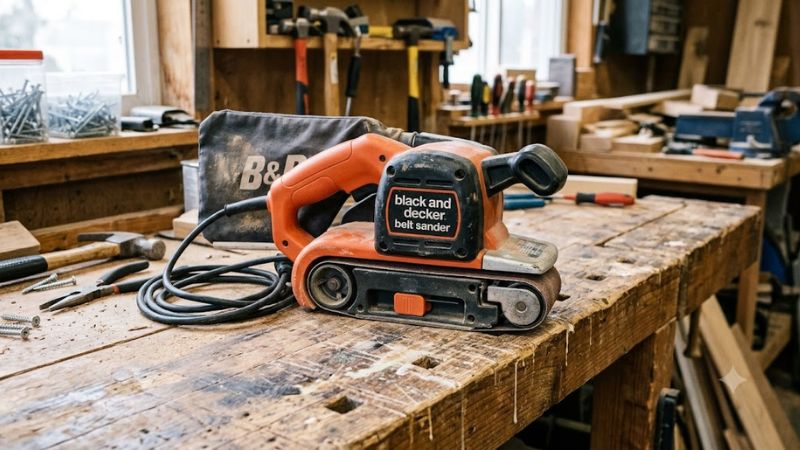
A belt sander uses a continuous loop of abrasive material stretched between two rollers. The motor drives the belt across the contact surface, allowing it to remove material quickly.
Common handheld configurations include 3 × 21-inch sanding belts, although other sizes are available.
Belt sanders are useful when working with rough lumber, large wooden surfaces, and projects that require substantial material removal.
Main advantages:
- Removes material quickly.
- Helps level uneven wooden surfaces.
- Suitable for larger boards and heavy refinishing work.
- Can remove stubborn coatings when the application and abrasive are appropriate.
Limitations:
- Can create deep scratches.
- May leave gouges if movement is uneven.
- Can remove too much material in a short time.
- Requires more experience and control than a general-purpose random orbital sander.
A belt sander is not usually the best choice for delicate furniture finishing or thin veneer. Its aggressive action makes it easier to damage the underlying wood.
Detail Sander
Best for: Corners, narrow areas, and intricate wooden surfaces.
A detail sander typically features a small triangular sanding pad designed to access areas that larger sanders cannot reach.
It is useful for sanding:
- Furniture corners.
- Window frames.
- Cabinet details.
- Wooden trim.
- Small decorative components.
- Areas around joints and edges.
Its compact sanding surface provides better access, but it also means that covering large panels takes considerably longer.
A detail sander is best considered a specialized addition rather than a replacement for a full-size random orbital sander.
3. Comparing Electric Sanders for Wood
The following table summarizes the main differences and helps match each tool to its intended workload.
| Sander type | Best application | Material removal | Finish potential | Main limitation |
| Random orbital | Furniture and general woodworking | Medium | Very good | Limited corner access |
| Finishing/orbital | Flat panels and light sanding | Low to medium | Good | Can leave swirl marks |
| Belt | Rough lumber and leveling | High | Requires additional finishing | Easy to gouge wood |
| Detail | Corners and intricate areas | Low to medium | Good in small areas | Slow on large surfaces |
For most home workshops, a random orbital sander offers the best balance of versatility and finishing capability.
However, professional woodworkers or people frequently working with rough lumber may benefit from owning multiple types.
4. How to Choose the Right Electric Sander for Wood
Before purchasing a sander, consider the projects you actually complete. A tool designed for heavy material removal may be unnecessarily aggressive for furniture restoration, while a small detail sander may become frustrating when working on large tabletops.
Consider the Type of Wood and Project
Different wood materials require different levels of sanding control.
For solid hardwood, such as oak, maple, or walnut, a random orbital sander is useful for general surface preparation and removing minor imperfections.
For softwood, such as pine, use a lighter touch because excessive pressure or prolonged sanding can create uneven areas and visible depressions.
For plywood and veneered panels, prioritize controlled material removal. The decorative veneer layer may be thin, so aggressive sanding can expose the underlying material.
If you are restoring painted furniture, determine whether the existing coating could contain lead or other hazardous substances before disturbing it. Older coatings should not be treated as ordinary sanding dust.
Check Motor Power and Speed Control
For corded sanders, manufacturers commonly specify motor input in amps or watts.
For example, Makita’s BO5041 is a corded 5-inch random orbital sander with a 3-amp motor and a variable speed range of 4,000–12,000 orbits per minute (OPM).
These figures describe the tool’s electrical input rating and pad movement, not a direct measurement of material removal or sanding performance.
Variable speed control is useful because different materials and sanding stages can require different operating conditions.
A slower setting may provide more control during delicate work, while a higher setting can help with suitable general sanding applications.
Always follow the manufacturer’s instructions rather than assuming that maximum speed is appropriate for every wood type.
Evaluate Dust Collection
Dust collection should be an important purchasing consideration.
Some sanders include a dust bag, while others provide a vacuum connection or support an external dust extraction system.
A dust bag can collect some sanding debris, but it should not be treated as complete protection against airborne fine particles.
Look for:
- A compatible vacuum connection.
- Properly aligned dust-extraction holes.
- A removable and cleanable dust container.
- An extraction arrangement suitable for the type of work.
- Replacement filters and accessories that remain available.
For frequent sanding, connecting the tool to an appropriate dust extractor is generally preferable to relying entirely on a small collection bag.
Choose Between Corded and Cordless Models
Both power configurations have practical advantages.
| Consideration | Corded sander | Cordless sander |
| Power supply | Electrical outlet | Rechargeable battery |
| Working mobility | Limited by cable length | Greater freedom of movement |
| Runtime | Continuous while powered | Depends on battery capacity and workload |
| Weight | No battery attached | Battery adds weight |
| Ownership cost | No replacement tool battery required | May require compatible batteries and charger |
A corded sander is a practical option for a fixed workshop where electrical outlets are readily available.
A cordless model is more convenient when moving between work areas or sanding in locations without convenient power access.
If you already own cordless tools, consider whether the sander belongs to your existing battery platform. Verify the exact model’s voltage and battery compatibility rather than assuming that all batteries from the same manufacturer can be interchanged.
Check Abrasive Compatibility
Sandpaper is a consumable that directly affects the quality of your work.
Before purchasing, check:
- Abrasive diameter or sheet dimensions.
- Hook-and-loop or clamp attachment.
- Number and position of dust-extraction holes.
- Recommended abrasive types.
- Availability of replacement discs and belts.
Abrasives that physically attach to a sanding pad are not necessarily compatible with its dust-extraction system.
5. Understanding Sandpaper Grit for Wood Sanding
Sandpaper grit determines how aggressively the abrasive removes material.
Lower grit numbers indicate coarser abrasives, while higher numbers indicate finer abrasives.
The following table provides practical starting points rather than mandatory settings for every wood species or project.
| Sandpaper grit | Typical application |
| 40–60 | Heavy material removal and rough surface correction |
| 80 | Initial sanding of rough or uneven wood |
| 100–120 | General surface smoothing |
| 150–180 | Refining the surface before finishing |
| 220 | Fine sanding and many final preparation tasks |
| 320–400 | Selected between-coat or fine finishing applications |
You do not necessarily need to use every grit.
For example, a reasonably smooth wooden tabletop might need 80, 120, 180, and possibly 220 grit, depending on its initial condition and the finish manufacturer’s recommendations.
The important principle is to remove the deeper scratches from the previous abrasive before moving to a finer one.
Jumping directly from coarse sandpaper to very fine sandpaper can leave scratches that become more visible after staining.
6. How to Use an Electric Sander on Wood Properly
Using the correct technique is just as important as selecting the right machine.
Follow these steps to achieve a more consistent surface.
Step 1: Prepare the Work Area
Place the wooden workpiece on a stable surface and secure it with suitable clamps.
Remove loose hardware, nails, screws, and other objects that could damage the abrasive or create a hazard.
Inspect the wood for cracks, loose joints, protruding fasteners, and existing coatings that may require special handling.
Wear appropriate eye and hearing protection, along with suitable respiratory protection for the sanding conditions.
Arrange dust extraction before switching on the tool.
Step 2: Install the Correct Sandpaper
Choose abrasive paper that matches the sander’s pad size and attachment system.
Check that the disc or sheet is centered and securely attached.
If the sander uses a dust-extraction pad, align the abrasive holes with the corresponding openings.
An incorrectly installed abrasive can produce poor dust collection and uneven sanding.
Step 3: Start with an Appropriate Grit
Choose the starting grit based on the surface condition.
Use coarser abrasives only when substantial material removal is necessary. For an already smooth wooden surface, starting with a finer grit may be more appropriate.
Test the selected abrasive on an inconspicuous area when working with delicate or unfamiliar materials.
Step 4: Move the Sander Consistently
Hold the sander with a comfortable, controlled grip.
Place its pad flat against the workpiece before starting when the manufacturer’s instructions permit this operating method.
Move the tool steadily across the surface without pressing down excessively.
Keep the pad level and avoid concentrating on one location.
For belt sanders and conventional orbital sanders, pay particular attention to the wood grain and follow the manufacturer’s recommended sanding direction.
A random orbital sander is less sensitive to grain direction, but controlled overlapping passes still help produce an even result.
Step 5: Progress Through Finer Grits
Once the initial sanding is complete, inspect the surface.
Remove dust and check for scratches, uneven areas, or remaining imperfections.
Move to a finer abrasive when the previous grit has adequately corrected the surface.
Avoid skipping too many grit levels, particularly when removing scratches left by aggressive sanding.
Step 6: Inspect and Clean the Finished Surface
Switch off the tool and wait until the abrasive pad has completely stopped before putting it down or changing accessories.
Remove dust using an appropriate vacuum or suitable cleaning method.
Inspect the wood under good lighting, preferably from different angles.
If visible scratches remain, return to an appropriate sanding stage rather than trying to hide them with a finish.
7. Common Electric Sanding Mistakes to Avoid
Even an appropriate sander can produce poor results when used incorrectly.
Applying excessive pressure: Pushing down on the tool does not necessarily improve sanding performance. It can reduce pad movement, cause uneven removal, and increase wear.
Using worn sandpaper: Dull or clogged abrasives can produce inconsistent results and make the tool work harder. Replace abrasive discs when they no longer cut effectively.
Skipping grit progression: Moving from coarse to very fine sandpaper too quickly can leave scratches that remain visible after staining.
Holding the sander in one place: Prolonged contact can create depressions and uneven patches, especially on softwood.
Ignoring dust collection: Fine wood dust can spread throughout a workshop and create respiratory hazards.
Using a belt sander on delicate veneer: Aggressive material removal can quickly expose the underlying substrate.
Assuming every sanding disc fits: Incorrect disc dimensions or hole patterns can interfere with attachment and dust extraction.
Taking time to inspect the surface between sanding stages is often more effective than simply increasing the tool’s operating speed.
8. Electric Sander Safety and Wood Dust Protection
Wood sanding produces airborne particles that can affect the eyes, skin, and respiratory system.
OSHA identifies wood dust exposure as a potential cause of respiratory problems, allergic reactions, and other adverse health effects. Some hardwood dust exposures have also been associated with occupational cancer risks.
Consequently, dust management should be part of every sanding setup.
Follow these precautions:
- Use suitable on-tool dust extraction whenever possible.
- Wear properly selected respiratory protection appropriate for the exposure and working environment.
- Use safety glasses to protect against airborne particles.
- Wear hearing protection when required by the tool’s noise level and working conditions.
- Secure the workpiece before sanding.
- Keep loose clothing, jewelry, and long hair away from moving components.
- Keep electrical cords away from the sanding pad.
- Inspect power cords, plugs, switches, and abrasive attachments before use.
- Disconnect corded tools before changing abrasives or performing maintenance.
- Remove batteries before servicing cordless sanders.
Do not rely on a dust mask as a substitute for effective extraction. Respiratory protection must be appropriate for the exposure, fit correctly, and be used according to its manufacturer’s instructions.
Clean workshop dust with suitable vacuum equipment rather than using compressed air or dry sweeping methods that redistribute fine particles.
Also remember that wood dust can accumulate and create a combustible dust hazard. Keep the work area clean and away from ignition sources.
9. Frequently Asked Questions
What type of electric sander is best for wood?
A 5-inch random orbital sander is generally the most versatile option for everyday woodworking. It handles furniture refinishing, surface smoothing, and preparation for painting or staining. A belt sander is better for aggressive material removal, while detail sanders are useful for corners.
Can you use an electric sander to remove paint from wood?
Yes, an electric sander can remove some paint and surface coatings from wood, depending on the coating and abrasive. However, test for hazardous substances such as lead before disturbing older painted surfaces. Follow applicable hazardous-coating removal requirements rather than treating every painted surface as ordinary sanding work.
What grit sandpaper should I use for wood?
The appropriate grit depends on the surface condition. Common starting points include 80–120 grit for general smoothing and 150–220 grit for finer preparation. Coarser grits may be needed for heavy material removal, while higher grits are appropriate for selected fine-finishing applications.
Is a random orbital sander better than a regular orbital sander?
A random orbital sander is generally more versatile for furniture and general woodworking because its combined rotational and orbital movement helps reduce visible sanding patterns. A traditional orbital finishing sander remains useful for controlled sanding on flat surfaces and near edges.
Conclusion
Choosing the right electric sander for wood comes down to matching the tool’s sanding action to your project. A random orbital sander is the strongest starting point for most DIY users because it offers a practical balance of material removal, surface quality, and versatility.
Belt sanders are better suited to aggressive sanding and leveling, finishing sanders handle lighter work on flat surfaces, and detail sanders provide access to difficult corners.
Before purchasing, consider the tool’s speed control, abrasive compatibility, dust collection, power source, and handling requirements. Just as importantly, use the correct grit progression and maintain effective dust extraction throughout the job.
For most home workshops, starting with a quality random orbital sander and a selection of compatible abrasive discs is a sensible approach. You can add specialized sanding tools later when your woodworking projects justify them.
Related guides
More from Amazon
Programs that pair well with the guide above. Offers and eligibility are set by Amazon and may change.
A free business account with business pricing and bulk-buying tools for work, shop or home office.
Create a business accountFree shipping on eligible items, Prime Video and more. Eligible new members can start with a free trial.
Start a Prime free trialAudiobooks and podcasts to listen to on the go. Eligible new members can start with a free trial.
Try Audible freeAd-free music streaming. Eligible new subscribers can start with a free trial.
Try Music Unlimited freeAs an Amazon Associate we earn from qualifying purchases.


Write Your Review
No reviews yet. Be the first to share your experience!