What's inside
As an Amazon Associate I earn from qualifying purchases. This post may contain affiliate links at no extra cost to you.
For door and window casing, an 18-gauge cordless brad nailer is usually the right starting point. It drives nails thin enough to leave small holes, yet holds most casing securely when you fasten into the jamb or framing. A 16-gauge finish nailer gives a stronger hold for thick, heavy trim, but leaves larger holes and is more likely to split narrow stock.
The best choice often depends less on the nailer alone than on the battery platform you already own. These tools are heavier and costlier than pneumatic nailers, but they avoid a hose and compressor—useful when moving between rooms or doing a small trim job. If you already have compatible batteries, compare tools within that ecosystem before buying into another one.
As an Amazon Associate we earn from qualifying purchases at no extra cost to you.


Choose the gauge for the trim
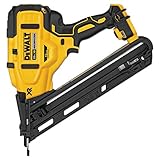
For common 1/2- to 3/4-inch casing, an 18-gauge brad nailer is a practical match. Brad nails are typically about 5/8 to 2-1/8 inches long, depending on the tool. Use a length that penetrates the jamb or framing by roughly 1 inch after passing through the trim. A nail that is too short may not hold; one that is too long can emerge through the back or hit wiring and other hidden material.
Choose a 16-gauge nailer when installing thicker, heavier casing or when you need more holding power. Its larger nails—often around 1 to 2-1/2 inches—are less likely to pull out, but their holes need more filling and they can split narrow pieces or fragile material. For delicate, narrow trim, an 18-gauge nailer is less aggressive. Neither tool replaces adhesive where the installation calls for it, and neither should be used to fasten casing where the nail could hit glass, wiring, or plumbing.
Quick comparison
| Tool type | Best fit | Main trade-off |
|---|---|---|
| 18-gauge cordless brad nailer | Most standard door and window casing | Small holes; less holding power on heavy trim |
| 16-gauge cordless finish nailer | Thick or heavy casing and trim | Stronger hold; larger holes and greater split risk |
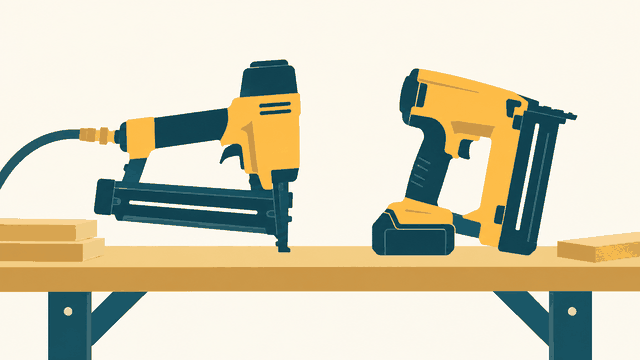
| Pneumatic finish nailer | Frequent trim work with a compressor already on hand | Light tool, but requires a hose and compressor |
What to compare before buying
Start with battery compatibility. A bare tool can be a good-value purchase if you already own batteries and a charger for the same platform. If you do not, compare the cost of the tool kit, battery, and charger—not just the advertised tool price. A compact battery keeps a nailer easier to handle overhead and around corners; a larger battery may run longer but adds weight. For an occasional room of casing, battery runtime is rarely the deciding factor.
For a first cordless tool in a platform, an 18-gauge cordless brad nailer kit is a sensible category to compare. If your battery shelf already has a compatible pack, a bare-tool 18-gauge brad nailer may cost less overall.
Also check nail range, tool weight, depth adjustment, and jam access. A no-mar tip helps protect painted or prefinished casing, though it cannot prevent every mark. Tool-free jam clearing is useful when a nail bends or strips. Dry-fire lockout prevents the tool from cycling when its magazine is empty, reducing the chance of leaving a string of empty marks on the work. If the tool will be used for windows as well as doors, a narrow nose can make it easier to reach close to a jamb or corner.
Cordless trade-offs that matter on trim
Cordless nailers are convenient, but they are generally heavier than pneumatic models. That matters when holding a tool at arm’s length while fitting a long head casing. Try the tool with its battery installed if possible; balance can matter more than the bare-tool weight printed on a product page.
Some cordless nailers use a flywheel or spring mechanism that must spin up before firing. Others use a gas-assisted system. Either way, expect a different feel and sound from a pneumatic nailer, and check whether the manufacturer specifies a warm-up delay or gas cartridge. For occasional trim work, convenience may outweigh the extra bulk. If you install casing every day, a pneumatic tool can be lighter and faster, provided you already have the compressor and hose.
For thicker casing, compare a 16-gauge cordless finish nailer with 18-gauge options before buying. A 16-gauge tool is not automatically better: the larger nail can split thin stock, and the larger hole takes more care to conceal.
Set the nailer up for clean results
Test the tool on an offcut of the same casing before working on the finished piece. Set the depth so the nail head sits just below the surface without crushing the wood or breaking through the face. If the head stands proud, increase depth in small steps; if it sinks too far, back off. Different wood species, casing thicknesses, battery charge, and nail lengths can change the result, so one setting is not guaranteed to work for every piece.
Place nails where the casing overlaps solid jamb or framing, rather than firing blindly toward the wall cavity. On a typical casing leg, fastening near the edge and at intervals of roughly 12 to 16 inches is a useful starting point, with additional nails near ends where the material needs to stay tight. Keep nails away from thin edges to reduce splitting, and use a nail set or adjust placement if a nail lands too close to the edge. Follow the trim and tool makers’ instructions when they call for a different pattern.
Common problems have straightforward checks. A nail that sits proud can mean the depth is too shallow, the tool needs more time to cycle, or the nail is too long for the material. A nail that sinks too deeply may need a shallower setting or a lighter battery combination. Frequent jams can point to bent or mismatched nails, a poorly seated strip, or a dirty driver channel. Disconnect or remove the battery before clearing a jam, following the tool manual.
Which one should you buy?
For most homeowners fitting ordinary door and window casing, buy an 18-gauge cordless brad nailer that uses batteries you already own. It makes smaller holes and is forgiving on narrow trim. Spend more only if better balance, jam access, or a feature you will use justifies it. If you have no battery platform yet, price the full kit and consider how its batteries will serve other cordless tools you expect to buy.
The cheaper option is fine when the job is occasional and the tool can handle the nail lengths your casing requires. A 16-gauge nailer is worth the added size and hole filling when the trim is heavy enough to need its stronger hold. For a one-time room, renting or borrowing a compatible tool may cost less than buying a new battery system.
FAQ
Which one should you buy?
Related guides
- Longest Lasting Lawn Mower Battery: AGM vs Lithium vs Flooded Lifespan and Cost per Season
- Duralast Gold Lawn Mower Battery Review: U1 Fit, CCA and When to Pay for AGM
- Greenworks Pro 80V 21-Inch Mower Review: Runtime Math, Push vs Self-Propelled and Yard Fit
- Bosch High Pressure Washer Gun Replacement: Fittings, Adapters and What Fits Your Model