What's inside
As an Amazon Associate I earn from qualifying purchases. This post may contain affiliate links at no extra cost to you.
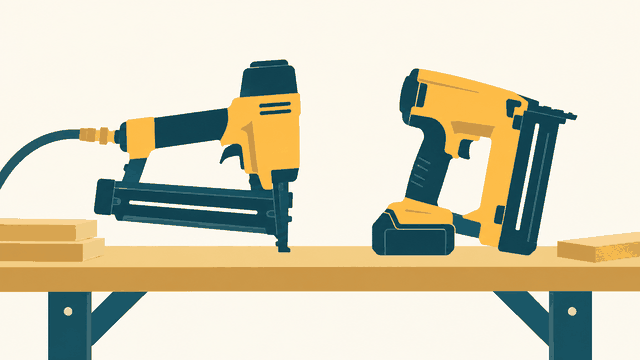
Baseboard and door casing usually call for a finish nailer, not a framing nailer. The practical choice is between a 15- or 16-gauge nailer for stronger attachment and an 18-gauge brad nailer for lighter trim and smaller holes. Battery platform matters too: if you already own cordless tools, a bare tool can be a sensible buy; if not, compare the cost of the nailer, battery, and charger together.
As an Amazon Associate we earn from qualifying purchases at no extra cost to you.



Choose the gauge for the trim
A 15-gauge nailer shoots thicker, typically angled nails. It provides good holding power for door casing, heavier baseboard, and trim that needs to bridge a small gap to the framing. The larger holes are more noticeable, though, and the nails can split narrow or delicate stock.
A 16-gauge nailer is a common middle ground. It handles most baseboard and casing well, with less conspicuous holes than a 15-gauge nailer. An 18-gauge brad nailer makes smaller holes and is a good fit for thin casing, shoe molding, and delicate trim, but its thinner nails are less reliable for pulling bowed, heavy baseboard tight to a wall.
For a typical room with standard baseboard and door casing, a 16-gauge nailer is a flexible one-tool choice. Choose 15 gauge if substantial casing or heavier trim is routine. An 18-gauge nailer is often enough for light trim, especially when the work is backed by adhesive or the trim is fastened into solid framing.
Cordless nailer comparison
| Type | Best suited to | Main trade-off |
|---|---|---|
| 15-gauge finish nailer | Heavy casing and thicker baseboard | Strong hold, but larger holes and greater risk of splitting narrow trim |
| 16-gauge finish nailer | General baseboard and door casing | Versatile, though holes are larger than those from an 18-gauge tool |
| 18-gauge brad nailer | Light casing, small molding, and delicate stock | Small holes, but less holding power on heavy or bowed trim |
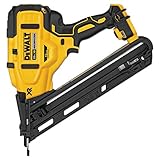
If you want one nailer for a mix of interior trim, compare cordless 16-gauge finish nailers. For heavier casing, look at cordless 15-gauge finish nailers. If most of your work is small, delicate trim, an 18-gauge cordless brad nailer may be the less costly and more appropriate option.
Cordless convenience has a cost
Cordless nailers avoid an air hose and compressor, which is useful when moving between rooms, working on a ladder, or doing a short punch-list job. They are also easier to set up than a pneumatic system. In exchange, the tool is heavier than many pneumatic nailers, and its balance can become tiring during a full day of overhead or repetitive work.
Battery-powered models use different firing systems. Some rely on a flywheel; others use a gas spring or similar mechanism. In practical use, the important checks are consistent depth, fast recovery between shots, and whether the tool fires cleanly at the pace you work. A small job may make speed differences irrelevant. A long installation can expose them.
Battery compatibility can outweigh small differences between nailers. If you already own a compatible battery platform, buying a bare tool avoids paying for another charger and battery. Check the exact platform and battery requirement before ordering: batteries are not interchangeable across brands, and some tools work best with a particular battery size. A larger pack may extend runtime but add weight. If you are starting from scratch, compare the complete kit cost rather than the bare-tool price.
Features worth checking
Look for tool-free jam clearing, a no-mar tip, a belt hook, and a clear way to adjust nail depth. A dry-fire lockout helps prevent the tool from cycling when the magazine is empty, reducing accidental marks on finished trim. Tool-free depth adjustment is handy, but test it on offcuts before relying on the scale or dial: the same setting can leave nails proud in one wood and buried in another.
Magazine capacity and nail availability also matter. Match the nail angle, gauge, and length to the tool; a nail with the wrong collation will not load correctly. For trim, lengths around 1-1/2 to 2-1/2 inches are common, but choose based on the thickness of the molding and what lies behind it. A nail that is too short may not reach framing; one that is too long can emerge through the face or hit wiring and plumbing. Avoid firing blindly where services may run behind the wall.
Set up for a clean install
Start with scrap pieces of the same material and thickness. Fire several nails and adjust depth until the heads sit just below the surface without crushing the wood. A proud nail needs careful setting; a deeply buried nail leaves a larger filler spot and can split or deform thin trim. If nails bend, the wood is very hard, the nail is too long, or the shot is meeting a knot or metal corner bead. Change position or nail length rather than forcing repeated shots.
Fasten into studs or framing where possible. For baseboard, that often means placing nails near the top edge into wall studs, with additional fastening near the bottom when it can reach the plate. A stud finder helps, but confirm positions against the room layout; misfires into a void leave trim loose, while firing into an unexpected masonry surface can deflect the nail. On casing, place fasteners where they will hold the trim without crowding the edge. Keep nails far enough from the end of narrow pieces to reduce splitting.
Adhesive can help secure trim to uneven walls, but it is not a substitute for locating solid backing on heavy pieces. Fill small nail holes with a suitable filler, then sand and paint or touch up. If you only install trim occasionally, a less expensive 18-gauge nailer is fine for light work; if you regularly fit standard baseboard and casing, a 16-gauge model is generally the safer all-round purchase.
Related guides
- Longest Lasting Lawn Mower Battery: AGM vs Lithium vs Flooded Lifespan and Cost per Season
- Duralast Gold Lawn Mower Battery Review: U1 Fit, CCA and When to Pay for AGM
- Greenworks Pro 80V 21-Inch Mower Review: Runtime Math, Push vs Self-Propelled and Yard Fit
- Bosch High Pressure Washer Gun Replacement: Fittings, Adapters and What Fits Your Model