What's inside
As an Amazon Associate I earn from qualifying purchases. This post may contain affiliate links at no extra cost to you.
For interior trim, the right cordless nailer depends less on brand than on the fastener and the work. A small 18-gauge brad nailer suits most casing and baseboard jobs; a 16-gauge finish nailer holds heavier trim more firmly but leaves a larger hole. For delicate, narrow trim, a 23-gauge pin nailer leaves the least visible mark, but its fasteners provide little holding strength on their own.
Battery platforms matter, too. If you already own compatible batteries and a charger, a bare tool can be the sensible buy. If you are starting from scratch, compare the cost and weight of the tool, battery, and charger together—not just the tool price.
As an Amazon Associate we earn from qualifying purchases at no extra cost to you.


Choose the nailer for the trim
18-gauge brad nailer: The best starting point for most interior trim. Brad nails are typically available from about 5/8 to 2 inches, giving you useful range for casing, baseboard, shoe molding, and small decorative trim. The holes are easier to fill than those from a 16-gauge nailer. For common 3/4-inch trim, a 1 1/2-inch fastener may work when fastening into framing; use a longer nail when the assembly requires it, while checking for pipes and wiring.
16-gauge finish nailer: A better fit for thick or heavy trim, wide baseboard, and joints that need more holding power. Nails commonly run roughly 1 to 2 1/2 inches. The trade-off is a larger hole and more risk of splitting narrow stock, so it can mean extra filling and sanding on painted trim.
23-gauge pin nailer: Useful for delicate molding, returns, and small pieces that a brad nail might split. Pins leave tiny holes, but they are not a substitute for stronger fasteners where the trim needs to stay put. Adhesive or another nailer may be needed for primary fastening.
For a first trim nailer, an 18-gauge cordless brad nailer is usually the most versatile choice. Buy a 16-gauge tool instead if your work regularly involves heavy trim or you need longer fasteners.
Compare the main options
| Nailer type | Good for | Typical trade-off | Practical buyer |
|---|---|---|---|
| 18-gauge brad | Casing, baseboard, general trim | Less holding power than 16-gauge | Most homeowners and trim installers |
| 16-gauge finish | Heavier trim and longer fasteners | Larger holes; can split narrow stock | Frequent work with substantial molding |
| 23-gauge pin | Small, delicate trim and returns | Low holding strength | Detail work or a second nailer |
What cordless changes
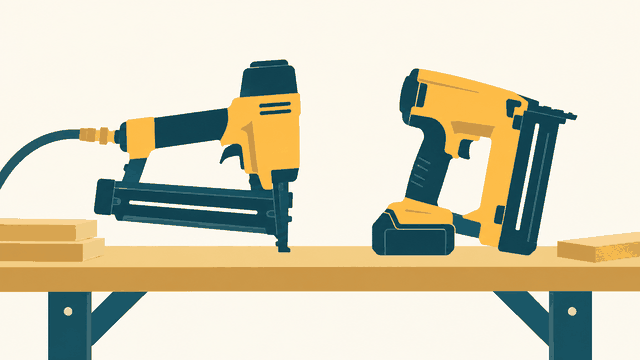
Cordless nailers eliminate the compressor and hose, which is useful when moving between rooms, working on a ladder, or installing trim in an occupied home. The trade-off is a heavier tool in the hand and more cost tied to batteries. A cordless nailer may also have a short delay between pulling the trigger and driving the nail, depending on its design. Try the tool in a store if possible: balance and nose visibility matter when you are working close to corners.
Check the tool’s listed nail-length range and collated nail angle before buying. Nails for one angle or collation style will not necessarily fit another nailer, even when the gauge is the same. Also check whether the package includes a battery and charger. A bare tool is often the better value if you already own batteries on that platform; it is less attractive when you need to buy a battery and charger separately.
If you do not own a platform yet, compare a cordless nailer kit with battery and charger against the bare tool plus the required battery size. One compact battery is easier to carry, while a larger one may last longer but add weight. Runtime varies with material, nail length, and firing pace, so a manufacturer’s claimed nail count is not a reliable promise for every trim job.
Features worth paying for
Prioritize consistent depth adjustment, a clear nose, a dry-fire lockout, and a tool-free jam release. Depth adjustment matters because a nail set too deep can tear the face veneer or leave a crater, while a proud nail needs to be reset and filled. Test the setting on scrap that matches the trim and backing before fastening installed pieces.
Sequential firing is adequate for careful trim work and easier to control near corners. Bump firing can be faster for repetitive tasks, but speed is rarely the priority when aligning casing or joining a miter. A belt hook and a light that illuminates the work area can help, but they matter less than a nose that lets you place the fastener accurately.
Avoid common installation problems
Choose nail length to pass through the trim and bite into solid backing, without driving blindly into a wall cavity. A stud finder can help locate framing, but confirm the location and consider concealed wiring and plumbing, especially near outlets, switches, and sinks. For a typical casing installation, fasteners should reach the jamb or framing as appropriate; the correct target depends on how the door or window is built.
Set the nailer’s depth on scrap, then place nails where they will hold the trim without breaking a thin edge. Keep fasteners away from the very edge of narrow stock to reduce splitting. If a nail bends, jams, or stands proud, stop and inspect the cause rather than firing again into the same spot. Disconnect or remove the battery before clearing a jam, following the tool manual.
For painted trim, fill small brad holes with suitable filler, sand, and touch up. For stained wood, even a small hole or a nail driven too deep can be conspicuous, so plan nail placement and use matching filler. Adhesive can reduce visible fasteners, but it is not a substitute for mechanical fastening where the trim needs secure attachment.
Make the buying decision
Choose an 18-gauge brad nailer if you need one cordless tool for ordinary casing, baseboard, and light trim. Choose 16-gauge when the material is heavier and holding power matters more than a smaller patch. Add a 23-gauge pin nailer only for delicate detail work; it is a specialist, not the best first purchase for a general trim installation.
Before ordering, confirm the nailer accepts the lengths and collation style you can readily buy, and check the total cost with the battery and charger you need. If you already have a compatible cordless platform, staying within it is often the cheaper and simpler choice. If you do not, compare complete kits and handle the tools if possible—an accurate, comfortable nailer is more useful than a feature-heavy one that is awkward to position.
Related guides
- Longest Lasting Lawn Mower Battery: AGM vs Lithium vs Flooded Lifespan and Cost per Season
- Duralast Gold Lawn Mower Battery Review: U1 Fit, CCA and When to Pay for AGM
- Greenworks Pro 80V 21-Inch Mower Review: Runtime Math, Push vs Self-Propelled and Yard Fit
- Bosch High Pressure Washer Gun Replacement: Fittings, Adapters and What Fits Your Model