What's inside
As an Amazon Associate I earn from qualifying purchases. This post may contain affiliate links at no extra cost to you.
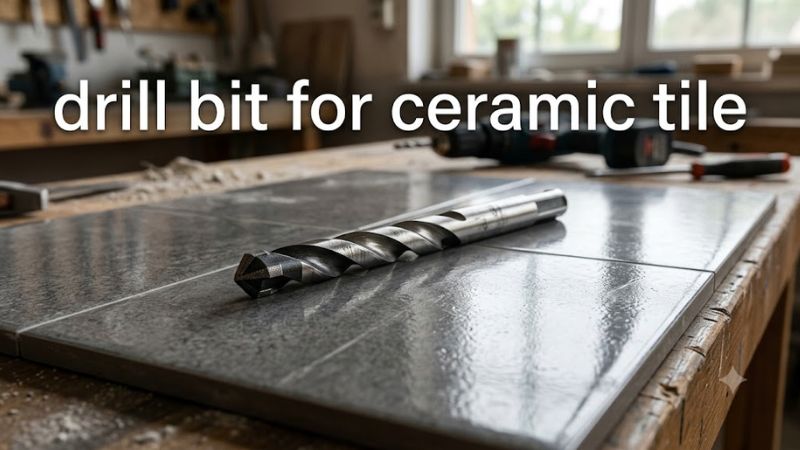
The best drill bit for ceramic tile is usually a tungsten-carbide spear-point glass-and-tile bit. For harder ceramic tiles, larger holes, or projects involving porcelain, a suitable diamond drill bit may be the better choice. The correct bit depends on the tile’s hardness, the hole diameter, and the manufacturer’s instructions for the accessory.
To drill successfully, use a drill in rotary mode, keep pressure light and controlled, and avoid hammer action while the bit is cutting the tile. Excessive force, heat, and vibration can chip the glaze or crack the tile.
This guide explains which bit to choose, how to drill a clean hole, and how to avoid common mistakes when installing bathroom accessories, shelves, towel bars, and other fixtures.
Which Drill Bit Is Best for Ceramic Tile?
The right choice depends on the material and size of the hole. Ceramic wall tiles and dense porcelain tiles may look similar, but they do not always respond the same way to a drill bit.
| Drill bit type | Best use | Main advantage | Main limitation |
| Carbide spear-point glass-and-tile bit | Small holes in ordinary glazed ceramic | Affordable and designed to start on brittle, glazed surfaces | Can wear quickly on dense or hard tiles |
| Diamond-tipped tile bit | Hard ceramic, porcelain, and other materials explicitly listed by the manufacturer | Abrasive cutting action suits hard, brittle materials | Performance and cooling requirements vary by bit design |
| Diamond hole saw or core bit | Larger circular holes for pipes and plumbing fittings | Makes larger openings without using a standard twist bit | Requires careful centering and adherence to the specified speed and cooling method |
| Standard masonry bit | The wall substrate behind the tile, after the tile has been penetrated | Suitable for compatible brick, block, or masonry | Usually not the best first choice for drilling the glazed tile surface |
Best starting point: For a small mounting hole in standard ceramic wall tile, choose a carbide spear-point tile bit. If the tile is dense, unusually hard, or identified as porcelain, select a diamond bit or a specialized carbide bit explicitly rated for that material.
A drill bit labeled for ceramic tile is not automatically suitable for every tile, hole size, or drilling method.
How to Choose the Correct Drill Bit
1. Identify the tile material
Before choosing an accessory, determine whether the surface is ordinary ceramic, porcelain, glass, or natural stone.
- Glazed ceramic wall tile: A carbide spear-point bit is often suitable for small holes.
- Hard or dense ceramic tile: A specialized carbide tile bit or diamond bit may be more appropriate, depending on its rated applications.
- Porcelain tile: A diamond bit designed for porcelain is a dependable choice. Some specialized carbide bits are also rated for porcelain, so check the manufacturer’s specifications rather than relying on the material label alone.
- Glass or natural stone: Use an accessory explicitly designed for the particular material.
If you cannot identify the tile, do not assume that an ordinary ceramic bit will work. Check the tile documentation or select an accessory whose manufacturer expressly lists the suspected material.
2. Match the bit diameter to the job
Choose the diameter based on the mounting hardware or fitting, not simply the size of the screw.
For example, a wall anchor may require a specific hole diameter, while a pipe penetration requires an opening large enough for the pipe and any installation clearance. Follow the anchor or fitting manufacturer’s instructions.
For larger openings, use a compatible diamond hole saw or core bit rather than attempting to enlarge a small hole by forcing a conventional bit sideways.
3. Check the shank and drill compatibility
The bit’s shank must fit the drill chuck or holder securely. Many small tile bits have round or hexagonal shanks; the exact design varies by product.
Before use, confirm:
- The shank fits the drill or drill driver.
- The bit’s diameter and overall length suit the job.
- The accessory’s permitted operating speed is compatible with the tool.
- Any cooling requirements can be met safely.
- The accessory is intended for the material being drilled.
Do not assume that a bit is compatible simply because its shank fits the drill.
4. Consider the hole size and number of holes
For a single small hole in a ceramic backsplash, a basic carbide tile bit may be sufficient. For several holes in hard tile, a suitable diamond bit may be a better investment, depending on the manufacturer’s stated applications and expected wear.
For a large plumbing opening, choose a correctly sized hole saw or core bit. Large accessories generate different loads and require particular attention to speed, centering, and the drill manufacturer’s limits.
Tools and Safety Equipment You Need
Prepare the equipment before starting. The right setup helps reduce slipping, chipping, overheating, and exposure to drilling dust.
- A variable-speed drill or drill driver with a compatible chuck.
- A carbide or diamond tile bit suitable for the tile and hole size.
- A tape measure, pencil, and suitable marking tape if needed.
- Eye protection and appropriate protection against airborne dust.
- A dust extraction system suitable for the material and task, or the manufacturer’s specified wet-drilling setup.
- A stable work platform or suitable support when drilling loose tile.
- A compatible wall bit for the substrate behind the tile, if the installation requires a deeper hole.
Important: Do not apply water around an ordinary powered drill unless the tool, accessory, and drilling setup are specifically suitable for that method. Keep electrical connections and equipment protected from water. For wet drilling, follow the accessory and tool manufacturers’ instructions.
Tile and the underlying mortar, grout, or masonry may contain crystalline silica. Drilling can create respirable dust, so use appropriate dust controls rather than relying on visible dust levels to judge exposure. OSHA provides specific guidance on controlling silica dust during drilling.
How to Drill Ceramic Tile Without Cracking It
Follow these steps for a small hole in an installed ceramic tile. The exact technique, speed, and cooling method must match the bit manufacturer’s instructions.
Step 1: Check the wall before drilling
Before making a hole, determine what is behind the tile. Bathroom and kitchen walls may contain electrical cables, water pipes, waterproofing membranes, or other services.
Use an appropriate detector and review available installation information. Do not drill where the location of concealed services is uncertain.
If the tile is loose, cracked, or poorly supported, repair the underlying problem before drilling.
Step 2: Mark the hole carefully
Measure the mounting position and mark the center of the hole with a pencil or a suitable marker.
Check the position against the fixture’s mounting template and the required anchor spacing.
Masking tape can make the mark easier to see and may help some bits stay in position, but it is not a substitute for a suitable centering tip or guide. Some modern tile bits are designed to start without tape, so follow the instructions for your chosen accessory.
Step 3: Fit the bit and disable hammer action
Secure the bit in the drill chuck and check that it runs straight.
Set the drill to rotary mode with hammer action off while drilling the tile. Hammering creates repeated impacts that can fracture the brittle surface or damage the bit.
Choose a low starting speed within the accessory manufacturer’s specified operating range. There is no single RPM setting that is correct for every tile bit, diameter, and tile material.
Step 4: Start the hole slowly
Position the bit perpendicular to the tile unless the accessory’s starting procedure specifies otherwise.
Start at low speed with light, steady pressure. Allow the cutting tip to establish a secure starting point before progressing.
Some hollow diamond core bits are designed to start at an angle and gradually move upright. Use that method only when the particular bit’s instructions permit it; it is not a universal technique for every tile drill bit.
If the bit skates across the glaze, stop and correct the positioning rather than pressing harder.
Step 5: Drill with controlled pressure
Once the bit has started cutting, maintain steady alignment and let the accessory do the work.
Keep these points in mind:
- Avoid forcing the drill or leaning heavily on it.
- Do not let the bit wander sideways to enlarge the hole.
- Follow the bit’s instructions for cooling and dust extraction.
- Pause if the accessory overheats, stops cutting effectively, or shows signs of damage.
- Do not increase pressure simply because drilling slows down.
Excessive pressure can cause chipping, breakage, and premature bit wear. Heat can also damage the cutting surface, particularly when a diamond accessory is operated outside its specified conditions.
Step 6: Control the breakthrough
As the bit approaches the back of the tile, reduce pressure and maintain control of the drill.
If the hole continues into the wall, stop once the tile has been penetrated and assess the substrate. Change to a compatible masonry bit if required, and use hammer action only when the substrate, drill, and bit instructions permit it.
Do not use hammer action while the bit is still cutting the tile.
Step 7: Inspect the hole before installing the fixture
Stop the drill, wait for the bit to stop rotating, and inspect the opening.
Check for:
- Chips or cracks radiating from the hole.
- A hole diameter suitable for the intended anchor or fitting.
- Loose fragments or damaged tile around the opening.
- Damage to any visible waterproofing layer.
Clean up dust using a suitable method. Install the anchor and fixture according to their respective instructions. If the hole penetrates a waterproofed shower or wet-area wall, restore the waterproofing and seal the penetration using a system compatible with the installation.
Common Mistakes When Drilling Ceramic Tile
| Mistake | Why it causes problems | Better approach |
| Using an ordinary wood or metal twist bit | The cutting geometry is not intended for glazed ceramic | Use a tile-rated carbide or diamond bit |
| Leaving hammer mode on | Impact forces can crack the tile | Use rotary mode while penetrating the tile |
| Applying excessive pressure | Can chip the glaze, fracture the tile, or damage the bit | Apply light, controlled pressure |
| Running a diamond bit outside its speed or cooling limits | Can overheat or prematurely wear the cutting surface | Follow the exact accessory instructions |
| Choosing the wrong diameter | The anchor may fit poorly or the opening may be unnecessarily large | Match the hole to the fitting manufacturer’s requirements |
| Drilling without checking behind the tile | May damage pipes, cables, or waterproofing | Check the substrate and concealed services first |
| Continuing with a worn or damaged bit | Poor cutting can increase heat and force requirements | Stop and inspect or replace the accessory |
What to Do If the Drill Bit Will Not Cut the Tile
If the bit spins but makes little progress, stop the drill and investigate rather than increasing pressure.
- Confirm the bit type. A standard carbide spear-point bit may struggle with dense porcelain or a particularly hard tile glaze.
- Inspect the cutting tip. Look for wear, damage, or debris that could prevent effective cutting.
- Check the operating mode. Make sure hammer action is off while drilling the tile.
- Review the speed and cooling requirements. The correct settings depend on the accessory. Do not assume that more speed or water will solve every problem.
- Check alignment. A bit that is slipping or running at an angle may fail to establish a clean hole.
- Stop if the tile begins to crack. Continuing may extend the damage. Assess whether the tile needs repair or replacement before proceeding.
If the bit is unsuitable for the tile, replace it with one explicitly rated for the material rather than attempting to force it through.
Frequently Asked Questions
Can I use a regular drill for ceramic tile?
Yes, a conventional variable-speed drill or drill driver can often drill ceramic tile when fitted with a suitable tile bit. Use rotary mode, keep the drill aligned, and follow the accessory manufacturer’s speed and cooling instructions.
Is a carbide or diamond drill bit better for ceramic tile?
A carbide spear-point bit is often a practical choice for small holes in ordinary ceramic wall tile, while a diamond bit is useful for harder tiles, larger openings, or materials specified by the manufacturer. The best choice depends on tile hardness, hole diameter, and the accessory’s rated applications.
Should I use water when drilling ceramic tile?
Not always. Some carbide tile bits and specialized diamond bits are designed for dry drilling, while other diamond accessories require or recommend wet drilling. Follow the exact bit and tool instructions, and never introduce water into an electrical setup that is not designed for wet operation.
Can I use a masonry drill bit on ceramic tile?
A standard masonry bit is generally better suited to the wall material behind the tile than to the glazed surface itself. Use a tile-rated bit to penetrate the tile, then change to an appropriate masonry bit if the substrate requires it.
Final Verdict
For most small holes in ordinary glazed ceramic tile, start with a carbide spear-point glass-and-tile drill bit. For harder ceramic, porcelain, and larger circular openings, choose a suitable diamond bit or another accessory explicitly rated for the material and hole size.
Use rotary mode while drilling the tile, maintain light pressure, control heat and dust according to the accessory instructions, and check for concealed services before drilling. The right bit and a controlled technique can reduce the risk of cracked tiles, damaged accessories, and costly repairs.
For your next tile project, identify the tile material and required hole diameter first, then select a compatible bit before starting work.