What's inside
As an Amazon Associate I earn from qualifying purchases. This post may contain affiliate links at no extra cost to you.
Long drill bits for wood help you bore holes through thick boards, timber beams, posts, and other wooden workpieces that standard-length bits cannot reach. The best choice depends on the hole diameter, drilling depth, wood type, and finish you need. For deep holes in solid timber, start by considering a long auger bit; for smaller, more precise holes, choose a long wood twist bit. Spade bits and self-feed bits are useful alternatives when you need wider holes for wiring, plumbing, or other installations.
Choosing the correct bit matters because extra length increases the difficulty of keeping the hole straight and controlling the drill. A suitable cutting design, compatible shank, appropriate speed, and regular chip removal help you work more accurately and reduce the risk of binding or bit damage.
What Are Long Drill Bits for Wood?
Long drill bits are woodworking accessories with extended overall lengths or cutting lengths that allow them to reach farther into a workpiece. They are used for deep holes, thick lumber, framing, furniture construction, and installation work where a standard bit is too short.
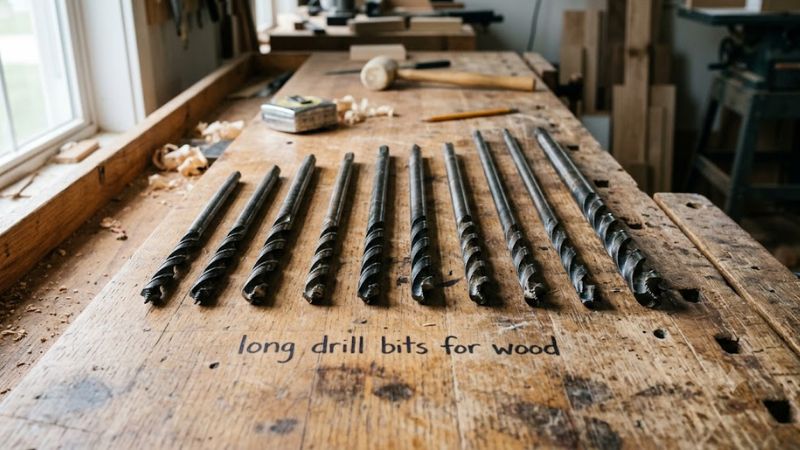
Two measurements are especially important:
- Overall length: The distance from the tip to the end of the shank.
- Working length: The usable cutting or fluted length that can enter the material.
A bit can have a long shank but a shorter cutting section, so overall length alone does not tell you how deep it can drill. Check the manufacturer’s dimensions and allow for the tip geometry, required clearance, and space needed to remove chips.
For example, STAR-M lists extra-long wood auger bits with overall lengths of 400 mm and 600 mm, while Bahco lists wood auger bits measuring 230 mm overall with a 155 mm usable length. These examples illustrate why working length matters as much as the advertised total length.
Types of Long Drill Bits for Wood
Different bit designs suit different hole sizes and levels of precision. Use this comparison to narrow down your options before choosing a diameter and length.
| Bit type | Best for | Main advantage | Main limitation |
| Long auger bit | Deep holes in solid timber | Screw point and flutes help feed and clear chips | Requires controlled speed and feed; can bind |
| Long wood twist bit | Smaller, precise holes | Centering point and spiral flutes support accurate boring | Less suited to large-diameter holes |
| Extra-long spade bit | Wider holes in framing and rough construction | Simple design for fast, larger holes | Can produce rougher edges and wander more easily |
| Self-feed wood bit with extension | Larger installation holes for pipes, cables, or ducts | Useful for wide holes in hard-to-reach locations | Extension and bit must be compatible and securely locked |
| Flexible installer bit | Access through cavities or around obstructions | Can reach locations a straight bit cannot easily access | Less suitable when precise, straight deep holes are essential |
The best bit is not necessarily the longest available. Choose the shortest bit that provides enough usable reach for the job, as excessive length makes alignment and control more difficult.
How to Choose the Right Long Wood Drill Bit
1. Match the bit to the hole diameter
The diameter determines how much material the bit removes and how much resistance the drill may encounter.
- Small holes for dowels, pilot holes, and wiring: Choose a long wood twist bit or a narrow auger bit, depending on the required depth.
- Medium holes in framing timber: A long auger bit is a practical option when chip removal and straight boring are priorities.
- Large holes for pipes and cables: Consider a self-feed bit with a compatible extension or a suitable large-diameter auger.
Do not choose a diameter solely because it fits your drill chuck. The drill must also be capable of handling the cutting load, and the bit must be rated for the intended application.
2. Calculate the required working length
Measure the actual drilling path, not just the thickness of the visible board. If you need to pass through a thick beam, account for the full depth and any additional reach required to clear the drill body or access the work area.
For example, a 400 mm auger with a 300 mm spiral section does not provide 400 mm of fluted cutting length. STAR-M publishes these measurements separately for its extra-long auger range.
Before buying, check:
- Overall length and usable cutting length.
- Whether the bit can reach the entire hole depth.
- Whether the shank will remain securely inside the chuck.
- Whether the drill has enough clearance to stay aligned.
- Whether the bit can be withdrawn without hitting surrounding structures.
Avoid using an extension simply to gain more length unless the extension is explicitly compatible with the bit, drill, and application.
3. Choose the right tip and flute design
The tip and flutes influence how a bit starts cutting, removes wood chips, and finishes the hole.
Auger bits generally have a screw-like lead point and deep spiral flutes. The point helps draw the bit into the wood, while the flutes carry chips out of the hole. This makes them well suited to deep boring in solid timber.
Wood twist bits typically have a centering point and narrower flutes. They are useful for smaller, accurately positioned holes, although deep holes still require frequent chip clearance.
Spade bits have a flat cutting head and are often chosen for relatively fast, wide holes in construction work. They are less suitable when a clean, precisely aligned deep hole is the main priority.
Self-feed bits are designed for larger holes. Their cutting geometry can remove substantial amounts of material, so the drill, extension, and workpiece support must be suitable for the load.
For thick beams, prioritize a bit designed for deep boring rather than relying on a general-purpose bit with an improvised extension.
4. Check the shank and drill compatibility
The shank is the part held by the drill chuck or accessory holder. A long bit can be unsuitable even when its cutting diameter is correct.
| Shank type | What to check |
| Round shank | Chuck capacity and the manufacturer’s clamping requirements |
| Hex shank | Hex dimensions, locking mechanism, and compatibility with the holder |
| Quick-change shank | Whether the drill or holder supports that exact connection |
| Extended bit or extension assembly | Bit retention, torque rating, and restrictions on tool type |
Do not assume every hex-shank bit is suitable for an impact driver or every extension is suitable for a high-torque drill. IRWIN specifically warns against using its drill-bit extensions in gas or impact power drills because the torque loads can cause the extension to break. It also requires compatible grooved-hex accessories for the extension design it describes.
Always verify the instructions for your particular accessory rather than treating one manufacturer’s restrictions as universal specifications for every extension.
5. Consider the wood and working conditions
Softwood, hardwood, engineered wood, and old construction timber can create different drilling conditions.
- Softwood: Often easier to bore, but long fibers and resin can still collect in the flutes.
- Hardwood: May require more controlled drilling and closer attention to the bit’s recommended speed.
- Plywood and engineered panels: Choose a bit suitable for the panel and the required edge quality.
- Old framing timber: Inspect for nails, screws, and hidden services before drilling. A standard wood auger is not automatically designed to cut through embedded metal.
If the workpiece may contain fasteners, use a bit specifically rated for that application or choose another drilling method. Do not assume a standard long wood bit can safely cut through nails.
How to Drill Deep, Straight Holes in Wood
A long bit requires more careful alignment than a short one. Follow this procedure for a typical deep hole in a solid timber workpiece, while observing the instructions for your drill and bit.
Tools and preparation
Prepare the following:
- A drill compatible with the bit’s shank and diameter.
- The correct long wood bit.
- A tape measure, pencil, and square.
- Clamps or a suitable vise to secure the workpiece.
- Safety glasses and any additional protective equipment required by the tool instructions.
- A drill guide or suitable jig when improved alignment is necessary.
Before drilling, identify the intended exit point and inspect the workpiece and surrounding area for electrical cables, pipes, and other obstructions. Do not drill where hidden services may be present until their location has been established safely.
Step 1: Mark the entry and exit points
Measure the required hole location and mark the center. For a through-hole, verify the exit location too.
Use a square or guide to check the intended drilling angle. A small error at the entry point can become more noticeable as the hole gets deeper.
Step 2: Secure the wood
Clamp the workpiece firmly to a stable surface. Do not hold a small board by hand while drilling, particularly when using a large-diameter bit that could bind.
Ensure that the clamp arrangement leaves enough room for the drill, bit, and any chips that exit the hole.
Step 3: Fit and inspect the bit
Disconnect the power source or remove the battery while fitting the accessory, following the tool manufacturer’s instructions.
Inspect the bit for bending, cracks, damaged cutting edges, or a worn shank. Insert it fully enough to achieve the required secure grip without violating the chuck or holder’s instructions.
Check that the bit runs true before starting work. If it visibly wobbles, stop and correct the setup rather than attempting to compensate by applying sideways pressure.
Step 4: Start slowly with the tip positioned correctly
Bring the tip into contact with the marked entry point before starting the drill. Begin at a low, controlled speed, consistent with the bit manufacturer’s instructions.
Keep the drill aligned with the intended hole axis. Do not allow a long bit to spin freely at high speed before its tip contacts the wood; manufacturer safety guidance warns that long bits can bend under these conditions.
Step 5: Drill with controlled feed pressure
Apply steady pressure directly along the bit’s axis. Let the cutting edges do the work rather than forcing the drill forward.
Excessive pressure can increase the risk of binding, bending, or losing control. Do not rock the drill from side to side to enlarge or straighten the hole.
If the bit starts to bind, stop the drill and follow the tool manufacturer’s procedure for safely freeing it. Do not pull or twist a powered drill aggressively to force the bit through.
Step 6: Withdraw the bit to clear chips
For deep holes, periodically withdraw the rotating accessory only as permitted by its instructions, or stop the drill before clearing accumulated chips if required by the procedure.
Long wood chips can clog the flutes, increasing resistance and heat. STAR-M recommends periodically lifting its extra-long auger bits when boring deep holes.
Clear the flutes as needed, check that the bit is not overheating, and resume only when the hole and accessory are clear.
Step 7: Check the exit and finish the hole
As the bit approaches the exit surface, reduce feed pressure and maintain alignment. If appearance matters, use a suitable backing board to reduce tear-out, provided the setup is safe and the backing does not interfere with the drill.
For a blind hole, use a suitable depth stop or another reliable depth-control method where supported. Do not rely solely on estimating depth by eye when the hole must meet a precise requirement.
Once finished, stop the drill, wait for all rotation to cease, and remove the bit according to the tool’s instructions.
Common Problems When Using Long Drill Bits
| Problem | Likely cause | What to do |
| Hole drifts off-center | Poor initial alignment, excessive bit flex, or unstable workpiece | Stop, check the setup, and use a suitable guide |
| Bit binds in the hole | Packed chips, damaged cutting edges, or excessive feed pressure | Stop the drill, isolate the power, and clear the obstruction safely |
| Wood burns or smokes | Excessive friction, a dull bit, clogged flutes, or unsuitable speed | Stop, allow the bit to cool, inspect it, and follow the manufacturer’s speed guidance |
| Drill twists in your hands | Sudden binding or excessive cutting resistance | Release the trigger, maintain control, and wait for rotation to stop before inspecting |
| Hole exit splinters | Unsupported wood fibers or an unsuitable bit for the required finish | Use a securely clamped backing board when appropriate and reconsider the bit type |
| Extension loosens or wobbles | Incorrect shank, poor retention, damage, or incompatibility | Stop immediately and verify the complete accessory assembly |
Do not continue drilling if the bit is bent, the extension is damaged, the drill repeatedly binds, or the tool cannot be controlled securely. Never try to straighten a hole by applying sideways pressure to a rotating bit.
Safety Tips for Long Wood Drill Bits
Long bits introduce additional leverage and can be harder to control, particularly when a large auger or self-feed bit catches in the wood.
Follow these precautions:
- Wear safety glasses and use suitable respiratory protection or dust extraction when the work creates hazardous wood dust.
- Secure the workpiece with clamps or an appropriate fixture rather than holding it by hand.
- Keep hands, clothing, cords, and other objects clear of the rotating bit.
- Check both sides of the workpiece and the drilling path for hidden electrical wiring, pipes, and obstructions.
- Use the speed specified by the bit manufacturer and the tool instructions. Do not apply one universal RPM setting to every diameter and bit design.
- Start long bits with the tip against the workpiece at a controlled speed.
- Keep the drill aligned with the bit and avoid excessive feed pressure.
- Never use a damaged bit or an extension whose compatibility and retention cannot be verified.
- Stop the drill before adjusting the setup, removing trapped chips, or inspecting a suspected problem.
- Wait for the accessory to stop rotating before placing the tool down.
IRWIN’s accessory safety guidance specifically emphasizes eye protection, secure workpieces, avoiding excessive force, and checking for hidden hazards. The exact operating limits and precautions depend on the accessory being used.
IRWIN Tools
Frequently Asked Questions
What is the best drill bit for deep holes in wood?
A long auger bit is generally a strong choice for deep holes in solid timber because its screw point helps feed the bit and its flutes remove chips. Confirm that the bit’s diameter, working length, shank, and speed rating match your drill and project.
How long can a wood drill bit be?
Wood drill bits are available in a range of lengths, including extra-long augers with overall lengths of 400 mm, 500 mm, and 600 mm. The usable drilling depth depends on the cutting length, bit geometry, workpiece access, and the manufacturer’s specifications.
Can I use a long wood drill bit with a cordless drill?
Yes, if the cordless drill can accept the bit’s shank and handle its diameter and cutting load. Check the drill and accessory instructions, use a suitable speed and operating mode, and consider the battery-powered drill’s ability to maintain control under load. Large-diameter, self-feeding bits may require a more capable drill than small wood twist bits.
How do I keep a long drill bit straight in wood?
Mark the entry point carefully, secure the workpiece, align the drill with the intended hole axis, and start at a controlled speed with the tip in contact with the wood. A suitable drill guide can improve alignment. Avoid sideways pressure, which can bend the bit or cause it to break.
Final Verdict
For most deep-hole applications in solid wood, a properly sized long auger bit is the best starting point because its screw point and flutes are designed for deep boring and chip removal. Choose a long wood twist bit for smaller, more precise holes, a spade bit for suitable rough construction work, or a compatible self-feed bit for larger installation holes.
Before purchasing, confirm the usable cutting length, hole diameter, shank compatibility, and manufacturer’s speed restrictions. During use, secure the workpiece, maintain alignment, and clear chips regularly. These checks will help you choose a bit that fits the job without relying on length alone.