What's inside
As an Amazon Associate I earn from qualifying purchases. This post may contain affiliate links at no extra cost to you.
The best diode laser engravers for woodworking and DIY projects are the xTool S1 for the most polished enclosed setup, the Creality Falcon2 22W for faster cutting, the Longer Ray5 10W for value and beginner-friendly features, and the Ortur Laser Master 3 10W when you need a compact open-frame machine.
Diode lasers are especially useful for engraving plywood, solid wood, leather, cardboard, paper, slate, coated metal, and some dark acrylic. They are less suitable for clear acrylic, transparent glass, bare reflective metal, and thick stock that requires a clean single-pass cut. The right choice depends less on maximum wattage than on working area, ventilation, enclosure, safety controls, and how often you expect to cut rather than merely engrave.
As an Amazon Associate we earn from qualifying purchases at no extra cost to you.
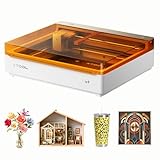


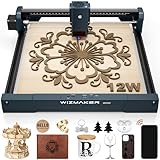
Best diode laser engravers at a glance
| Machine | Laser power | Working area | Approx. machine footprint | Best for | Typical market position |
|---|---|---|---|---|---|
| xTool S1 | 10W or 20W diode | 498 × 319 mm | About 765 × 561 mm with enclosure | Enclosed home workshop, repeatable projects | Mid-range to premium |
| Creality Falcon2 | 12W or 22W diode | 400 × 415 mm | About 630 × 630 mm open frame | Faster cutting and larger batch work | Mid-range |
| Longer Ray5 | 5W, 10W, or 20W diode | 400 × 400 mm | About 610 × 590 mm open frame | Budget-conscious beginners | Budget to mid-range |
| Ortur Laser Master 3 | 5.5W or 10W diode | 400 × 400 mm | About 580 × 620 mm open frame | Compact engraving and hobby experimentation | Budget to mid-range |
Dimensions vary by bundle, riser feet, rotary accessories, and enclosure. Treat the footprint figures as planning estimates and leave additional clearance for cable routing, ventilation, and access to the emergency stop.
Head-to-head: which machine fits your workshop?
xTool S1: the best all-rounder for a home workshop
The xTool S1 is the easiest recommendation when safety, organization, and repeatability matter more than the lowest purchase price. Its enclosed design reduces exposure to the laser beam and helps contain smoke, while an optional smoke-extraction setup makes it more practical for a spare room or small workshop. The 498 × 319 mm work area is large enough for signs, cabinet labels, ornaments, and many furniture templates without requiring an industrial-sized bench.
The 10W version is well suited to detailed engraving and moderate cutting. The 20W version is the better choice for frequent plywood and hardwood cutting because it delivers more usable cutting speed and depth. A height-adjustable design also makes it easier to work with thicker objects than a basic flat-frame machine. The trade-off is cost: once the enclosure, air-assist equipment, and exhaust accessories are included, the total ownership price can move into the premium range.
Creality Falcon2: the cutting-focused choice
The Falcon2 22W is attractive when cutting matters as much as engraving. A higher-power diode can complete many 3 mm plywood projects in fewer passes than a 10W machine, although results still depend on plywood glue, wood density, focus, air assist, and speed. The 400 × 415 mm area is practical for signs and panels, and the machine includes safety-oriented features such as a protective shield, emergency stop, flame detection, and an air-assist system on applicable configurations.
Its open-frame design needs more workshop discipline. You must provide a suitable enclosure or shield, manage smoke, restrict access while operating, and protect nearby surfaces from reflected or escaping light. It is a strong option for a garage or dedicated makerspace, but less convenient beside a desk in a shared living area.
Longer Ray5: the value pick for learning
The Longer Ray5 offers a useful 400 × 400 mm area at a generally accessible market price. The 10W version is a balanced starting point for wood engraving, leather work, cardboard prototypes, and occasional plywood cutting. A 5W model costs less and can produce fine engraving, but it will require more passes for cuts. The 20W version is more appropriate if you already know that cutting will be a regular part of your projects.
Its touchscreen and common controller support make it approachable for beginners, while the open frame leaves room for future upgrades such as an enclosure, air assist, and a rotary attachment. Budget for those safety and productivity additions rather than comparing only the base machine price.
Ortur Laser Master 3: a compact open-frame platform
The Ortur Laser Master 3 remains a sensible choice for users who want a 400 × 400 mm work area, a relatively compact frame, and a large community of hobby users. The 10W version is preferable for mixed engraving and cutting; the lower-power version is better viewed as an engraving-first tool. Its open design makes it easy to position material and inspect the job, but it also means that enclosure, ventilation, and supervision are your responsibility.
Choose it when you enjoy adjusting settings and building a workstation around the machine. Choose an enclosed model instead if you want fewer environmental and safety decisions.
How diode power changes real woodworking results
| Material | 10W-class diode | 20–22W-class diode | Important limitation |
|---|---|---|---|
| 3 mm birch plywood | Usually several passes; air assist is valuable | Often substantially fewer passes | Adhesive layers can resist cutting |
| 3 mm basswood | Good cutting material with careful settings | Faster cutting and more margin | Warping changes focus and results |
| 6 mm pine | Usually a slow, multi-pass job | Possible with multiple passes and air assist | Resin and knots create uneven cuts |
| Hardwood engraving | Good for logos, labels, and shallow graphics | Usually faster, not automatically darker | Species and grain direction affect contrast |
| Black acrylic | Generally engraves and may cut thin sheets | Better cutting potential | Clear and pale acrylic often does not absorb blue diode light |
| Slate and coated metal | Suitable for surface marking | Usually faster marking | These are marking jobs, not deep cuts |
Wattage is not a guaranteed cutting depth. A clean lens, accurate focus, flat stock, correct air flow, and a suitable feed rate can matter as much as the nominal laser rating. Never assume that a machine will cut a material safely just because another user achieved it with a different batch or setting.
Decision matrix for common buyers
| Your situation | Best direction | Why |
|---|---|---|
| First laser, limited experience, indoor workspace | xTool S1 10W with enclosure and extraction | More contained workflow and simpler routine operation |
| Frequent plywood cutting and batch production | Creality Falcon2 22W | Higher diode power and useful cutting area |
| Budget under roughly $500 before accessories | Longer Ray5 10W or Ortur Laser Master 3 10W | Leaves room in the budget for enclosure and air assist |
| Mostly engraving, occasional small cuts | 10W-class machine | Better value than paying for maximum cutting power |
| Small bench and minimal setup work | Enclosed xTool S1 configuration | Less need to design a separate protective workstation |
Setup, safety, and maintenance that affect results
- Plan the whole workstation. Measure the machine, enclosure, exhaust path, and material-loading space. A 400 mm work area does not mean the machine needs only 400 mm of bench width.
- Use an enclosure or appropriate laser shield. Blue diode lasers can injure eyes. Do not rely on ordinary sunglasses, improvised acrylic, or an open machine in an accessible room.
- Add air assist for cutting. Air flowing across the cut helps clear smoke, reduces scorching, and lowers the chance of a small flame becoming a larger fire. It does not make unattended operation safe.
- Ventilate smoke outdoors where permitted. Wood smoke, plywood adhesives, paint, and plastics can produce irritating or hazardous fumes. Never cut PVC, vinyl, unknown plastics, or materials containing chlorine.
- Focus and test on scrap. Make a small speed-and-power test grid from the same wood batch. This prevents burning an expensive panel while revealing how grain, glue, and moisture affect the setting.
- Clean the optics regularly. Smoke residue on the lens reduces power and can create a hot spot. Inspect the lens and air-assist nozzle, and clean only according to the manufacturer’s procedure.
- Keep a fire response plan. Stay with the machine, keep a suitable extinguisher nearby, and stop the job if flames persist rather than assuming air assist will control them.
Ownership costs and common mistakes
The machine is only part of the budget. A realistic setup may include an enclosure, exhaust fan and ducting, air pump, honeycomb or sacrificial bed, safety equipment, replacement lenses, and test materials. A nominally cheaper open-frame engraver can therefore approach the total cost of an enclosed model after upgrades.
The parts most likely to require attention are the focus lens, protective window if fitted, air-assist tubing, belts, rollers, and spoilboard. Smoke buildup is the most common avoidable problem. Running too slowly at high power can char the top surface without improving penetration, while a dirty lens can make every project appear underpowered. Plywood also varies considerably: voids, thick glue lines, and warped sheets are frequent causes of incomplete cuts.
For most woodworking and DIY users, the 10W class is the sensible starting point for detailed engraving and occasional cutting. Move to 20–22W when throughput, thicker plywood, or repeated production justifies the additional cost and ventilation requirements. If your priority is a controlled indoor workflow, choose the xTool S1. If cutting speed in a dedicated workspace matters most, choose the Creality Falcon2 22W. For learning on a tighter budget, the Longer Ray5 10W is the strongest value-oriented starting point, with the Ortur Laser Master 3 as a compact alternative.