
What's inside
- 1. Understanding the Main Parts of a BLACK+DECKER Cordless Drill
- 2. How to Prepare a BLACK+DECKER Cordless Drill Before Use
- 3. How to Install or Change a Drill Bit
- 4. How to Adjust Clutch Settings on a BLACK+DECKER Drill
- 5. How to Use a BLACK+DECKER Cordless Drill for Drilling Holes
- 6. How to Use a BLACK+DECKER Cordless Drill for Driving Screws
- 7. Choosing the Correct Speed and Gear Setting
- 8. BLACK+DECKER Cordless Drill Safety Precautions
- 9. Battery Charging and Maintenance Tips
- 10. Common BLACK+DECKER Cordless Drill Problems and Solutions
- 11. When Should You Choose a Different BLACK+DECKER Drill?
- 12. Frequently Asked Questions
- Conclusion
- 1. Understanding the Main Parts of a BLACK+DECKER Cordless Drill
- 2. How to Prepare a BLACK+DECKER Cordless Drill Before Use
- 3. How to Install or Change a Drill Bit
- 4. How to Adjust Clutch Settings on a BLACK+DECKER Drill
- 5. How to Use a BLACK+DECKER Cordless Drill for Drilling Holes
- 6. How to Use a BLACK+DECKER Cordless Drill for Driving Screws
- 7. Choosing the Correct Speed and Gear Setting
- 8. BLACK+DECKER Cordless Drill Safety Precautions
- 9. Battery Charging and Maintenance Tips
- 10. Common BLACK+DECKER Cordless Drill Problems and Solutions
- 11. When Should You Choose a Different BLACK+DECKER Drill?
- 12. Frequently Asked Questions
- Conclusion
As an Amazon Associate I earn from qualifying purchases. This post may contain affiliate links at no extra cost to you.
A BLACK+DECKER cordless drill is a practical tool for everyday household repairs, furniture assembly, woodworking, and light drilling projects. However, getting good results requires more than pulling the trigger. You need to understand the chuck, clutch, speed selector, forward/reverse switch, battery, and correct drill-bit selection before starting a project.
Whether you own a 12V cordless drill, an 18V POWERCONNECT model, or a 20V MAX drill/driver, the basic operating principles are similar. Individual controls, battery connections, speed ranges, and available features vary by model, so always check the instruction manual for your exact model number.
This guide explains how to set up, operate, adjust, and maintain a BLACK+DECKER cordless drill. It also covers common mistakes, troubleshooting, and safety precautions to help beginners work more confidently.
1. Understanding the Main Parts of a BLACK+DECKER Cordless Drill
Before using your drill, become familiar with its main components. Knowing what each part does makes it easier to select the correct setting and avoid unnecessary damage.
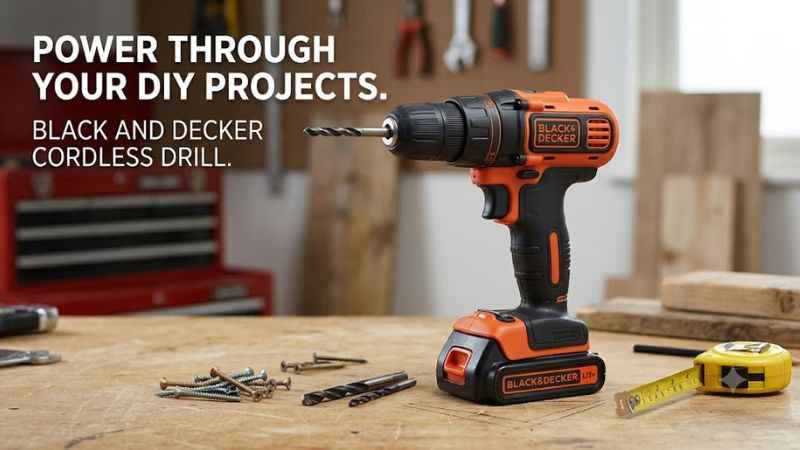
Chuck
The chuck is the adjustable component at the front of the drill that grips the drill bit or screwdriver bit. Many BLACK+DECKER cordless drills use a keyless chuck, which allows you to change accessories by hand without a separate chuck key.
The chuck must hold the bit firmly and centrally. A loose or poorly positioned bit can wobble, produce inaccurate holes, or slip during operation.
Clutch or torque adjustment collar
The clutch collar is usually located directly behind the chuck. It has numbered positions that control how much torque the drill applies when driving screws.
Its main purpose is to prevent screws from being driven too deeply or damaging the material. When the selected torque limit is reached, the clutch disengages and may produce a clicking or ratcheting sound.
Higher numbers generally allow more driving torque, while lower numbers provide greater protection against overtightening.
Variable-speed trigger
The trigger controls the drill’s rotational speed. Pressing it lightly produces slower rotation, while pulling it farther increases speed.
This feature is particularly useful when starting a hole, positioning a screw, or working with materials that can split easily.
Releasing the trigger stops the motor.
Forward/reverse selector
This switch changes the direction in which the drill rotates.
- Forward: Normally rotates clockwise when viewed from the chuck end, making it suitable for driving screws and most conventional drilling operations.
- Reverse: Rotates counterclockwise, allowing you to remove screws and back out a stuck bit.
- Center position: On models equipped with this feature, locks the trigger to reduce accidental activation.
Always release the trigger and allow the motor to stop before changing direction.
Speed selector
Some BLACK+DECKER models have a two-speed gearbox. The selector usually sits on top of the drill.
- Gear 1 provides lower rotational speed and greater mechanical advantage for controlled screwdriving and demanding drilling applications.
- Gear 2 provides higher rotational speed for faster drilling when the material and bit allow it.
Not every model has a two-speed gearbox. Follow the markings and instructions for your particular drill.
Battery pack and release button
The battery supplies electrical energy to the motor. Depending on the product generation, BLACK+DECKER drills may use different battery platforms, including 12V, 18V POWERCONNECT, and 20V MAX.
The battery release button allows you to remove the pack for charging, storage, or accessory changes.
LED work light
Some models include an LED near the chuck or handle. It illuminates the immediate working area when the trigger is activated.
It is useful in cabinets, closets, and poorly lit corners, but it should not replace proper workspace lighting.
2. How to Prepare a BLACK+DECKER Cordless Drill Before Use
Proper preparation reduces the risk of slipping bits, damaged screws, and unexpected tool movement.
Before starting, gather the necessary equipment:
- BLACK+DECKER cordless drill and compatible battery.
- Manufacturer-approved charger.
- Drill bits or screwdriver bits suitable for the material.
- Safety glasses with appropriate impact protection.
- Measuring tape, pencil, and a suitable marking tool.
- Clamps or a vise for securing the workpiece.
- Hearing and respiratory protection when the material or working conditions require them.
Check the drill body, chuck, battery contacts, trigger, and direction selector for visible damage. Do not use a tool with a cracked housing, damaged battery, loose chuck, or malfunctioning switch.
Charge and install the battery
Start by checking the battery’s charge level. If the pack is low, charge it using a charger approved for that exact battery platform.
A BLACK+DECKER 12V battery should not be assumed compatible with an 18V or 20V drill simply because both products carry the same brand.
Also remember that 20V MAX is a maximum initial voltage rating measured without a workload; the corresponding nominal voltage for that platform is 18V. This distinction does not make it interchangeable with every 18V product.
To install the battery:
- Inspect the battery pack for cracks, swelling, leakage, or damaged terminals.
- Align the battery with the drill’s mounting rails.
- Slide the pack into the handle or battery base.
- Push until the locking mechanism engages.
- Check that the pack is securely attached before operating the drill.
If the battery does not slide into place easily, stop and verify compatibility. Never force it into the tool.
Select the correct drill bit
The accessory must match the material and the operation.
| Bit type | Typical application |
| Twist drill bit | Drilling metal, plastic, and some wood |
| Brad-point bit | Producing cleaner, more accurately positioned holes in wood |
| Masonry bit | Drilling compatible brick, concrete, and masonry with an appropriate hammer drill |
| Phillips screwdriver bit | Driving Phillips-head screws |
| Slotted screwdriver bit | Driving flat-head screws |
| Torx bit | Driving star-shaped fasteners |
| Spade bit | Making larger holes in suitable wood |
Check the drill’s chuck capacity and the accessory manufacturer’s recommendations before installation. A bit that physically fits is not automatically suitable for every drill or material.
3. How to Install or Change a Drill Bit
Most household BLACK+DECKER cordless drills have keyless chucks. Changing a bit is straightforward, but the tool must be secured against accidental activation first.
Follow these steps:
- Release the trigger and wait until the chuck stops rotating.
- Move the forward/reverse selector to its center lock position if your model provides one.
- Remove the battery when changing accessories if required by the instruction manual; doing so is a useful additional precaution.
- Hold the rear section of the chuck firmly.
- Rotate the front sleeve counterclockwise, viewed from the chuck end, to open the jaws.
- Insert the bit straight into the chuck.
- Rotate the chuck sleeve clockwise while holding the rear section until the jaws grip the accessory securely.
- Check that the bit is centered and firmly held.
For screwdriver bits, ensure sufficient shank engagement so the jaws can grip the accessory properly.
Never use the drill’s motor to tighten the chuck. Holding the chuck sleeve while pulling the trigger can cause injury or damage the chuck mechanism.
After installation, check the bit’s alignment before beginning the actual job.
4. How to Adjust Clutch Settings on a BLACK+DECKER Drill
Clutch adjustment is one of the most useful features for beginners because it helps prevent screws from going too deep.
However, the numbered settings are not universal torque measurements. A setting of 5 on one drill does not necessarily produce the same torque as setting 5 on another model.
Understanding the numbered settings
The basic principle is simple:
- Lower settings: Suitable starting points for small screws and softer materials.
- Middle settings: Useful for many ordinary household fastening jobs.
- Higher settings: Allow greater driving torque for larger screws and more demanding materials.
- Drill symbol: Selects drilling mode on models that provide this setting, generally bypassing the screwdriving clutch.
These are starting principles rather than fixed material-specific settings.
How to find the correct clutch setting
Use this practical method:
- Choose a screw and material representative of the actual project.
- Set the clutch to a low number.
- Position the screw straight against the workpiece.
- Start the drill slowly.
- Observe how far the screw enters the material.
- If the clutch disengages before the screw reaches the intended depth, increase the setting slightly.
- Repeat until the screw reaches the desired position without damaging the material.
Once you find a suitable setting, use it as a starting point for similar screws and materials.
For drilling holes in wood, metal, or plastic, select the drill symbol if your model has one. Do not assume that every BLACK+DECKER drill uses the same clutch layout.
Why does the clutch keep clicking?
A clicking sound during screwdriving often means the clutch has reached its selected torque limit.
This is usually normal. However, repeated clicking can also occur when the screw is too large, the bit is incorrect, the material is too hard, or the battery cannot supply sufficient power.
Do not automatically turn the clutch to its maximum setting. First check the screw, bit, material, and drill speed.
5. How to Use a BLACK+DECKER Cordless Drill for Drilling Holes
Once the battery and bit are installed, the drill is ready for basic drilling operations.
The correct procedure depends on the material.
Drilling into wood
Wood is one of the most common materials for household cordless drill projects.
- Measure and mark the required hole location.
- Secure the workpiece with clamps.
- Select a sharp wood-compatible drill bit.
- Set the clutch to drill mode if available.
- Select an appropriate gear and begin at a controlled speed.
- Hold the drill straight against the marked position.
- Pull the trigger gradually until the bit begins cutting.
- Apply steady pressure without forcing the drill.
- Reduce pressure as the bit approaches the opposite surface.
- Release the trigger and allow the bit to stop before removing it.
For a cleaner exit hole, use a backing board where practical. This helps reduce tear-out as the bit passes through the wood.
Drilling into metal
Metal requires an appropriate bit and more careful speed control.
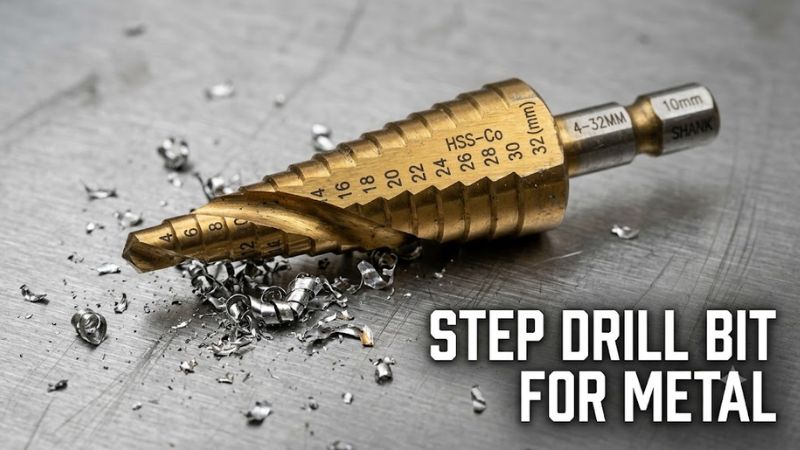
Use a drill bit specifically rated for the metal being drilled. High-speed steel bits are common for general metalworking, while specialized coatings and geometries may be appropriate for particular alloys.
Mark the hole location accurately. For larger or more demanding holes, a center punch can help prevent the bit from wandering.
Keep the drill aligned with the surface and use controlled pressure. Avoid excessive speed, which can generate heat and damage the cutting edge.
For harder metals or larger holes, verify that the drill has sufficient capacity for the task. A compact household drill may not be appropriate for demanding metal fabrication.
Drilling into plastic
Plastic can crack, deform, or melt when excessive speed or pressure is applied.
Use a sharp bit suitable for the plastic type, secure the material, and start slowly. Allow the bit to cut without forcing it.
If the plastic begins melting around the hole, stop and reassess the bit, speed, and drilling technique.
Can a regular BLACK+DECKER drill drill concrete?
A standard drill/driver is not automatically suitable for concrete.
Some BLACK+DECKER models are hammer drills, while others are conventional drill/drivers. A hammer drill combines rotation with a hammering action to assist masonry drilling.
For concrete, verify that your exact model has a hammer function and that the manufacturer approves the intended application. Use a compatible masonry bit.
For substantial concrete drilling, a rotary hammer is generally more appropriate than a basic household drill.
6. How to Use a BLACK+DECKER Cordless Drill for Driving Screws
Driving screws is different from drilling holes. The goal is to fasten two materials securely without stripping the screw head, damaging the workpiece, or snapping the fastener.
Follow this procedure:
- Choose a screwdriver bit that matches the screw head exactly.
- Set the forward/reverse selector to forward.
- Select Gear 1 if your drill has a two-speed gearbox and the task benefits from controlled, higher-torque operation.
- Rotate the clutch collar to a low starting number.
- Position the screw perpendicular to the workpiece.
- Apply light trigger pressure to start the screw.
- Increase trigger pressure gradually as the screw enters the material.
- Allow the clutch to disengage when the selected torque limit is reached.
- Inspect the screw depth and adjust the clutch if necessary.
For hardwood, long screws, or larger fasteners, a pilot hole can reduce resistance and help prevent splitting. The appropriate pilot-hole diameter depends on the screw’s core diameter, material, and fastening requirements.
Avoid applying excessive downward pressure. A screwdriver bit that repeatedly slips out of the screw head can damage both the bit and the fastener.
How to remove a screw
Removing a screw is similarly straightforward:
- Release the trigger.
- Wait for the chuck to stop completely.
- Move the direction selector to reverse.
- Select a suitable clutch setting.
- Seat the screwdriver bit firmly in the screw head.
- Pull the trigger gradually until the screw comes free.
If the screw refuses to move, stop rather than repeatedly forcing the drill. Check whether the screw head is damaged, the bit is incorrect, or the fastener is corroded.
7. Choosing the Correct Speed and Gear Setting
Speed selection affects drilling quality, screw control, heat generation, and tool performance.
BLACK+DECKER models with two-speed gearboxes generally offer different operating characteristics.
| Operating mode | Typical application | Practical consideration |
| Low gear | Large screws and demanding fastening | Better control and mechanical advantage |
| High gear | Smaller holes and faster drilling | Higher rotational speed |
| Variable trigger | Starting holes and positioning screws | Allows gradual speed adjustment |
| Drill mode | Drilling applications | Bypasses the screwdriving clutch on applicable models |
The correct speed depends on the drill bit, material, hole diameter, and manufacturer’s instructions.
A common misconception is that maximum speed always produces faster results. In reality, excessive speed can overheat a bit, damage plastic, or reduce cutting efficiency.
For example, a large bit cutting through hardwood may require a different speed and feed approach from a small twist bit drilling thin sheet metal.
If your drill has only one mechanical gear, use the variable-speed trigger to control the starting speed and follow the manual for the permitted operating range.
8. BLACK+DECKER Cordless Drill Safety Precautions
Cordless operation removes the need for a power cord, but it does not eliminate mechanical, electrical, or material-related hazards.
The rotating chuck and bit can catch clothing, twist the workpiece, or cause injury if the bit suddenly binds.
Wear appropriate protective equipment
At a minimum, use suitable impact-rated eye protection when drilling. Flying chips, wood fragments, and metal particles can cause serious eye injuries.
Depending on the material and working environment, additional protection may include:
- Hearing protection when noise exposure warrants it.
- Respiratory protection appropriate for hazardous dust.
- Suitable work clothing that cannot become entangled in rotating parts.
- Protective footwear for construction and workshop environments.
Do not wear loose gloves near a rotating drill bit or chuck because fabric can become caught in moving components.
Secure the workpiece
Never assume that holding a small board by hand is sufficient.
A drill bit can catch as it enters or exits the material, causing the workpiece to rotate unexpectedly.
Use clamps or a suitable vise to secure the material whenever practical. Keep your hands away from the drilling path.
Watch for hidden electrical wiring and plumbing
Before drilling into walls, ceilings, floors, or cabinets, consider what may be behind the surface.
Electrical wiring, water pipes, gas lines, and other concealed services can turn a simple DIY project into a serious hazard.
Use appropriate detection equipment and verify the installation layout where possible. If you cannot establish that the drilling area is safe, stop and consult a qualified professional.
Avoid excessive pressure and bit binding
A drill that suddenly stops rotating may have encountered excessive resistance or a jammed bit.
Do not repeatedly pull the trigger in an attempt to force a stalled drill to rotate.
Release the trigger, secure the workpiece, and disconnect the battery before inspecting the accessory or removing an obstruction.
A large hole saw or bit can produce substantial reaction torque when it catches. Maintain a firm grip and a stable working position.
Keep batteries away from heat and moisture
Lithium-ion batteries require proper handling.
Do not expose battery packs to excessive heat, water, fire, or physical damage. Avoid storing loose batteries alongside metal objects that could bridge the terminals.
If a battery becomes swollen, cracked, unusually hot, or visibly damaged, stop using it. Follow the manufacturer’s instructions for safe handling and disposal.
9. Battery Charging and Maintenance Tips
Good battery care helps maintain the reliability of your cordless drill.
However, charging requirements vary between battery generations and charger models.
Use the correct charger
Always use a charger specifically approved for the battery platform.
A battery that physically fits a charger is not necessarily electrically compatible. Check the battery and charger model numbers before connecting them.
Follow the manufacturer’s charging instructions rather than relying on a universal charging time.
Store batteries correctly
When the drill is not in use:
- Store the battery in a cool, dry location.
- Keep it away from direct sunlight and extreme temperatures.
- Avoid leaving it exposed to moisture.
- Protect the terminals against accidental contact with metal objects.
- Follow the manual’s recommendations for long-term storage and charge level.
Do not leave a damaged battery in storage alongside healthy packs.
Clean the drill after use
Dust and debris can accumulate around the chuck, ventilation openings, and battery mounting area.
Remove the battery before cleaning the tool.
Use a dry cloth or an appropriate soft brush to remove loose debris. Do not immerse the drill in water or spray cleaning liquid into its housing.
Avoid inserting metal objects into the ventilation openings.
Inspect the chuck and accessories
Check the chuck periodically for looseness, visible damage, or excessive runout.
Inspect drill bits for worn cutting edges, bending, cracks, or damaged shanks. Replace unsuitable accessories rather than continuing to use them.
If the chuck becomes difficult to tighten, slips repeatedly, or shows unusual movement, consult the manufacturer’s service guidance.
10. Common BLACK+DECKER Cordless Drill Problems and Solutions
A cordless drill may occasionally stop working properly. Start with simple external checks before considering professional repair.
| Problem | Possible cause | Recommended action |
| Drill will not start | Battery depleted or incorrectly installed | Check charge and battery connection |
| Drill runs slowly | Low battery, excessive load, or incorrect gear | Recharge, reduce load, and check gear |
| Chuck does not hold the bit | Incorrect installation or worn chuck | Reinstall the bit and inspect the chuck |
| Clutch keeps clicking | Torque setting too low or excessive resistance | Check the setting, screw, and material |
| Screw head keeps stripping | Incorrect bit or excessive trigger pressure | Use the correct bit and slower starting speed |
| Battery does not charge | Incorrect charger, poor contact, or battery fault | Verify compatibility and inspect contacts |
| Drill becomes unusually hot | Excessive load, restricted ventilation, or fault | Stop operation and allow the tool to cool |
Why does my BLACK+DECKER drill keep stopping?
A drill that stops unexpectedly may have a depleted battery, an overloaded motor, an overheated battery pack, or an electrical or mechanical fault.
First, release the trigger and allow the tool to cool if it is warm. Check the battery indicator, installation, and workpiece resistance.
If the tool continues stopping under light loads with a suitable battery, consult an authorized service provider.
Why does my drill battery lose charge quickly?
Battery runtime depends on capacity, age, workload, material, accessory size, and operating conditions.
Drilling large holes or driving long screws generally demands more energy than light furniture assembly.
If runtime becomes noticeably shorter, compare performance under similar conditions and inspect the battery for physical damage. A worn battery may require replacement with an approved compatible pack.
Do not attempt to open or rebuild a lithium-ion battery yourself.
11. When Should You Choose a Different BLACK+DECKER Drill?
Not every cordless drill is designed for every project.
A compact 12V drill may be sufficient for furniture assembly, small pilot holes, and routine household repairs. An 18V POWERCONNECT or 20V MAX model may offer a different combination of torque, speed, and battery capacity, depending on its exact specifications.
Consider the following:
| Project | Suitable drill category |
| Furniture assembly | Compact cordless drill/driver |
| Hanging shelves | General-purpose drill/driver |
| Drilling wood and plastic | Standard cordless drill/driver |
| Routine metal drilling | Drill/driver with suitable capacity and bits |
| Repeated masonry drilling | Compatible hammer drill |
| Heavy concrete drilling | Rotary hammer |
| Long or demanding fastening jobs | Higher-capacity drill/driver or appropriate impact driver |
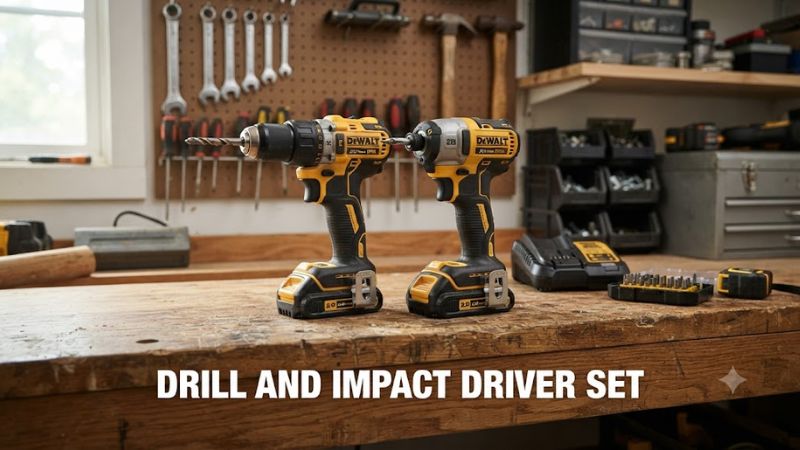
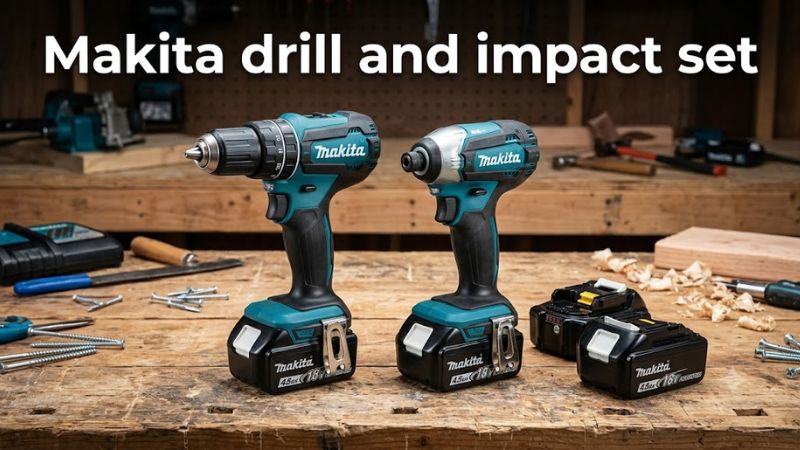
An impact driver is not simply a more powerful replacement for a drill. It uses a different driving mechanism and typically accepts 1/4-inch hex-shank accessories rather than conventional round-shank drill bits in a standard keyless chuck.
Choose the tool based on the operation rather than assuming that one cordless model can handle every household or construction task.
12. Frequently Asked Questions
1. What setting should I use on a BLACK+DECKER cordless drill?
Use a low clutch setting when driving small screws into soft materials, then increase it gradually if the screw stops before reaching the required depth. For drilling, select the drill symbol when available. Choose the gear and trigger speed according to the bit, material, and exact drill model.
2. Can I use a BLACK+DECKER 20V battery on an 18V drill?
Not automatically. BLACK+DECKER 20V MAX and 18V product designations can describe different voltage-labeling conventions, but compatibility must be confirmed through the exact battery and tool model numbers. Check the manufacturer’s compatibility documentation before installing a battery.
3. Why does my BLACK+DECKER cordless drill make a clicking sound?
A clicking sound during screwdriving commonly indicates that the adjustable clutch has reached its torque limit. This is normal when the clutch is working correctly. If the sound occurs during ordinary drilling or the chuck slips, stop and inspect the tool.
4. Can a BLACK+DECKER cordless drill drive screws and drill holes?
Yes. A conventional BLACK+DECKER drill/driver is designed for both operations. Use the appropriate screwdriver bit and clutch setting for fastening, or a compatible drill bit and drill mode for making holes. Hammer drilling requires a model specifically equipped with that function.
Conclusion
A BLACK+DECKER cordless drill can handle many everyday DIY projects when its features are used correctly. Understanding the chuck, clutch, speed selector, trigger, and battery system makes drilling and screwdriving easier to control.
The most important habits are choosing the right accessory, starting with conservative clutch settings, adjusting speed to the material, securing the workpiece, and following the instructions for your exact model.
Before your next project, identify your drill’s model number and check its manual for battery compatibility, chuck capacity, operating modes, and accessory limitations. These simple checks help you choose the correct setup and avoid unnecessary tool or material damage.




Write Your Review
No reviews yet. Be the first to share your experience!