
Our Top Picks

What's inside
- Contents
- Why use a cordless caulking gun
- Types of dispensing guns compared
- Cartridge formats and what fits
- Features that matter
- Batteries and platform considerations
- Sealant types and which gun suits them
- Technique for clean beads
- Care, cleaning and safety
- Common mistakes
- Who should choose what
- Checklist
- FAQ
- Conclusion
- Contents
- Why use a cordless caulking gun
- Types of dispensing guns compared
- Cartridge formats and what fits
- Features that matter
- Batteries and platform considerations
- Sealant types and which gun suits them
- Technique for clean beads
- Care, cleaning and safety
- Common mistakes
- Who should choose what
- Checklist
- FAQ
- Conclusion
As an Amazon Associate I earn from qualifying purchases. This post may contain affiliate links at no extra cost to you.
The short answer: the best cordless caulking gun is one that fits the cartridge format you actually use, offers adjustable speed so you can match the flow to the bead, stops flow cleanly when you release the trigger, and runs on a battery you already own or will use for other tools. For a few small bathroom beads a year, a good manual gun is cheaper and perfectly adequate. For long runs of exterior sealant, window and siding work, or repeated daily use, a powered gun saves hand fatigue and gives more consistent beads. Technique and surface preparation still decide how the finished joint looks.
Contents
- Why use a cordless caulking gun
- Types of dispensing guns compared
- Cartridge formats and what fits
- Features that matter
- Batteries and platform considerations
- Sealant types and which gun suits them
- Technique for clean beads
- Care, cleaning and safety
- Common mistakes
- Who should choose what
- Checklist
- FAQ
- Conclusion
Why use a cordless caulking gun
A manual caulking gun asks your hand to do two jobs at once: squeeze a trigger repeatedly to push the plunger forward, and steer the nozzle along a joint. Over a long run, your grip tires, the pressure becomes uneven, and the bead swells and shrinks as your hand does. Thick sealants and adhesives make this worse, since they take real force to push through a small nozzle.
A powered gun replaces the squeezing with a motor that drives the plunger. You pull the trigger, and a steady push is applied. That frees your attention for the part that matters: guiding the nozzle at a consistent angle and speed. The result is a more uniform bead with less effort, which is why contractors who seal windows, siding, roofing details and expansion joints often prefer powered models.
Powered does not mean flawless. Motors can push out too much material if you are not careful, and a gun that keeps flowing after you release the trigger leaves blobs. The best models manage pressure well, but the operator still needs good habits. If your jobs are occasional, a manual gun with a smooth ratchet and a dripless mechanism may be all you need, and money saved can go on better sealant.
Types of dispensing guns compared
Not every gun suits every material. The table below compares the main styles. Keep in mind that the battery-powered category itself includes a few distinct designs.
| Gun type | How it works | Good for | Limitations |
|---|---|---|---|
| Manual ratchet gun | Squeeze trigger to advance a notched rod | Occasional small jobs, thin sealants | Hand fatigue; flow continues after release unless it has a release lever |
| Manual dripless (smooth rod) gun | Rod retracts slightly or relieves pressure on release | Neat bathroom and kitchen beads | Still needs hand force for thick materials |
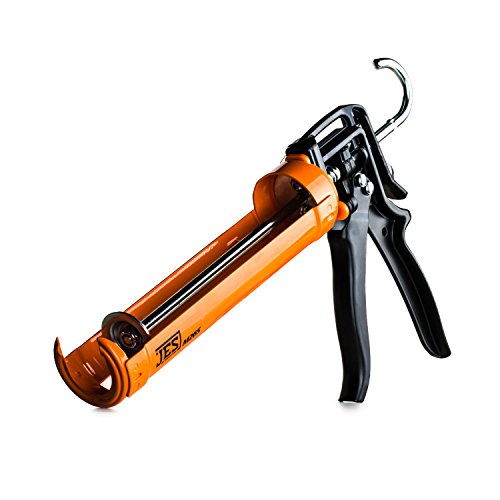
| Cordless gun for standard cartridges | Motor drives plunger; speed dial or trigger sets rate | Windows, trim, siding, frequent users | More expensive; adds weight |
| Cordless gun for sausage packs | Barrel holds a foil pack of sealant | High-volume work, long runs, commercial sealing | Larger and heavier; needs the right pack size and barrel |
| Cordless dual-cartridge gun | Pushes two components together via a mixing nozzle | Two-part adhesives and epoxies | Higher force needs; uses specific cartridge sizes; specialist |
| Pneumatic gun | Compressed air pushes the plunger | Shop or production settings with an air supply | Needs a compressor and hose; not cordless |
If you only seal bathroom and kitchen joints, a good dripless manual gun may serve you for years. If you do weekend remodeling, add exterior windows or trim, or use thick construction adhesive often, a battery gun starts to justify itself. Sausage-pack models are really professional tools for high volume jobs; most homeowners do not need them.
Cartridge formats and what fits
Before you buy, check the cartridge format. The most common retail format is a standard tube-style cartridge, often around ten fluid ounces, which fits most manual and standard cordless guns. Larger formats hold roughly twice as much material and require a different barrel. Foil-wrapped sausage packs are loaded into a covered barrel and dispensed from the end, and are common on professional jobs.
Two-component adhesives and epoxies come in side-by-side cartridges with two chambers that feed a mixing nozzle. They need a gun designed for that cartridge size, because the plunger must push both chambers at the same ratio. Do not try to use a standard single-cartridge gun on them.
Check whether the gun’s barrel is open (a cradle that holds the tube) or closed (a tube that encloses it). Open frames are lighter and allow you to see how much remains. Closed barrels can support the cartridge better under high pressure but add weight. Also confirm the stroke length and cartridge diameter in the product details so you know your usual cartridges will fit without struggle.
Features that matter
Variable speed control. A dial or a trigger that responds to how far you press lets you match flow to the bead you need. A fine bead along a bathtub rim needs slow, gentle flow. A wide gap along a foundation or a thick adhesive for panels needs more speed. A gun with only one speed forces you to adjust your own motion to compensate.
Drip control. Look for an automatic retract or pressure-release feature that backs the plunger off when you let go of the trigger. Without it, material keeps oozing from the nozzle, wasting sealant and spoiling the line you just drew. Some guns have an adjustable release; test it on scrap to learn how it behaves.
Thrust and force. Thicker materials need a gun with enough push to move them through a small nozzle. Powered guns advertise their maximum thrust; compare these figures within the same maker’s range rather than treating them as absolute. A gun intended for adhesive should handle heavier loads than one aimed at thin sealant.
Comfort and balance. The gun is held for long stretches, so grip shape, weight and balance matter. A compact gun suits overhead and tight work; a full-size model is more stable on long runs. Because the battery adds weight, check how it sits.
Light and rod design. A built-in work light helps in dim corners. A rod that retracts fully and quickly makes cartridge changes easier. A spare-parts supply is also worth checking, since rods, seals and nozzles wear.
Consider the nozzle cutter and puncture tool that many guns have built into the frame. These small features are useful and cost nothing, but they are not a reason to choose one gun over another.
Batteries and platform considerations
A caulking gun draws little power compared with a drill or saw, so a small battery usually runs it for a long time. That makes it one of the easier tools to power from a compact, lightweight pack, which also keeps the gun balanced in your hand. If you already own batteries from a particular tool family, a bare gun that takes the same pack is often the most economical route. If you do not, check whether the gun comes with a battery and charger, and think about whether that platform offers other tools you want.
Be careful with batteries, even small ones. Use the charger intended for the pack, charge in a dry ventilated place, do not charge damaged or swollen packs, and keep spare packs away from loose metal in a toolbox. Remove the battery when you change cartridges or clean the gun, so the plunger cannot move unexpectedly.
Sealant types and which gun suits them
The material in the cartridge matters as much as the gun. Different sealants differ in thickness, cure time and where they belong, and picking the wrong one is a classic reason for failed joints.
| Material type | Typical use | Thickness in the gun | Notes |
|---|---|---|---|
| Acrylic latex caulk | Interior trim, baseboards, small gaps; paintable | Easy to moderate | Cleans up with water while wet; limited movement tolerance; not for constant water exposure |
| Silicone sealant | Kitchens, baths, glass, exterior joints | Moderate | Flexible and water resistant; typically not paintable; cleanup requires solvent or mechanical removal |
| Hybrid or polymer sealant | Mixed materials, exterior, some wet areas | Moderate to thick | Often paintable and flexible; check the label for compatible surfaces |
| Polyurethane sealant | Expansion joints, concrete, masonry, siding | Thick | Strong and durable; can be sticky and messy; powered gun helps |
| Construction adhesive | Bonding subfloors, panels, trim | Very thick | Needs a high-thrust gun; read the solvent and ventilation warnings |
| Two-part adhesive or epoxy | Structural bonding, repairs, anchoring | Thick, dual chamber | Needs a dual-cartridge gun and the correct mixing nozzle |
Always read the label for surface compatibility, temperature range and cure time. Some sealants are meant for interior use only, some for wet areas, and some for exterior exposure. Never assume that one tube does all jobs. Where a label lists a minimum application temperature, respect it; cold or damp surfaces ruin adhesion.
Powered guns shine with the thick end of the table. Polyurethane sealants and construction adhesives can wear out a hand quickly, and a motor does the pushing. For thin interior caulk, the gun matters less and your technique matters more. If you want to compare gun styles side by side, cordless caulking guns with speed control are worth a look.
Technique for clean beads
Preparation decides durability. Remove old sealant fully with a scraper or suitable remover, then clean the joint of dust, soap scum, oil and moisture. Let it dry. Where appropriate, apply masking tape on both sides of the joint to keep edges crisp, and pull it before the sealant skins over.
Cut the nozzle tip at an angle, starting small. The opening should be a little narrower than the joint, because you can always cut more but cannot put plastic back. Pierce the inner seal with the rod or tool on the gun. For deep gaps, push in a foam backer rod so the sealant bridges the joint rather than filling it to the bottom; this improves flexibility and saves material.
Hold the gun at a consistent angle, roughly forty-five degrees, and move at a steady speed. Pushing the nozzle ahead of the bead tends to force sealant into the joint; dragging it behind leaves a surface bead. Choose whichever works for your joint, but be consistent. Start the flow slightly before you move, and release the trigger and retract before you lift off so the tail does not smear. With a powered gun, begin on the lowest speed and increase until the flow matches your pace.
Tool the bead soon after applying, using a damp finger or a profile tool as the sealant type allows, to press it into the joint and smooth the surface. Wipe excess promptly. Do not overwork the bead, since repeated passes tear the surface. Allow the full cure time before exposing the joint to water or paint it if the material is paintable.
Care, cleaning and safety
After use, relieve pressure with the release control, remove the cartridge, and wipe the rod and barrel while the sealant is wet. Dried sealant is harder to remove and can jam the mechanism. Store partly used cartridges according to the label, with the nozzle sealed or a small screw or nail pushed into the tip, and discard them when they have hardened.
Wear safety glasses and gloves. Many sealants and adhesives can irritate skin or eyes, and some release fumes while curing. Ventilate the area, read the product warnings, and follow disposal instructions. Keep solvents away from heat, sparks and open flames. When working above your head, wear eye protection, since sealant can drip. Keep wet sealant off the battery contacts, and do not immerse the gun in water. Do not carry the gun by the trigger or leave it connected to a pack when stored.
Common mistakes
The usual errors are cutting the nozzle too wide, skipping surface preparation, applying sealant over old failed caulk, and using a product not meant for the location, such as an interior acrylic around a shower. Others include working in cold or wet conditions, filling deep joints without a backer, and applying too much so it squeezes out and requires cleanup. With powered guns, the specific mistake is running too fast for the joint, which floods it. Buying a gun for a cartridge size you do not use is another frequent disappointment.
Who should choose what
Occasional renovators who seal a bathroom or two should start with a good manual dripless gun. Homeowners who caulk windows, trim and siding annually can justify a compact cordless gun. Remodelers and installers who run beads daily benefit from variable speed, drip control and a comfortable body. Professionals applying large volumes may look at sausage-pack models. Anyone bonding with two-part adhesives needs a gun designed for that cartridge. You can compare styles in battery sealant gun kits before deciding.
Checklist
- Identify the cartridge format you use most before choosing a gun.
- Decide whether you need a standard, sausage-pack or dual-cartridge model.
- Look for variable speed and a drip-control feature.
- Check whether the gun’s thrust is suitable for thick adhesives.
- Confirm the battery platform and whether a pack is included.
- Select the sealant type that suits the location and surface.
- Buy safety glasses, gloves and cleanup supplies.
- Gather scraper, cleaner, tape and backer rod for preparation.
- Check temperature limits on the sealant label before starting.
- Plan to clean the gun immediately after each job.
FAQ
Is a cordless caulking gun worth it for a homeowner?
Only if you do regular or long runs of sealing or use thick adhesives. For a few small beads a year, a good manual gun is enough.
Can a cordless gun use any cartridge?
No. Check whether it takes standard, larger or sausage formats, and whether it is built for dual cartridges. Match the gun to your cartridges.
How do I stop the sealant from dripping?
Use a gun with drip control, release pressure before lifting the nozzle, and wipe the tip. Avoid overfilling the nozzle opening.
What speed should I use?
Start low and increase until the flow matches your walking pace along the joint. Thick materials usually need more speed than thin ones.
Do I need a backer rod?
For deep or wide joints, yes. It controls depth and lets the sealant flex, which helps long-term performance.
Why does my caulk crack or peel?
Common causes are poor surface preparation, moisture, wrong product, or too much movement in the joint for the material chosen.
How should I store a half-used cartridge?
Seal the nozzle according to the label, keep it in a moderate temperature and use it before it hardens. Discard it if it has cured.
Can I leave the battery in the gun?
Remove it during cleaning, cartridge changes and storage to prevent accidental movement and keep it from sitting in a hot or cold space.
Conclusion
The best cordless caulking gun is the one that matches your cartridge, offers controllable flow and clean cut-off, and uses a battery you can live with. Pair it with the right sealant, prepare the joint properly and keep your technique steady, and the gun will repay itself in neater beads and less strain. For a final scan of the market, see cordless adhesive and sealant guns.
Disclosure: As an Amazon Associate, we earn from qualifying purchases. If you buy through links on this page, we may receive a small commission at no extra cost to you.
Related guides
More from Amazon
Programs that pair well with the guide above. Offers and eligibility are set by Amazon and may change.
A free business account with business pricing and bulk-buying tools for work, shop or home office.
Create a business accountFree shipping on eligible items, Prime Video and more. Eligible new members can start with a free trial.
Start a Prime free trialAudiobooks and podcasts to listen to on the go. Eligible new members can start with a free trial.
Try Audible freeAd-free music streaming. Eligible new subscribers can start with a free trial.
Try Music Unlimited freeAs an Amazon Associate we earn from qualifying purchases.
Write Your Review
No reviews yet. Be the first to share your experience!