What's inside
As an Amazon Associate I earn from qualifying purchases. This post may contain affiliate links at no extra cost to you.
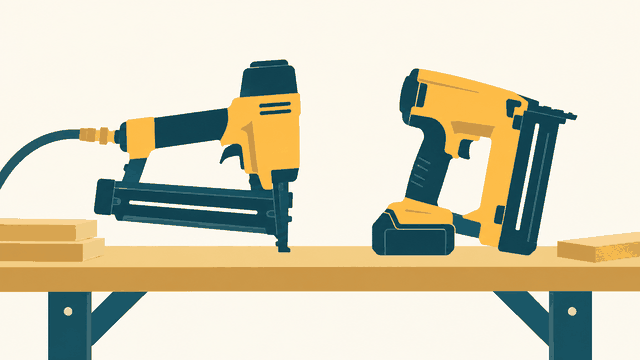
Small cabinet repairs rarely need a full-size framing or finish nailer. A cordless 23-gauge pin nailer is better suited to loose trim, small returns, face frames, applied moldings, and narrow edging where a larger nail would split the wood. The pins leave holes that are usually easy to hide, but the tool still has enough force to damage a thin cabinet part if it is set up poorly.
As an Amazon Associate we earn from qualifying purchases at no extra cost to you.


What a cordless pin nailer is for
Most pin nailers use headless 23-gauge pins from 5/8 to 1-3/8 inches long. Some models accept pins up to 1-3/8 or 1-3/8 inches; check the manufacturer’s stated range before buying. These fasteners provide temporary clamping while glue dries, rather than the holding power of screws or larger finish nails.
For cabinet work, that is usually an advantage. A 23-gauge hole is roughly 0.025 inch wide, so it disappears under paint or a small dab of filler. The limitation is grip: a pin has little head area and a very small shaft. Use glue for the permanent bond and pins to keep the parts from sliding.
A cordless tool makes sense when you are repairing cabinets in a finished kitchen, where dragging a compressor and hose through the room is more trouble than the repair. It is also useful for occasional trim work. If you already own the battery platform, the bare tool is often the most economical choice.
Best cordless pin nailer choices
| Type | Best for | Main advantage | Main drawback |
|---|---|---|---|
| Compact 12V pin nailer | Small repairs and light trim | Low weight and easy handling | Less reserve for hard wood |
| 18V or 20V pin nailer | Frequent cabinet and trim work | More driving power and runtime | Heavier and often bulkier |
| Pneumatic 23-gauge nailer | High-volume shop work | Light tool and consistent cycling | Needs compressor, hose, and fittings |
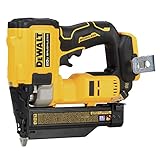
Best overall for an existing 20V platform: the DeWalt 20V 23-gauge pin nailer is a practical choice for users already invested in DeWalt batteries. It has the power for hardwood face-frame parts and the convenience of cordless operation. Its size and battery weight are less pleasant for delicate, overhead, or one-handed work, but those are common trade-offs with full-size cordless nailers.
Best compact option: a Milwaukee M12 23-gauge pin nailer suits users who already have the M12 battery system. The smaller pack keeps the tool easier to maneuver around cabinet openings. It is a good fit for veneer strips, small moldings, and repairs using shorter pins. For repeated work in oak, maple, or dense beech, a larger 18V or 20V tool may cycle more confidently.
Best value if you own another platform: choose a pin nailer that uses your current batteries rather than buying into a new ecosystem. A cheaper tool is fine when the work is limited to a few cabinet repairs each year. Spending more for a new battery line rarely makes sense unless you also need its drill, impact driver, lights, or other cordless tools.
Battery platform and charger cost
Battery cost changes the real price substantially. A bare tool can look inexpensive, but a new battery and charger may add $80 to $150 or more. For occasional cabinet work, a compact 1.5Ah to 2.0Ah battery is normally enough. You may drive several hundred pins on one charge, although dense wood, long pins, and frequent dry firing reduce that figure.
Small batteries make the tool lighter but can be less comfortable if the pack is mounted at the handle or bottom. Larger 4Ah and 5Ah packs add runtime without necessarily improving the nailer’s driving force. Buy the smallest compatible pack that balances properly in your hand. Chargers from the same platform are not interchangeable across brands, so the battery ecosystem matters more than a small difference in advertised voltage.
Features that matter for cabinets
Look for tool-free depth adjustment. Cabinet parts vary from soft pine to hard maple, and one fixed setting will either leave pins proud or drive them too deeply. A useful nailer should also have a narrow nose that lets you place a pin close to an inside corner without the housing hitting the adjacent panel.
A dry-fire lockout prevents the tool from cycling when the magazine is empty. This protects the work surface and reduces wear. A visible magazine window is helpful because short pins can run out sooner than expected. Sequential firing is preferable to bump firing for cabinet work; it gives you deliberate placement and reduces accidental marks.
Also check jam access. Bent pins and glue squeeze-out can stop a 23-gauge nailer, particularly when you are using very short pins. A tool-free nose opening saves time. LED lights are useful in dark cabinet interiors, but they do not compensate for poor nose visibility or a bulky design.
Pin length and glue selection
As a starting point, use pins that penetrate the second piece by about 1/2 to 3/4 inch without coming through the back or face. For a 1/2-inch molding attached to a 3/4-inch panel, 1-inch pins are often suitable. For a thin 1/4-inch veneer strip, 5/8-inch pins may be safer. Always test on scrap because actual thickness can vary with veneer, edge banding, and paint.
Do not rely on pins alone to hold a loose cabinet joint. Remove dust, dry-fit the parts, apply a thin coat of wood glue, and clamp or hand-hold the repair while driving pins. Too much glue causes squeeze-out around the tiny holes and can interfere with a clean finish. In damp areas, use glue appropriate to the exposure; a pin nailer does not make an interior adhesive suitable for moisture.
Avoiding common failures
Pin blows through the face: the pin is too long, the tool is set too deep, or the nose is not flat against the work. Reduce length first, then adjust depth and test again.
Pin stands proud: increase depth slightly, charge the battery, and make sure the nose is fully depressed. Hard wood may require a shorter pin or a more powerful tool.
Wood splits: stay at least 1/8 inch from an end or edge when possible. On narrow molding, shoot slightly across the grain rather than directly toward an end. For a fragile part, glue and clamp it instead of forcing a pin.
Parts move during firing: the pin is not a clamp. Use masking tape, a spring clamp, or a temporary block to hold alignment. Drive the first pin near the center, check the joint, then add pins at roughly 3- to 5-inch intervals where needed.
For most homeowners, the right purchase is the smallest cordless pin nailer already supported by the battery tools they own. Choose a compact 12V model for light trim and occasional repairs; choose an 18V or 20V model when hardwood, longer pins, or regular cabinet work is on the schedule. In either case, careful pin selection and glue matter more than maximum firing speed.
Related guides
- Longest Lasting Lawn Mower Battery: AGM vs Lithium vs Flooded Lifespan and Cost per Season
- Duralast Gold Lawn Mower Battery Review: U1 Fit, CCA and When to Pay for AGM
- Greenworks Pro 80V 21-Inch Mower Review: Runtime Math, Push vs Self-Propelled and Yard Fit
- Bosch High Pressure Washer Gun Replacement: Fittings, Adapters and What Fits Your Model