What's inside
As an Amazon Associate I earn from qualifying purchases. This post may contain affiliate links at no extra cost to you.
Small cabinet components—applied moldings, edge bands, face-frame returns, trim blocks, and drawer dividers—are where a 23-gauge cordless pin nailer earns its keep. The nails leave holes small enough to disappear under finish, and there is no compressor hose dragging across a freshly assembled cabinet. The trade-off is that pins provide limited holding power. A cordless pinner is mainly a positioning and clamping tool, not a substitute for glue, clamps, or a larger 18-gauge brad nailer.
As an Amazon Associate we earn from qualifying purchases at no extra cost to you.


What to look for in a cordless pin nailer
For cabinet work, the useful range is 5/8 to 1-3/8 inch, with some nailers accepting pins up to 2 inches. A 5/8-inch pin is appropriate for thin applied molding or a narrow return. For a 3/4-inch trim piece attached to a 3/4-inch cabinet part, 1-1/4-inch pins are a practical default. Avoid pins long enough to exit the back or side of the work.
Depth adjustment matters more than maximum nail length. A good tool should let you set the driver so the pin finishes just below the surface without crushing a fragile veneer. A dry-fire lockout prevents repeated trigger pulls after the magazine is empty. A narrow, visible nose helps you place a pin close to an inside corner, while a swivel belt hook and a small battery keep the tool from becoming awkward during installation.
Look for a sequential trigger rather than assuming bump firing is useful. Small cabinet parts need controlled placement, and firing only after the nose is pressed against the work reduces misfires. LED lights are helpful in dark cabinet interiors, but they do not compensate for a bulky nose or poor depth control.
The best cordless platforms for this job
| Platform or tool type | Best use | Main advantage | Main limitation |
|---|---|---|---|
| 12V cordless 23-gauge pinner | Trim, small blocks, face-frame details | Light and easy to control | Usually less battery runtime and lower resale ecosystem breadth |
| 18V or 20V cordless 23-gauge pinner | Repeated cabinet installation and shop use | More runtime and often faster cycling | Heavier, especially with a large battery |
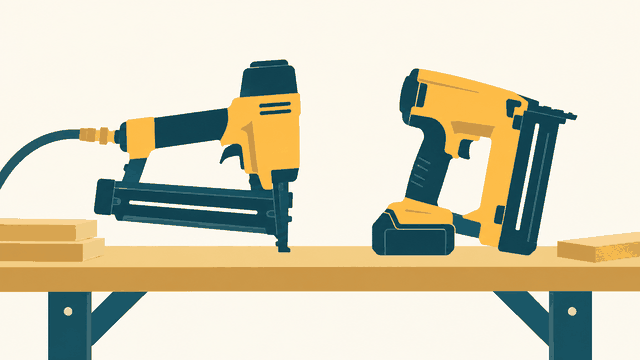
| Pneumatic 23-gauge pinner | High-volume stationary work | Lightest tool and consistent power | Requires compressor, hose, fittings, and a dry air supply |
| 18-gauge cordless brad nailer | Heavier trim and structural assembly | Much stronger holding power | Larger holes and more risk of splitting small parts |
If you already own batteries, staying within that system usually matters more than small differences in nose design. A bare tool can cost substantially less than a kit, and one battery may be enough for a small cabinet project. Someone starting from zero should compare the charger, battery, and the other tools they expect to buy—not just the nailer.
A cordless 23-gauge pin nailer is the right category when you want hose-free trim installation. If you already use a 12V system, its smaller batteries are usually a better match for delicate work than a heavy 18V pack.
How the common battery systems compare
Milwaukee’s M12 system is attractive for cabinet installers who value compact size. An M12 pinner and compact battery are less tiring when you are working inside a face frame or holding a small part in an awkward position. Runtime is not normally a problem for occasional trim work, but a spare battery is sensible for a full day.
Makita, Ryobi, and DeWalt offer 18V or 20V-class options that make more sense if those batteries already power your drills, sanders, or saws. The larger packs add weight, but they also provide plenty of capacity for hundreds of pins. Use the smallest compatible battery available; a high-capacity pack can make a compact nailer top-heavy.
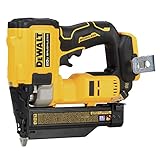
For buyers already invested in DeWalt’s 20V MAX line, a DeWalt 20V MAX pin nailer avoids a second charger and battery family. The same logic applies to a Makita 18V pin nailer or another tool that matches batteries already in your shop.
Pin length, glue, and holding strength
Pin nails are typically headless 23-gauge fasteners. Their small diameter minimizes visible damage, but it also means they have little resistance to pulling apart. Apply glue to the mating surfaces and use pins only to hold the parts while the glue cures. On a 1/2-inch-wide molding strip, two pins spaced several inches apart are often enough. On a wider or slightly bowed piece, add pins closer together, but keep them at least 1/4 inch from the edge to reduce splitting.
Use the shortest pin that gives roughly 1/2 inch of penetration into the receiving part after passing through the attached piece. Test on scrap from the same material. Hardwood, plywood veneer, and MDF can behave differently, and a depth setting that works on poplar may leave a crater in thin oak veneer.
Common problems and how to prevent them
A pin that stops proud of the surface usually indicates an incorrect depth setting, insufficient battery charge, or a driver that needs cleaning. Do not hammer a proud pin into a finished cabinet; you can dent the veneer. Adjust depth, try a fresh battery, and test again.
Pins that disappear too deeply are harder to fill and can weaken a thin edge. Reduce depth and inspect the nose for packed adhesive or debris. Misfires often come from using the wrong fastener length, loading pins upside down, or pressing the nose at an angle. Keep pin strips dry and free of dust.
Blowout is the most serious failure on small components. It happens when a pin follows the grain toward an edge or exits the back. Move the firing point inward, shorten the fastener, or hold the piece in a different orientation. Always make a test joint before applying pins to a visible cabinet part.
When the cheaper option is fine
A lower-cost cordless pinner is perfectly adequate for a homeowner installing one kitchen’s worth of trim, especially if it shares batteries with an existing drill. You do not need maximum magazine capacity or premium cycling speed for a few dozen components. Spend more for a better tool when you install cabinets regularly, work overhead, need reliable depth adjustment, or expect to use the nailer for several hours at a time.
Before buying, confirm the exact pin range, battery price, warranty, dry-fire protection, and whether the bare tool includes a case or no-mar nose. Then test the tool on scrap. For small cabinet components, predictable depth and comfortable handling are worth more than headline firing speed.
Related guides
- Longest Lasting Lawn Mower Battery: AGM vs Lithium vs Flooded Lifespan and Cost per Season
- Duralast Gold Lawn Mower Battery Review: U1 Fit, CCA and When to Pay for AGM
- Greenworks Pro 80V 21-Inch Mower Review: Runtime Math, Push vs Self-Propelled and Yard Fit
- Bosch High Pressure Washer Gun Replacement: Fittings, Adapters and What Fits Your Model