Our Top Picks


What's inside
- 1. The Digging Tool: Auger or Clamshell Digger
- 2. Layout: Laser Level, String Line, and Batter Boards
- 3. Cordless Power: One Drill/Driver, One Impact Driver
- 4. Cutting: Circular Saw First, Miter Saw Second
- 5. Concrete and Backfill: Wheelbarrow, Mixing Hoe, Tamping Bar
- 6. Plumb and Bracing: Post Level, 4 ft Level, Clamps
- What To Skip
- Best Tools For Fence Installation: Rent vs Buy Math
- FAQ
- 1. The Digging Tool: Auger or Clamshell Digger
- 2. Layout: Laser Level, String Line, and Batter Boards
- 3. Cordless Power: One Drill/Driver, One Impact Driver
- 4. Cutting: Circular Saw First, Miter Saw Second
- 5. Concrete and Backfill: Wheelbarrow, Mixing Hoe, Tamping Bar
- 6. Plumb and Bracing: Post Level, 4 ft Level, Clamps
- What To Skip
- Best Tools For Fence Installation: Rent vs Buy Math
- FAQ
As an Amazon Associate I earn from qualifying purchases. This post may contain affiliate links at no extra cost to you.
Most fence projects do not fail at the panels. They fail at the holes. A crooked post line, a footing that heaved after one winter, a gate that sags by August: all of that traces back to the digging and setting stage, which is exactly the stage most homeowners try to do with whatever is already in the garage. The best tools for fence installation are not the ones that make the prettiest picket cuts. They are the ones that get 30 to 60 holes down to depth, plumb, and set correctly before the concrete starts curing.
This list is ordered by what to buy first, not by price. Each entry names the job it unlocks, because a fence build is a chain of dependencies. Skip the layout tools and every later tool is working against a bad line. Skip the digging tool and you will still be on hole nine at sunset. Buy in this order and each purchase makes the next stage possible.
As an Amazon Associate we earn from qualifying purchases at no extra cost to you.


| Priority | Tool | Job It Unlocks | Rent or Buy |
|---|---|---|---|
| 1 | Post hole digger or auger | Getting 30+ holes to frost depth | Rent the auger, buy the clamshell |
| 2 | Laser or string line setup | A straight post line and consistent height | Buy |
| 3 | Cordless drill/driver or impact driver | Rails, brackets, gate hardware | Buy |
| 4 | Circular saw or miter saw | Cutting rails, pickets, post tops | Buy |
| 5 | Wheelbarrow and mixing hoe | Setting posts before concrete sets | Buy |
| 6 | 4 ft level and post level | Plumb posts that stay plumb | Buy |
| 7 | Compactor or tamping bar | Gravel base and backfill | Buy the bar |
1. The Digging Tool: Auger or Clamshell Digger
This is first because it is the bottleneck. A residential fence line of 150 feet on 8 foot centers is roughly 20 holes, and a typical yard fence is 300 to 400 feet. At 12 inches wide and 30 to 42 inches deep, that is a serious volume of soil to move.
The honest split: rent a powered auger for the digging day, and own a clamshell post hole digger for cleanup and the holes the auger cannot reach. A two-person hydraulic auger from a rental yard handles clay and mixed soil far better than a one-man gas auger, which will try to spin you around when the bit catches a root. If your soil is heavy clay or full of cobble, an auger on a skid steer or tractor is the only sane option, and rental is the only sane way to get one.
Own the clamshell digger regardless. You will use it to square up auger holes, to dig the two or three holes near a utility line where you must go by hand, and to reset the post you got wrong. Fiberglass handles beat wood for shock and weight. Pair it with a digging bar for roots and rock.
Post Hole Digger with Fiberglass Handles
Buy this even if you rent an auger. Look for fiberglass handles, a ruler stamped on the blade, and a hinge that does not wobble side to side. Cheap all-steel diggers transmit every impact into your wrists and bend at the hinge after a season. This is a sub-$100 tool that you will still own in fifteen years.
2. Layout: Laser Level, String Line, and Batter Boards
The job this unlocks is a line that reads straight from the street. A fence that is structurally perfect but visibly bowed is a failure, and human eyes are brutally good at catching a bowed top rail from 40 feet away.
The low-tech version works: mason’s line pulled tight between stakes at the corners, plus a second line at final post height. Add a rotary or line laser and you gain the ability to set consistent post heights across a sloping yard without measuring down from a string that sags. On grades, a laser with a receiver is worth the rental or the purchase, because outdoor visibility in daylight is the real constraint on cheap green lasers.
Do not skip the tape measure upgrade either. A 100 ft open reel tape is the right tool for laying out a fence run. A 25 ft pocket tape is the wrong tool used forty times.
3. Cordless Power: One Drill/Driver, One Impact Driver
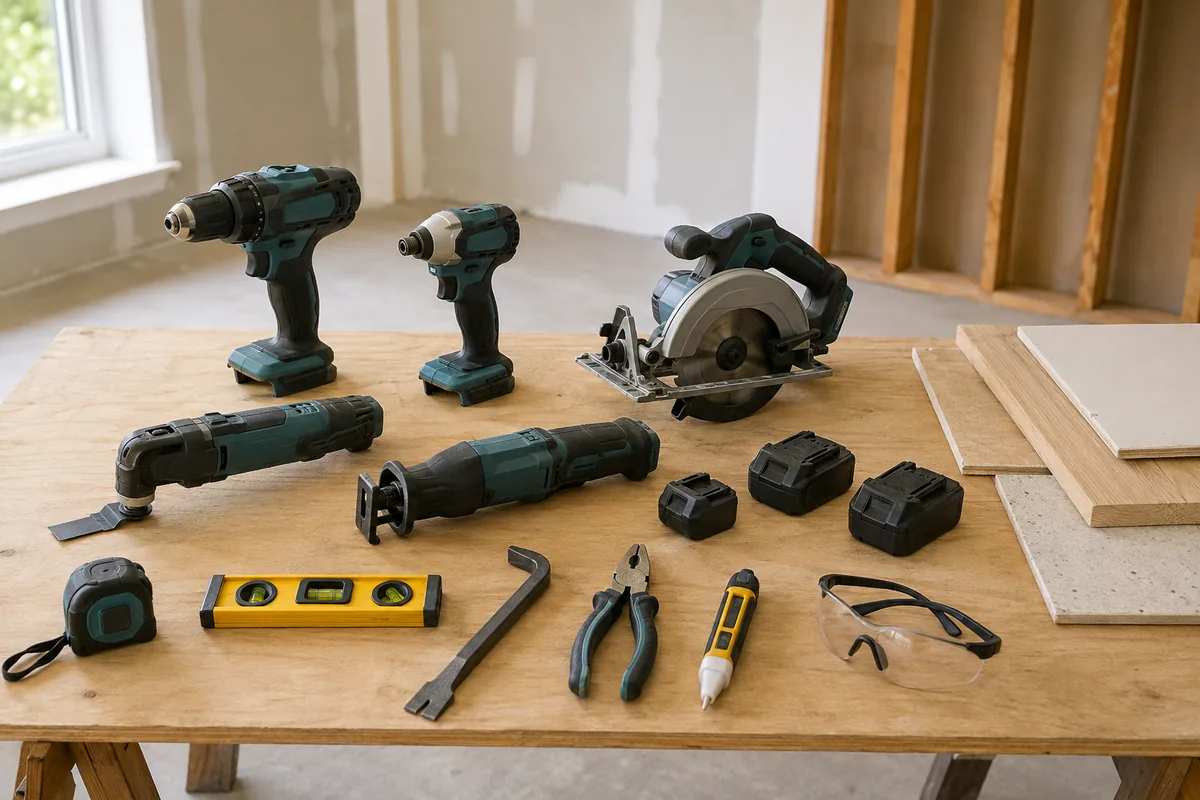
This unlocks everything above ground: rails, brackets, hinges, latches, and the hundreds of structural screws that hold the fence together. The distinction matters. The drill/driver bores pilot holes and drives lag screws with control. The impact driver runs long structural screws into pressure-treated lumber without stripping heads or wrecking your wrist.
Any current 18V or 20V brushless platform is enough. If you are already invested in DeWalt XR, Milwaukee FUEL, or Makita LXT, stay there and buy bare tools. If you are starting cold, pick the platform whose batteries you can find locally, because that is what determines whether you finish the project on a Sunday afternoon.
Two things actually matter on a fence job: battery count and a belt hook. Bring at least three batteries and a charger to the yard. You are 100 feet from an outlet and you do not want to walk it.
- ✔ Brushless motors handle long structural screws without overheating
- ✔ One battery platform powers your saw, blower, and light too
- ✔ Belt hooks and side handles matter more than peak torque numbers
- ✘ Compact batteries die fast in pressure-treated lumber, size up to 4.0Ah or larger
- ✘ Impact drivers strip soft hardware if you do not back off the trigger
- ✘ Cheap bit sets shear off inside a driven screw and cost you the board
4. Cutting: Circular Saw First, Miter Saw Second
A circular saw is the priority because it is the only saw that goes to the fence. You will cut post tops in place, trim rails to fit an out-of-square run, and rip a picket to close a gap. A cordless circular saw on the same battery platform as your drills eliminates cord management across a muddy yard.
A miter saw earns its place at the cut station for repeat cuts: pickets to identical length, rails to identical length, angled cuts on a raked fence. If you are building 300 feet of privacy fence, the miter saw saves real hours. If you are installing 60 feet of pre-built panels, it may not come out of the truck.
Buy a framing blade with a low tooth count for pressure-treated lumber and keep a second blade in the bag. Treated wood is wet, sticky, and hard on carbide.
Cordless Circular Saw (Bare Tool)
If you already own a battery platform, the bare-tool circular saw is the single highest-value purchase on this list. Get a 6-1/2 in or 7-1/4 in brushless model with a rafter hook and an electric brake. Rear-handle saws have more power for repeat crosscuts in wet treated lumber, while sidewinders are lighter for cutting post tops overhead on a ladder.
5. Concrete and Backfill: Wheelbarrow, Mixing Hoe, Tamping Bar
The job this unlocks is setting posts before the mix goes off, which is a timing problem more than a strength problem. Fast-setting concrete gives you minutes, not hours. If you are mixing in a five gallon bucket with a stick, you will lose that race.
A contractor wheelbarrow with a 6 cubic foot tub and a pneumatic wheel is the baseline. A mixing hoe with holes in the blade moves mix far better than a shovel. For anything over about 20 posts, price out a rental mixer or a concrete delivery, because the mixing itself becomes the whole day.
Add a tamping bar or hand tamper for the gravel base at the bottom of each hole. Four to six inches of compacted gravel under the post is the single cheapest thing you can do for drainage and heave resistance, and it takes about 30 seconds per hole.
6. Plumb and Bracing: Post Level, 4 ft Level, Clamps
A post level straps to the post and reads two planes at once, freeing both hands to brace. That is the whole reason it exists and it is worth the price of a sandwich. Keep a 4 ft level as the referee, since magnetic post levels on wood posts can drift and cheap vials go out of true.
Bring more bracing lumber than you think you need. Two 1×4 stakes per post, screwed not nailed, so you can adjust. Spring clamps and a few F-clamps hold rails while you drive screws, which turns a two-person job into a one-person job.
What To Skip
Skip the one-man gas auger for clay soil. It will bind, kick, and hurt you. Either rent a two-person hydraulic unit or a machine-mounted auger, or dig by hand.
Skip the pneumatic framing nailer for fence rails and pickets. Nails back out as treated lumber cycles wet and dry. Structural screws hold and let you disassemble a section later without destroying it. A cap stapler or nailer makes sense on some picket work, but not on structure.
Skip the dedicated fence picket spacing jig. A scrap of the picket material and a couple of screws does the same job for free and matches your actual stock width, which varies board to board.
Skip buying a plate compactor. Unless you are doing hardscape too, the tamping bar and your boots handle fence backfill fine.
Skip cheap combo kits with two 1.5Ah batteries. The tools are usually acceptable. The batteries will not survive a day of driving 3 inch screws into wet lumber.
Skip the laser level upgrade if your yard is flat and short. A tight string line and a story pole are genuinely sufficient under about 100 feet on level ground.
Best Tools For Fence Installation: Rent vs Buy Math
The rule of thumb: rent anything you will use for one day and store for ten years. Buy anything you will touch on every outdoor project. That puts augers, mixers, and rotary lasers in the rental column and hand tools, levels, cordless drills, and saws firmly in the buy column.
One more consideration. Rental yards charge by the day and the clock starts when you pick up, so line up your layout, your gravel, your posts, and your helper before you rent the digging equipment. The most common way people waste rental money on a fence build is renting an auger before the string lines are set and the hole locations are marked.
Post Level and 4 ft Box Level Combo
The post level costs less than a bag of concrete and it is what keeps your posts plumb in two planes while your hands are busy with bracing. Buy it alongside a real 4 ft box level and check them against each other before you start. Verify both against a known plumb surface, because an out-of-true level will make every post wrong in the same direction.
FAQ
How deep do fence post holes need to be? The general standard is one third of the post’s above-ground height, or below the local frost line, whichever is deeper. In cold northern states that often means 36 to 48 inches. In mild southern climates 24 to 30 inches may satisfy code. Check with your local building department, since frost depth requirements are set locally and gate posts frequently require more depth than line posts.
Do I need a concrete mixer or can I mix bags in the hole? Both approaches are used. Dry-setting fast-setting mix in the hole and adding water is common for line posts and works when soil is well drained. Mixing in a wheelbarrow or mixer gives you more consistent strength and is the better choice for gate posts, corner posts, and end posts, which carry the real load. If you are setting more than about 20 posts, rent a mixer.
What is the one tool people regret not having? A reciprocating saw with a demolition blade, if there is an old fence coming out. Cutting through rusted fasteners and buried post remnants is miserable with anything else. It is not on the main ranked list because a new fence line on virgin ground does not need it, but demo work changes the answer immediately.
Buy in the order above and each tool unlocks the next stage instead of sitting in the truck. Start with the digging tool and the layout gear, since those two decisions determine whether the rest of the build goes smoothly or fights you for a week.
Check prices on Amazon →