What's inside
As an Amazon Associate I earn from qualifying purchases. This post may contain affiliate links at no extra cost to you.
A BLACK+DECKER hedge trimmer can make routine shrub and hedge maintenance easier, but the right model depends on hedge size, branch thickness, access to an outdoor outlet, and how much cutting you need to do between charges. The brand offers corded electric, cordless battery-powered, and pole hedge trimmers, along with smaller shear-shrubber tools for light garden work.
For most homeowners, the decision comes down to three factors: corded convenience, cordless mobility, and the reach or cutting capacity required for the job. Before purchasing or troubleshooting a BLACK+DECKER hedge trimmer, identify its exact model number. Specifications, battery compatibility, replacement parts, and maintenance instructions vary across models and regional versions.
This guide explains how to choose a suitable trimmer, operate it safely, maintain its blades, and diagnose common problems without assuming that every BLACK+DECKER model uses the same components.
Which BLACK+DECKER Hedge Trimmer Should You Choose?
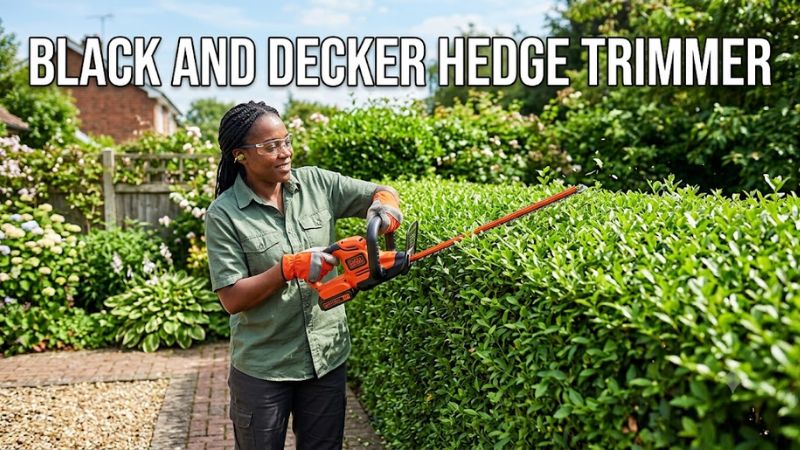
Start with the type of hedge you maintain and the working conditions around it. A longer blade may help cover a wider hedge more efficiently, but it does not automatically mean the tool can cut thicker branches or is easier to control.
| Trimmer type | Best suited for | Main advantages | Main limitations |
| Corded electric | Small to medium hedges near a suitable outdoor outlet | Continuous power without recharging a battery | Power cord must remain clear of the blade |
| Cordless handheld | Routine trimming across different parts of a yard | Freedom of movement without an extension cord | Runtime depends on battery capacity, condition, and workload |
| Cordless pole hedge trimmer | Tall or difficult-to-reach hedges | Extended reach without relying on a handheld tool alone | Overhead work and extended reach can increase handling difficulty |
| Compact shear-shrubber | Small shrubs, grass edges, and detail work, depending on the attachment | Compact size for light trimming | Not a substitute for a full-size hedge trimmer |
BLACK+DECKER’s product lineup includes all these general categories, although availability and specifications differ by country.
Corded electric models
A corded model is worth considering if you maintain a relatively small garden and have a suitable outdoor power outlet. You do not need to plan the job around battery runtime, but you must manage the cord carefully throughout the cut.
For example, the BLACK+DECKER BEHT100 is a 16-inch, 3.0-amp electric hedge trimmer designed for routine trimming of small hedges and shrubs. The manufacturer lists a 120-volt supply and a two-year limited warranty for this US-market model.
The BEHT200 is an 18-inch corded model with a dual-action blade, a wraparound handle, and built-in cord retention. These features suit routine hedge maintenance, but the cord still needs to be kept away from the cutting area.
Cordless battery-powered models
A cordless hedge trimmer is a practical option when shrubs are spread across the yard or a power cord would restrict movement.
Check the battery capacity, whether the kit includes a battery and charger, and whether the battery belongs to a tool platform you already own. A bare-tool package may cost less initially but require a separate battery and charger.
One example is the BLACK+DECKER LHT321, a 20V MAX* cordless model with a 22-inch dual-action blade. The manufacturer specifies a 3/4-inch branch-cutting capacity and lists the referenced kit with one 1.5 Ah lithium-ion battery and a charger. Its stated cutting capacity is a manufacturer specification, not a guarantee that every branch of that diameter will cut easily.
Pole hedge trimmers
Choose a pole model when the main challenge is reaching the top or far side of a tall hedge. The BLACK+DECKER LPHT120, for example, has an 18-inch dual-action blade and a pivoting head with five positions. The manufacturer lists an extended reach of up to 11 feet and a weight of 7.7 pounds.
Treat advertised reach as a product specification, not a reason to stretch, lean, or work from an unstable ladder. If the cutting area cannot be reached while maintaining stable footing and control, use an appropriate alternative or hire a qualified professional.
How to Choose the Right BLACK+DECKER Hedge Trimmer
Before buying, compare these five factors rather than choosing by brand name or blade length alone.
1. Blade length and cutting capacity
Blade length affects how much hedge you can cover with each pass. A longer blade can help with broad, straight hedge faces, while a shorter blade may be easier to position around compact shrubs and detailed shapes.
Cutting capacity is a separate specification. A model advertised for branches up to 3/4 inch in diameter should not be assumed to handle every branch of that size, especially if the wood is hard, dry, twisted, or unusually dense.
Use hand pruners or loppers for branches that exceed the tool’s documented limits. Do not force the hedge trimmer through resistant material.
2. Battery platform and kit contents
For a cordless BLACK+DECKER hedge trimmer, confirm the following before purchasing:
- Exact model and type number.
- Battery platform and voltage.
- Battery capacity in amp-hours (Ah).
- Whether the package includes a battery and charger.
- Whether the charger is compatible with the supplied battery.
- Whether the manual confirms compatibility with batteries you already own.
The brand’s US 20V MAX* products generally specify a maximum initial voltage of 20 volts measured without a workload and a nominal voltage of 18 volts. This labeling difference is normal and does not, by itself, indicate a faulty battery.
Never assume that every BLACK+DECKER battery fits every trimmer. Check the exact model’s documentation, even if two batteries have similar labels.
3. Runtime and battery capacity
Amp-hours indicate battery capacity, not a guaranteed number of minutes of operation. Actual runtime varies with battery condition, cutting resistance, hedge density, and operating technique.
A larger battery may help extend working time, but it can also add weight. If you maintain a long hedge, consider whether a compatible spare battery would be more practical than relying on one extended session.
Do not interpret a manufacturer’s estimated coverage per charge as a universal result. Yard layout, plant species, cutting frequency, and the amount removed all affect how much area a battery can trim.
4. Weight, grip, and reach
Consider the complete tool configuration rather than the weight of the bare tool alone. For cordless models, check whether the published weight includes the battery.
Look for handle arrangements that allow a secure grip and controlled movement. A pole trimmer can reduce the need to reach upward with a handheld blade, but its longer shaft changes the balance and can increase fatigue.
If you cannot comfortably hold and guide the tool through the intended cutting path, choose a lighter or more manageable option.
5. Replacement parts and warranty
Before purchasing an older or discounted model, check whether the correct manual, battery, charger, blade assembly, and other service parts are available.
BLACK+DECKER directs customers to ToolServiceNet to locate manuals and parts lists using the model and type number. The type number may appear beside or below the model number on the tool.
Warranty terms depend on the product and applicable region. Confirm the warranty for the exact model and purchase market instead of assuming that every BLACK+DECKER hedge trimmer has identical coverage.
How to Use a BLACK+DECKER Hedge Trimmer Safely
A hedge trimmer has fast-moving cutting blades capable of causing serious injuries. Before starting, read the manual for the exact model and make sure the hedge, work area, power supply, and protective equipment are appropriate.
Before you start
- Inspect the trimmer. Check the blade, hand guard, handles, switches, housing, cord or battery connection, and any visible fasteners. Do not use a tool with damaged safety components or a cracked housing.
- Clear the work area. Remove loose debris and look for wire, fencing, stones, hidden obstacles, and other objects that could damage the blades or be thrown.
- Wear suitable protection. Use eye protection, sturdy footwear, hearing protection where required by the tool’s noise exposure, and gloves appropriate to the task and the manufacturer’s instructions.
- Check the power source. For corded models, use a suitable outdoor-rated extension cord where permitted by the manual and keep it behind and away from the cutting path. For cordless models, install the specified battery securely.
- Plan your stance and cutting path. Maintain stable footing, keep both hands on the designated grips, and position yourself so that you are not reaching beyond your balance.
Never operate the trimmer in wet conditions unless the exact model’s instructions explicitly permit the conditions involved. Keep the blade away from your body, bystanders, pets, and hidden electrical wiring.
Step-by-step trimming procedure
- Start with a clear view of the hedge. Identify the intended cutting line and check for branches or obstacles that could obstruct the blade.
- Position the tool before activating it. Follow the model’s prescribed starting procedure and keep the blade clear of the ground and other objects.
- Trim in controlled passes. Guide the blade along the intended hedge shape without forcing it through thick branches. Allow the cutting mechanism to do the work.
- Maintain a safe cutting direction. Keep the blade away from your body and do not cut above shoulder height with a handheld model if doing so compromises control. Use an appropriate pole trimmer or professional service for inaccessible areas.
- Stop if the blade jams. Release the controls, disconnect the battery or unplug the tool, and wait until all blade movement has stopped before inspecting the obstruction.
- Shut down before moving or adjusting the tool. Switch it off and isolate its power source before clearing debris, checking damage, or preparing it for storage.
Never hold a branch near the moving blade, bypass a two-hand switch or other safety mechanism, or attempt to clear a jam while the tool is powered. If a blade is damaged or the mechanism remains obstructed, stop work and follow the model’s service instructions.
How to Clean and Maintain a BLACK+DECKER Hedge Trimmer
Regular cleaning helps prevent plant residue from building up between the cutting teeth and makes it easier to spot damage before the next job. Follow the maintenance instructions for your exact model rather than assuming every blade assembly can be serviced in the same way.
1. Disconnect the power source
Switch off the trimmer, unplug a corded model, or remove the battery from a cordless model. Wait for all blade movement to stop before cleaning or inspecting the cutting assembly.
Do not rely on the trigger being released as your only precaution.
2. Remove leaves, sap, and debris
Use a suitable brush to remove loose leaves, small twigs, and plant residue from the blade area. Keep your hands away from the cutting edges, even when the tool is disconnected.
BLACK+DECKER also recommends cleaning the blades with soap and water when needed, followed by thorough drying and appropriate lubrication before storage.
Avoid spraying water into the motor housing, battery contacts, switches, or other electrical components.
3. Apply a suitable blade lubricant
BLACK+DECKER’s support guidance explains that its hardened, rust-resistant hedge-trimmer blades do not necessarily require lubrication simply to prevent rust. However, a light spray lubricant can help clean the blades and leave a thin protective coating. Excessive lubricant may collect residue.
Use only a product and application method compatible with the tool’s manual. Keep lubricant off electrical contacts and allow any applied product to settle or dry as directed before reconnecting power.
4. Inspect the blades and housing
With the power source disconnected, check for:
- Bent, cracked, or heavily chipped teeth.
- Debris that prevents the blades from moving freely.
- Damaged guards, handles, switches, or housing.
- Loose or missing fasteners.
- Unusual wear or signs of overheating.
Do not operate a trimmer if the blade is visibly damaged or the mechanism appears obstructed.
5. Sharpen only when appropriate
BLACK+DECKER states that its hardened-steel hedge-trimmer blades generally do not need sharpening during normal use. A nick caused by contact with a hard object may not require removal if it does not interfere with blade movement. If damage affects movement, the manufacturer provides limited guidance on removing a nick with a fine-toothed file or sharpening stone after disconnecting the tool. It does not recommend using a power tool to sharpen the blade.
If the blade is bent, badly damaged, or requires work beyond the instructions for your model, consult an authorized service provider. Do not disassemble the cutting mechanism unless the manual specifically permits the procedure.
6. Store the trimmer properly
Before storage:
- Clean and dry the blade assembly.
- Apply lubricant if recommended for the model.
- Fit the supplied blade cover when applicable.
- Store the tool in a dry, secure location away from children.
- Remove and store the battery according to the manufacturer’s instructions when appropriate.
For cordless tools, use the specified charger and follow the battery’s storage instructions. Do not store a damaged battery or continue using one that shows signs of swelling, leakage, or overheating.
BLACK+DECKER Hedge Trimmer Troubleshooting
If your trimmer stops working, runs intermittently, or struggles to cut, begin with external checks. A symptom alone does not establish whether the cause is a depleted battery, a jammed blade, a damaged switch, or a mechanical fault.
| Symptom | Possible cause | Safe next step |
| Trimmer will not start | Discharged battery, loose battery connection, power-supply issue, or safety switch not engaged correctly | Check the manual’s starting procedure and inspect the power source |
| Cordless trimmer stops during cutting | Low battery charge, excessive cutting resistance, or a blade obstruction | Switch off, remove the battery, inspect for a jam, and recharge if needed |
| Blade moves slowly or struggles | Dense branches, residue between the teeth, damage, or a mechanical fault | Disconnect power, clean the blade, and check the material against the rated cutting capacity |
| Blade appears stuck | Branches, wire, or other debris trapped in the cutting assembly | Disconnect power completely before attempting any permitted obstruction removal |
| Excessive vibration or unusual noise | Damaged teeth, loose components, or internal mechanical problems | Stop using the tool and arrange inspection if the cause is not clearly resolved by safe external checks |
| Battery does not charge | Incorrect charger, poor connection, battery fault, or charger fault | Verify model compatibility and follow the battery and charger troubleshooting instructions |
What to do if the hedge trimmer will not start
- Switch off the tool and isolate the power source.
- For a cordless model, confirm that the battery is the correct type, securely installed, and charged using its compatible charger.
- For a corded model, inspect the cord and plug for visible damage and check the supply using the procedure in the manual. Never use a damaged cord.
- Check whether the model requires a particular switch sequence or two-handed starting procedure.
- If the tool still does not start, or if you notice burning smells, damaged wiring, or unusual heat, stop and contact an authorized service provider.
Do not bypass the safety switch, open energized equipment, or attempt electrical repairs without the appropriate qualifications.
What to do if the blades jam
A jammed blade can cause injury if the motor starts unexpectedly.
- Release the controls and switch the tool off.
- Unplug the corded tool or remove the battery from the cordless tool.
- Wait until the blades have stopped completely.
- Follow the model’s instructions for removing the obstruction using a suitable tool, keeping fingers clear of the cutting edges.
- Inspect the blade for damage before reconnecting power.
If the blade remains stuck, the teeth are bent, or the mechanism makes unusual noises, do not force the blades apart. Seek qualified service.
When should you replace the blade or the entire trimmer?
Replacement depends on the extent of damage, the availability of the correct parts, and the cost of repair.
A replacement blade assembly may be appropriate when the original is damaged beyond the permitted maintenance procedure. However, a trimmer that has a faulty switch, damaged housing, or internal mechanical failure may require a different repair.
Confirm the exact model and type number before ordering any part. Do not assume that blades from two trimmers with the same advertised length are interchangeable.
Frequently Asked Questions
How long does a BLACK+DECKER hedge trimmer battery last?
Battery runtime varies by model, battery capacity, battery condition, and cutting workload. A higher-capacity compatible battery may extend runtime, but the actual result depends on hedge density and how much material is removed. Check the manufacturer’s guidance for your exact model rather than relying on a universal runtime estimate.
Can I use any BLACK+DECKER battery with my hedge trimmer?
No, you should use only a battery that is confirmed compatible with your exact hedge-trimmer model. Check the voltage platform, battery system, and model-specific manual before connecting a battery. Similar branding or a battery that appears to fit does not establish compatibility.
How often should I oil a BLACK+DECKER hedge trimmer?
Follow the maintenance instructions for your specific model. BLACK+DECKER’s support guidance says its hardened, rust-resistant hedge-trimmer blades do not necessarily need oil solely to prevent rust, although a light spray lubricant can help clean them and leave a thin coating. Clean and dry the blades after use, and avoid excessive lubrication.
Why does my BLACK+DECKER hedge trimmer keep jamming?
Repeated jamming can result from branches exceeding the tool’s cutting capacity, dense or unsuitable material, debris between the teeth, or blade damage. Disconnect the power source before inspecting or cleaning the blade. If the trimmer continues to jam after safe cleaning and use within its rated capacity, stop using it and arrange a service inspection.
Final Verdict
A BLACK+DECKER hedge trimmer can be a practical choice for routine garden maintenance when its power source, blade length, cutting capacity, and reach match the work. Corded models suit jobs near a suitable outlet, cordless models offer more freedom of movement, and pole trimmers can help with tall hedges when used within safe reach and handling limits.
Before buying, verify the exact model, included battery and charger, cutting-capacity specification, replacement-part availability, and warranty. Before every maintenance task, disconnect power and follow the model’s instructions.
For existing owners, identifying the model and type number is the best next step when looking for a compatible battery, replacement blade, manual, or repair guidance. BLACK+DECKER’s official support resources can help locate the correct documentation.