What's inside
As an Amazon Associate I earn from qualifying purchases. This post may contain affiliate links at no extra cost to you.
Best Jigs for Cutting Angles on a Table Saw
For most accurate repeat cuts, choose a table-saw sled with a replaceable angled fence and a positive-stop adjustment; use a miter gauge with a pivoting fence for occasional angles, and a dedicated taper jig for long, narrow parts. The best cutting angles on table saw with jig setup depends less on the widest angle range than on how securely the jig holds your workpiece and how reliably it returns to the same setting.
These options solve different problems. A miter gauge is compact and versatile, a crosscut sled is stable for smaller parts, and a taper jig guides long stock at a fixed angle. Before buying, check the saw’s miter-slot dimensions and spacing, the jig’s usable capacity, and whether its angle scale is easy to verify against a reliable square or digital angle gauge.
As an Amazon Associate we earn from qualifying purchases at no extra cost to you.
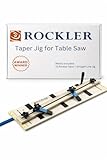
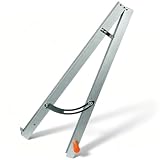


Compare the main jig types
The figures below are practical selection targets, not universal product specifications: capacities vary by model and saw. Treat the stated workpiece dimensions as approximate maximums to confirm against the manufacturer’s instructions and your actual setup.
| Jig type | Typical adjustment range | Practical workpiece size | Repeatability and clamping | Assembly complexity | Best use |
|---|---|---|---|---|---|
| Adjustable miter gauge with fence | About 0–60° left and right; verify model | Parts roughly 3–12 in. wide, depending on fence | Good with a positive stop and a clamp; less secure if the stock only rests against the fence | Low; usually attach the fence and set the bar | Occasional miters and small-to-medium crosscuts |
| Angled crosscut sled | Often fixed at one angle; adjustable designs may cover about 0–45° | Commonly 6–18 in. across the sled; limited by the saw and sled footprint | Very good when the work is supported against a tall fence and clamped | Medium to high for a shop-built sled; low for a ready-to-use model | Accurate, repeated crosscuts and small parts |
| Taper jig | Commonly about 0–15° of taper, depending on model | Long stock around 24–48 in. is typical; check the jig’s rated length | Good if the board is held firmly; hold-downs or clamps matter more than angle markings | Low to medium; set the fence and secure the board | Legs, rails, and other long tapered pieces |
| Shop-built adjustable angle sled | Designed for the angles you need; practical range depends on the pivot and fence | Set by the base size; a 12 × 18 in. base is a useful small-part starting point | Excellent when the pivot locks positively and the fence is calibrated | High; requires accurate construction and calibration | Frequent production of the same unusual angle |
A table saw angle cutting jig should be chosen around the cut, not just the printed angle range. A wide-range gauge can still be a poor choice for a narrow piece if it lacks clamping. Conversely, a fixed-angle sled may outperform an adjustable jig when making a batch because there is less opportunity for the setting to shift.
Choose by the work you actually do
- Occasional picture frames or trim: Start with an adjustable miter gauge and a long auxiliary fence. Look for positive stops at common angles, a low-play bar, and a way to clamp the stock.
- Repeated small parts: Use a crosscut sled with a replaceable fence face. A sled supports the work on both sides of the blade and makes it easier to keep your hands away from the cut line.
- Long tapered legs or rails: Choose a taper jig that holds the board along its length. A miter gauge is not a substitute for this: long stock can pivot or lose support during the cut.
- Frequent, unusual angles: Consider an adjustable sled only if you can calibrate and lock it securely. If the same angle is used every time, a dedicated fixed-angle jig is simpler and often more repeatable.
- Limited shop space or budget: A miter gauge takes little storage space and often costs less than a large sled. A shop-built sled can be economical, but only if you already have suitable material and can build it accurately.
What matters for accurate repeat cuts
Range is useful; repeatable stops are better
Printed scales are starting points, not guarantees of accuracy. Scale marks can be difficult to read, and a small error at the fence becomes a visible mismatch across a wide panel or frame. Prefer a jig with positive detents or a firm locking mechanism, then verify the actual fence angle before making a batch. For compound or high-precision work, confirm the angle with a dependable measuring tool rather than trusting the scale alone.
Match capacity to the part, not the blade
Capacity depends on the jig’s fence, base, and support—not simply the saw’s cutting depth. A small sled may handle a 6-inch-wide part comfortably but leave a 14-inch panel unsupported. For longer stock, check that the jig keeps the work flat throughout the cut and that the saw table can support the overhang. Add outfeed support where needed without creating a point that can snag or lift the workpiece.
Clamping prevents angle drift
When comparing a table saw jig for cutting angles, inspect how it holds the board. A stop block controls length but does not necessarily prevent the work from sliding or rotating. A hold-down clamp, toggle clamp, or secure fence contact helps resist movement. Keep clamps clear of the blade path, and never position a hand where the blade could reach it if the work shifts.
Set up a jig for a repeatable batch
- Check the fit. With the saw unplugged, confirm that the miter bar or sled runners move freely in the slots without noticeable side play. A binding runner can push the jig off line; excessive play undermines repeatability.
- Calibrate the fence. Set the target angle, lock the adjustment, and measure the fence against the blade or a known reference. Check at the point where the work will contact the fence, since a long fence can reveal small alignment errors.
- Make a test cut. Use a scrap piece of the same thickness and similar width as the real stock. Join two test pieces to check the fit; a cut can look clean while still being slightly off-angle.
- Lock the setting and add a stop. Tighten the angle mechanism, then use a stop block for repeat lengths. Test the first few pieces before cutting the full batch, and recheck if the jig receives a knock or the clamp loosens.
- Use a controlled feed. Keep the stock flat against the fence and advance the jig steadily. Do not force a cut or reach across the blade to retrieve offcuts; wait for the blade to stop.
Ownership details that affect the choice
On a miter gauge, the first signs of trouble are often play in the bar, a loose fence connection, or a stop that no longer locks consistently. On a sled, inspect the runners and fence alignment; dust and wear can make a once-accurate setup feel sloppy. Taper jigs depend on their hold-downs and contact surfaces, which can lose grip if they collect pitch or sawdust.
Keep sliding surfaces clean and dry, and remove dust from adjustment tracks and clamps. Avoid overtightening knobs against soft plastic parts, and check fasteners periodically. On a shop-built sled, the fence can shift as materials move with humidity, so verify its calibration after storage or seasonal changes. A replaceable fence face is useful because it can be renewed after repeated blade contact without rebuilding the whole jig.
For most woodworkers, the practical choice is clear: buy an adjustable miter gauge for occasional angled crosscuts, use a stable sled for frequent small-part batches, and choose a taper jig for long tapered stock. A table saw jig to cut angles earns its place when it matches the workpiece size, clamps securely, and returns to the needed setting without guesswork.