What's inside
As an Amazon Associate I earn from qualifying purchases. This post may contain affiliate links at no extra cost to you.
What Makes a Good Cordless Brad Nailer for Cabinet Work
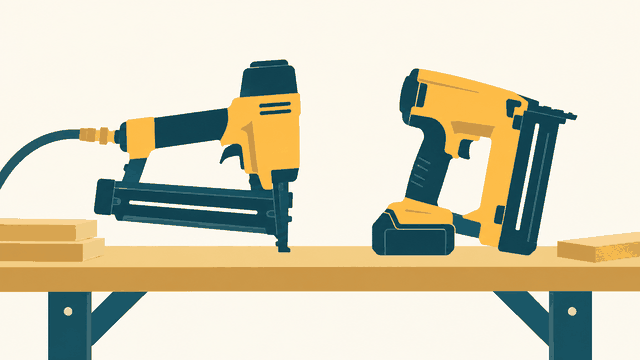
A cordless 18-gauge brad nailer is useful for attaching cabinet face frames, securing trim, assembling small boxes, and holding glued joints while the adhesive cures. It eliminates the compressor, hose, and noise of an air nailer, but it is heavier and usually more expensive.
For most cabinet and craft-shop work, an 18-gauge nailer accepting brads from 5/8 to 2-1/8 inches is the most useful size. The nails are thin enough to reduce splitting in hardwood and plywood, yet long enough for face-frame assembly and trim. A 16-gauge nailer provides more holding power, but leaves a larger hole and is excessive for many small assemblies. A 23-gauge pinner leaves a smaller mark but is mainly a positioning tool, not a general cabinet nailer.
As an Amazon Associate we earn from qualifying purchases at no extra cost to you.


Look for tool-free depth adjustment, a selectable bump-fire mode, a dry-fire lockout, a narrow nose, and an easy-to-see magazine. If you are buying your first tool in a battery system, compare the charger and battery cost as carefully as the nailer price. The bare tool can look inexpensive until a battery and charger add another $80 to $150.
The Best Cordless Platforms
| Platform type | Strengths | Weaknesses | Best for |
|---|---|---|---|
| Compact 12V | Light, easy to handle, smaller batteries | Fewer brad-nailer choices and less reserve power | Trim, small boxes, occasional assembly |
| 18V/20V mainstream | Broad tool selection, strong driving performance | Heavier and more expensive | Cabinet shops and frequent use |
| 18V budget platform | Lower tool and battery cost | More variation in fit, balance, and service | DIY and light production work |
For an existing cordless-tool owner, staying on the same battery platform is normally the best decision. A bare tool may cost less than a new kit, and a battery already used in a drill or saw can run the nailer. The disadvantage is weight: high-capacity batteries make an already bulky nailer tiring during overhead trim work.
DeWalt 20V Max, Milwaukee M18, Makita 18V LXT, and Ryobi 18V are the main ecosystems worth considering in this category. Each has drills, drivers, sanders, lights, and other shop tools that share batteries. Do not assume batteries cross between brands, even when voltage ratings appear similar.
If you are starting from zero, compare a kit rather than buying the nailer alone. A kit with a 2.0Ah or 3.0Ah battery is usually a better match than one with a heavy 5.0Ah pack. The smaller pack reduces wrist strain and still drives hundreds of brads in typical assembly work. Consider a cordless 18-gauge brad nailer kit if you need the battery and charger as well.
Which Nailer Type Fits Your Work
A mainstream 18V or 20V nailer is the safest choice for a cabinet shop. It generally handles 1-1/4- and 1-1/2-inch brads reliably in hardwood face frames, and it has enough adjustment range for thin plywood and trim. These tools are not small; expect roughly 6 to 8 pounds with a battery, depending on the platform.
A compact 12V nailer can be a better choice for craft work, drawer parts, and light trim. Its lower weight matters when you are holding a cabinet component in position with one hand. The trade-off is shorter runtime and fewer platform options. If your projects rarely use brads longer than 1-1/4 inches, a 12V cordless brad nailer can be entirely adequate.
Budget 18V nailers are fine for occasional cabinet assembly when the work is mostly softwood, plywood, or predrilled trim. They may require a longer pause between shots and can leave more variation in nail depth. That is not a dealbreaker for painted parts, where filler covers the holes. It matters more on clear-finished oak, maple, or walnut.
Nail Length, Depth, and Joint Strength
Use a brad long enough to penetrate the second piece by approximately 1/2 to 3/4 inch without breaking through. For 1/2-inch plywood attached to a solid frame, 1-1/4-inch brads are often suitable. For 3/4-inch stock, 1-1/2-inch brads are a common starting point. Test on scrap because actual penetration changes with the angle of the tool and the hardness of the wood.
Brad nails are clamps, not a substitute for glue or mechanical joinery. A face frame assembled with glue and brads can be strong, but a dry joint held only by nails will loosen. Use enough adhesive to wet the joint without flooding it, then shoot nails while the parts are flush.
Set the depth adjustment so the brad finishes just below the surface. Too shallow leaves a metal crown that catches on sanding equipment. Too deep creates a crater that is difficult to hide under clear finish. On a cabinet front, keep nails at least 3/8 inch from an end or edge when possible. Near-edge shots are a common cause of splits and blowouts.
Problems to Watch For
Misfires and double shots: These often result from the wrong nail strip, a nearly empty magazine, or a driver that needs cleaning. Use the nail brand and length specified by the tool, and do not mix partial strips carelessly.
Inconsistent depth: Hard maple, knots, and angled shots can leave brads proud even when soft pine drives correctly. Increase depth gradually and test again. Excessive force against the nose can also change how the tool seats.
Jams: A bent brad, damaged collation, or nails loaded at the wrong angle can jam the channel. Remove the battery before clearing one. Never pull a jammed nail with the battery installed.
Weak shots near the end of a battery charge: Some nailers slow noticeably before the battery protection shuts off. Keep a spare compact battery charged if you are assembling a large batch of doors or drawers.
Buying and Setup Tips
Choose a model with a no-mar nose or keep replacement pads available. Bare metal around the nose can dent prefinished plywood and soft pine. A swivel belt hook is useful in a larger shop, while an adjustable light helps when working inside cabinets.
Before production work, fire 10 to 20 brads into identical scrap. Check depth, splitting, hole size, and whether the nail exits the back. Mark the working setting on the tool. Keep the nailer square to the surface unless an angled shot is intentional, and clamp or brace wide panels instead of relying on the nailer to pull a poor-fitting joint together.
If you already own compatible batteries, buy the bare-tool cordless brad nailer. If you only assemble a few projects each year, the cheaper platform is usually enough; spend more for a premium model when reduced downtime, smoother depth control, and a larger shared tool ecosystem will pay back over regular cabinet work.
Related guides
- Longest Lasting Lawn Mower Battery: AGM vs Lithium vs Flooded Lifespan and Cost per Season
- Duralast Gold Lawn Mower Battery Review: U1 Fit, CCA and When to Pay for AGM
- Greenworks Pro 80V 21-Inch Mower Review: Runtime Math, Push vs Self-Propelled and Yard Fit
- Bosch High Pressure Washer Gun Replacement: Fittings, Adapters and What Fits Your Model