What's inside
As an Amazon Associate I earn from qualifying purchases. This post may contain affiliate links at no extra cost to you.
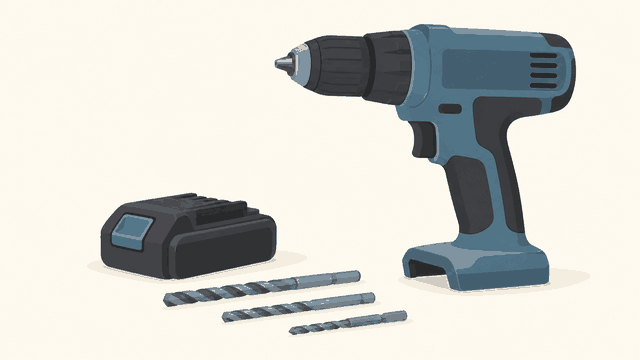
Installing cabinet hinges and drawer slides is a precision job, not a maximum-power job. The best cordless drill is light enough to control, has a dependable clutch, and accepts small driver bits without excessive wobble. Too much torque can strip a hinge screw, pull a screw head through particleboard, or push a drawer slide out of alignment.
For most cabinet work, a compact 12V drill/driver is the sweet spot. An 18V or 20V Max drill makes sense if you already own that battery platform or also build decks, assemble furniture, and drill larger holes. The battery ecosystem matters nearly as much as the drill because a bare tool is only a good deal when you already have compatible batteries and a charger.
As an Amazon Associate we earn from qualifying purchases at no extra cost to you.




What to Look For in a Cabinet Drill
Choose a drill/driver with a two-speed gearbox, a mechanical clutch with at least 15 settings, and a variable-speed trigger. A low-speed range around 0–450 rpm gives better control when driving screws. The high range, typically around 1,300–1,700 rpm, is useful for drilling pilot holes.
A 3/8-inch keyless chuck is sufficient for hinge and slide work. A 1/2-inch chuck is common on larger 18V tools, but it adds little value here unless you regularly use large drill bits. Look for a short head length—roughly 6 to 7 inches from the back of the tool to the chuck—because it fits more easily inside face-frame cabinets.
Weight matters. A drill that weighs about 2 to 3 pounds with its battery is easier to hold square against a hinge plate or drawer slide. A large high-voltage drill may have more power, but its extra length and weight make it easier to tilt, especially when working inside an upper cabinet.
A built-in work light is useful in dark cabinet interiors, although the light on many drills sits below the chuck and can cast the chuck’s shadow onto the screw. A belt hook is optional. A slim handle and a battery that does not protrude far below the grip are more important for cramped work.
Best Cordless Drill Categories
| Drill category | Best use | Advantages | Trade-offs |
|---|---|---|---|
| Compact 12V drill/driver | Hinges, drawer slides, cabinet assembly | Light, maneuverable, easier to control | Less runtime and drilling power |
| Compact 18V/20V drill/driver | Cabinet work plus general home repairs | More torque, longer runtime, broad tool ecosystem | Heavier and often longer |
| Brushless 12V drill/driver | Frequent installers and remodelers | Efficient, cooler-running, better battery life | Higher kit price |
| Right-angle drill | Tight spaces and rear cabinet fastening | Reaches where a standard drill cannot | Awkward for normal hinge and slide installation |
When a 12V Drill Is the Better Choice
A 12V cordless drill/driver kit is usually the best dedicated cabinet tool. Its lower weight reduces hand fatigue during a kitchen installation, and its clutch is easier to use without overdriving small screws.
Do not interpret 12V as weak for this job. Hinge screws and slide screws are usually small, and the cabinet material is commonly plywood, MDF, or particleboard. You generally need only enough torque to seat the screw firmly. A 12V drill can handle pilot holes, confirmat-style cabinet screws, and repeated hinge installation without difficulty.
The main limitation is runtime with a small battery. A 1.5Ah or 2.0Ah pack is light and fine for a few cabinets. For a full kitchen, a second battery prevents interruptions. A compact brushless model is worth considering if you install cabinets regularly, but a brushed kit can be the cheaper and perfectly adequate choice for one renovation.
When to Buy an 18V or 20V Max Drill
Choose a compact 18V or 20V Max drill/driver kit when you want one cordless platform for cabinet work and tougher jobs. These drills have enough reserve power for long screws, large pilot holes, and occasional construction work. They also tend to offer more battery choices, including compact packs and larger high-capacity batteries.
The cheaper brushed version is fine if you install cabinets only occasionally. Spend more for brushless if the tool will see frequent use, because brushless models usually deliver better efficiency and longer service life. Avoid choosing a bulky hammer drill solely because it is on sale. The hammer function is unnecessary for wood and adds size and weight.
If you already own compatible batteries, buying a bare tool can be economical. If you are starting from zero, compare the kit price, charger speed, and the cost of additional batteries. A discounted drill can become expensive if its replacement batteries cost more than the tool.
Settings That Prevent Damage
Start with the clutch set low—often around 4 to 8 on a compact drill—and increase it only when the screw will not seat. The numbers are not standardized between brands, so test on scrap material. The correct setting leaves the screw head flush without crushing the hinge cup, deforming the slide, or stripping the hole.
Use the drill’s low gear for driving screws and high gear for drilling. Hold the tool in line with the screw. A slight angle can cam out a Phillips or square-drive bit and damage the screw head. Use a fresh, correctly sized bit; a worn bit is a common cause of slipping and stripped screws.
For hinges, drill a small pilot hole when the manufacturer allows it, particularly near the edge of a hardwood face frame. For drawer slides, mark the holes with a self-centering drill bit or an awl before drilling. A 1/16-inch to 3/32-inch pilot hole is often appropriate for small cabinet screws, but follow the screw manufacturer’s guidance because particleboard holes can become loose if oversized.
Battery and Charger Considerations
Stay within one battery platform when possible. A platform with compact batteries, fast chargers, impact drivers, lights, and small saws offers more value than a slightly cheaper drill from an isolated line. For cabinet installation, one compact battery and one spare are usually more useful than a single high-capacity pack.
Keep the spare battery charged before beginning. Cold batteries may deliver less power, while overheated packs can shut down temporarily. Do not use a high-speed impact driver as your primary cabinet drill. It can drive screws quickly, but its hammering action makes it much easier to strip threads or overdrive fasteners.
A Practical Cabinet Installation Setup
For most homeowners, buy a compact 12V drill/driver with two batteries, a charger, a magnetic bit holder, a quality set of Phillips and square-drive bits, and a small self-centering pilot bit. If you already own an 18V platform, buy its shortest drill/driver rather than adding another battery system.
Use the drill to start and seat screws, but finish delicate hinge adjustments by hand if the clutch setting is uncertain. That extra control takes seconds and can prevent a stripped cabinet panel that is difficult to repair.
Related guides
- Longest Lasting Lawn Mower Battery: AGM vs Lithium vs Flooded Lifespan and Cost per Season
- Duralast Gold Lawn Mower Battery Review: U1 Fit, CCA and When to Pay for AGM
- Greenworks Pro 80V 21-Inch Mower Review: Runtime Math, Push vs Self-Propelled and Yard Fit
- Bosch High Pressure Washer Gun Replacement: Fittings, Adapters and What Fits Your Model