What's inside
As an Amazon Associate I earn from qualifying purchases. This post may contain affiliate links at no extra cost to you.
For clean tile cuts, choose a diamond-grit oscillating tool tile blade for porcelain, long cuts, and frequent work; choose a carbide-grit blade for occasional ceramic, grout removal, backsplash adjustments, and the lowest purchase cost.
As an Amazon Associate we earn from qualifying purchases at no extra cost to you.
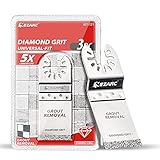


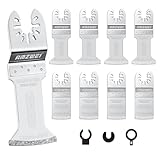
Quick Picks by Cutting Situation
| Job or material | Best blade type | Useful width | Typical cutting depth | Why it fits |
|---|---|---|---|---|
| Soft ceramic wall tile | Carbide-grit | 20–35 mm | 10–20 mm | Fast enough for small openings and inexpensive to replace |
| Porcelain floor tile | Diamond-grit | 20–35 mm | 8–15 mm | Harder abrasive lasts longer and leaves a more controlled cut |
| Backsplash outlet or pipe opening | Fine diamond-grit | 20–30 mm | 6–12 mm | Better control near finished surfaces |
| Plunge cut near a corner | Narrow diamond-grit | 10–20 mm | 6–12 mm | Smaller profile is easier to position accurately |
| Removing tile grout | Carbide-grit grout blade | 2.5–5 mm | 6–10 mm | Thin edge fits the joint without removing excessive tile |
| Occasional single repair | Carbide-grit | 20–30 mm | Up to 10–15 mm | Lower upfront cost is usually more important than maximum life |
These are practical working ranges rather than promises for every blade. Actual capacity depends on the blade’s exposed grit, the tile thickness, the tool’s oscillation angle, and how aggressively you feed the cut. A multi tool tile blade is intended for controlled, localized cutting—not for replacing a wet saw on a large installation.
Carbide-Gr it vs. Diamond-Grit Tile Blades
Carbide-grit blades
Carbide-grit blades use tungsten-carbide particles bonded to a steel edge. They are generally the better value for glazed ceramic tile, cement board, grout, and occasional backsplash work. The abrasive surface removes material rather than slicing it with conventional teeth, so it can start a plunge cut without requiring a pre-drilled hole.
The main advantages are lower cost, broad availability, and good performance on softer tile. A carbide blade also makes sense when the cut will be hidden under a trim plate or when you expect to use the blade only a few times.
Its limitations become clear with porcelain. Porcelain is denser and more abrasive than ordinary ceramic tile, so carbide grit can lose its cutting ability relatively quickly. Excessive pressure accelerates wear and may produce a rough, overheated edge.
Diamond-grit blades
Diamond-grit blades carry synthetic diamond particles on the cutting edge. They cost more, but they are normally the preferred oscillating tool blade for tile when working with porcelain, stone-look porcelain, glass-adjacent areas, or a series of repeated cuts.
Diamond does not make an oscillating tool fast at removing large areas. Its value is control and wear resistance. A fine diamond edge can make a clean outlet notch, trim a tile at a door jamb, or enlarge a cut gradually while reducing the chance of chipping the visible glaze.
Diamond blades still need a light feed rate. Forcing one into dry porcelain can generate heat, clog the abrasive surface with dust, and shorten its useful life. Where the manufacturer permits it, occasional misting or a damp sponge near the cut can reduce dust and heat; keep water away from the tool body, battery, and electrical connections.
How to Choose a Multi Tool Blade for Tile
- Match the abrasive to the tile. Use carbide for ceramic and grout when cost matters. Use diamond for porcelain or repeated work.
- Measure the required depth. A blade’s overall length is not its cutting capacity. Look for the usable exposed edge and keep the blade from striking the substrate unnecessarily.
- Select the narrowest practical width. A 10–20 mm blade is easier to steer around a pipe or corner. A 30–35 mm blade is more stable for a straight notch.
- Check the mounting interface. Many current blades use a universal-style open mounting pattern, but not every pattern fits every tool. Confirm compatibility with your tool manufacturer or the blade package.
- Consider the visible edge. Fine-grit diamond is preferable where the cut will remain exposed. A coarser carbide edge is acceptable behind an electrical cover or trim.
- Plan for dust. Tile dust is abrasive. A vacuum, dust mask rated for fine particulates, eye protection, and hearing protection are sensible additions.
Searches for “tile blade for multi tool,” “multi tool blade for tiles,” and “oscillating tool blades for tile” often return grout blades, carbide blades, and diamond blades together. The critical distinction is the abrasive material and edge width, not the wording used for “multi tool” or “oscillating tool.”
Decision Matrix: Which Blade Makes Sense?
| Your situation | Recommended choice | Reason |
|---|---|---|
| One ceramic backsplash opening and a tight budget | 20–30 mm carbide-grit | Enough abrasion for the job without paying for extended porcelain life |
| Several porcelain tiles in one room | 20–35 mm diamond-grit | Better wear resistance and more predictable progress |
| Beginner making a visible plunge cut | 20–25 mm fine diamond-grit | More controllable than a wide, coarse blade |
| Professional or frequent remodeler | Fine diamond plus narrow diamond blade | One stable blade for straight work and one for corners and detail |
| Only grout removal | 2.5–5 mm carbide-grit grout blade | Thin profile reduces accidental contact with adjacent tile |
| Very large number of straight cuts | Wet saw or tile cutter, with an oscillating blade for finishing | A multi tool is slower and less economical for production cutting |
Making a Clean Plunge Cut
- Mark the opening. Use painter’s tape over the cut line, then mark the outline on the tape. The tape helps improve visibility and can reduce minor surface scuffing.
- Confirm what is behind the tile. Locate wiring, plumbing, studs, and backer board before cutting. Never assume an empty cavity.
- Score the glaze lightly. Set the tool to a low or medium speed and let the blade establish a shallow outline. Do not attempt full depth immediately.
- Deepen the cut in passes. Work around the outline, alternating sides of the opening rather than forcing one section to full depth. Withdraw the blade periodically to clear dust.
- Support the tile. If the tile is not installed, place it on a stable, fully supported surface. Unsupported tile can crack as the blade exits.
- Finish the corners by trimming inward. Avoid swinging the blade past a corner, which can chip the glaze. Small corrections are safer than one aggressive plunge.
For an outlet opening, leave the cut slightly inside the final cover-plate boundary. A cover plate can hide a small amount of unevenness, while an oversized opening cannot be repaired neatly without replacing the tile.
Durability, Cost, and Maintenance
Grit usually wears first at the center of the working edge, especially when the operator holds the blade in one position and pushes hard. A blade that still oscillates but cuts slowly is not necessarily defective; its abrasive surface may simply be polished or depleted.
As a rough market guide, carbide-grit tile blades commonly cost about $10–$25 each, while diamond-grit versions often range from $20–$60 or more depending on width, coating, and intended material. Suppose a carbide blade costs $15 and completes two small ceramic jobs: its consumable cost is $7.50 per job. A $35 diamond blade that completes eight porcelain jobs costs about $4.38 per job, before accounting for labor or tool wear. The more expensive blade can therefore be cheaper for repeated hard-tile work, but not necessarily for one repair.
- Brush or vacuum dust from the blade after use; do not store it buried in wet debris.
- Allow a hot blade to cool naturally instead of quenching it suddenly.
- Inspect the mounting hole and flange for packed dust before reinstalling.
- Replace a blade with a cracked body, loose abrasive, distorted mount, or severe loss of cutting speed.
- Do not use a tile abrasive blade as a general-purpose wood or metal blade.
The most common mistake is treating an oscillating tool blade for tile like a high-speed grinder wheel. The tool works best with modest pressure, a steady hand, and repeated shallow passes. If the project involves many linear cuts, a wet saw will usually be faster and may produce a cleaner edge; use the oscillating multi tool blade for notches, corners, installed-tile repairs, and final fitting.
Bottom Line
Choose carbide-grit when you need an affordable multi tool blade for ceramic tile, grout, or a single backsplash modification. Choose diamond-grit when the material is porcelain, the cut will be visible, or you expect enough work to justify longer abrasive life. For the most flexible kit, pair a 25–30 mm diamond blade for general cutting with a 10–20 mm narrow blade for plunge cuts and edge trimming.