What's inside
As an Amazon Associate I earn from qualifying purchases. This post may contain affiliate links at no extra cost to you.
The best caulk gun for smooth, dripless beads is usually a 10:1 or 18:1 dripless manual gun for standard acrylic and silicone, while thick polyurethane, construction adhesive, sausage packs, and frequent work justify 26:1 leverage or a battery-powered model.
As an Amazon Associate we earn from qualifying purchases at no extra cost to you.
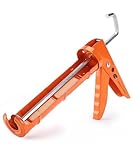
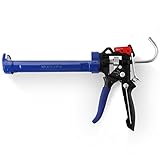

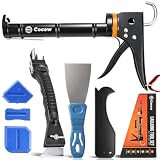
Quick picks by job
| Situation | Best choice | Why | Typical budget |
|---|---|---|---|
| Occasional indoor repairs | 10:1 dripless manual gun | Light trigger pull for low- to medium-viscosity caulk; inexpensive and easy to control | $10–$25 |
| Regular trim, windows, and doors | 18:1 dripless manual gun | Better control and leverage across acrylic, latex, silicone, and many hybrid sealants | $20–$45 |
| Thick polyurethane or construction adhesive | 26:1 steel-frame gun | Reduces hand force and keeps dense material moving at a usable rate | $30–$70 |
| Many tubes every week | 18:1 or 26:1 battery-powered gun | Consistent flow, adjustable speed, and much less repetitive squeezing | $150–$350, tool only or kit |
| Large commercial joints or less waste | Manual or battery sausage-gun system | Higher material capacity and fewer rigid tubes to dispose of | $40–$400 |
Thrust ratio: what 10:1, 18:1, and 26:1 mean
A caulk gun’s thrust ratio describes the mechanical advantage between the trigger force and the force pushing the plunger. In simplified terms, an 18:1 gun applies about 18 units of plunger force for every unit of force at the handle, before friction and design losses. The ratio is not a speed rating: higher leverage makes thick material easier to dispense, but usually moves the plunger a shorter distance per trigger stroke.
10:1: best for light materials and occasional work
A 10:1 gun suits painter’s caulk, lightweight acrylic latex, and some low-viscosity silicone. It gives a relatively fast bead with less trigger movement, making it comfortable for short repairs. Its limitations appear when a tube is cold, the nozzle opening is small, or the compound is labeled high-solids, polyurethane, or construction adhesive. The trigger can become tiring, and an inexpensive frame may flex instead of transferring force efficiently.
18:1: the most useful general-purpose ratio
For most homeowners and finish carpenters, 18:1 is the practical middle ground. It provides enough leverage for common sealants without making ordinary caulk feel excessively slow. Choose it when one gun must handle interior trim, baseboards, bath fixtures, window frames, and exterior joints. A smooth plunger, rigid barrel, and controlled trigger matter at least as much as the printed ratio.
26:1: for dense compounds and long sessions
Use 26:1 when dispensing thick polyurethane, butyl, MS polymer, roof sealant, or construction adhesive. It is also useful when working in cool conditions, because many sealants become significantly more viscous as temperature falls. The trade-off is slower output and potentially too much force for thin acrylic caulk. If the trigger feels difficult to release or the bead continues to grow after you stop, the gun may be overpowered for that material.
Dripless versus ratchet-rod caulk guns
“Dripless” and “no-drip” designs use a clutch or pressure-release mechanism that stops forward plunger movement when you release the trigger. This helps prevent a blob of sealant from emerging while you reposition the gun. It does not eliminate every drip: pressure trapped inside the tube, a damaged cartridge seal, or a cut nozzle that is too large can still push material forward.
A ratchet-rod gun has a toothed push rod and a trigger that advances it one tooth at a time. These guns are inexpensive and can produce strong thrust, but the rod typically continues to apply pressure until you reverse or release it manually. They are serviceable for occasional low-cost work, though they require more deliberate pressure control.
A smooth-rod dripless gun generally offers better bead control and quicker stopping. Look for a substantial release lever, a rod that does not wobble in the frame, and a plunger disc that fits the cartridge properly. Some professional models use a rotating or adjustable plunger to accommodate different tube sizes.
| Design | Typical thrust | Common capacity | Approximate bare weight | Main compromise |
|---|---|---|---|---|
| Basic ratchet rod | 6:1–10:1 | 10 oz cartridge | 0.5–1.0 lb | More pressure after the trigger is released |
| Dripless smooth rod | 10:1–18:1 | 10 oz cartridge | 1.0–1.8 lb | Higher purchase price and more moving parts |
| Heavy-duty manual | 18:1–26:1 | 10 oz or 20 oz cartridge | 1.5–2.5 lb | Slower dispensing with thin caulk |
| Battery-powered | Electronic variable thrust | 10 oz, 20 oz, or sausage packs | 4–8 lb with battery | Cost, bulk, charging, and cleaning |
Weights and capacities vary by frame and manufacturer. A 10-ounce cartridge is the common rigid tube size; larger 20-ounce cartridges and 20- or 24-ounce sausage packs are not interchangeable unless the gun is designed for them.
When a sausage gun is worth the upgrade
Sausage packs replace a rigid cardboard or plastic cartridge with a flexible foil package. They can reduce packaging waste and often leave less unusable material behind. They are particularly useful for long construction runs, flooring adhesive, roofing sealant, and commercial sealing.
The upgrade makes sense when you regularly use several large packs, need a 20-ounce or larger capacity, or want to buy sealant in packaging that minimizes waste. It is less attractive for a homeowner who uses one 10-ounce tube twice a year: the specialized barrel, plunger, and cleanup process add cost and storage requirements. Sausage material also needs the correct follower plate and a proper end-cutting procedure; forcing an incompatible pack into a cartridge gun can damage the seal.
When battery power pays off
A battery-powered caulk gun is valuable when hand fatigue affects bead consistency, when you dispense many tubes per day, or when thick sealant must be applied overhead or in awkward positions. Variable-speed triggers and adjustable force settings can produce a steady bead without repeated manual squeezing. Models from established cordless tool systems may be particularly convenient if you already own compatible batteries.
For occasional DIY use, the economics are harder to justify. Consider a $220 powered gun compared with a $35 manual model. If the powered tool saves 10 minutes per job and you complete 15 jobs per year, it saves about 2.5 hours annually. It becomes a practical purchase when that saved effort matters, when repetitive strain is a concern, or when the gun is part of frequent paid work—not simply because it sounds more powerful.
How to use a caulk gun for a smooth bead
- Prepare the joint. Remove loose old sealant, dust, grease, and moisture. A clean, dry joint is more important than an expensive gun.
- Cut the nozzle correctly. Cut at a 30- to 45-degree angle and make the opening slightly narrower than the finished bead. You can enlarge it, but you cannot make an oversized cut smaller.
- Puncture the inner seal. Use the built-in rod or a separate tool. A partial puncture can cause sudden pressure changes and an uneven bead.
- Set the pressure. Start with the lowest speed or thrust that moves the material continuously. Dense sealant may require 18:1 or 26:1 leverage.
- Pull, do not push. Hold the nozzle at roughly 45 degrees and pull the gun toward you while maintaining contact with both sides of the joint. Keep the trigger speed and travel speed steady.
- Release pressure immediately. On a dripless gun, release the trigger and let the clutch disengage. On a ratchet-rod design, use the release lever or reverse the rod to prevent a blob.
- Tool promptly. Smooth the bead with a compatible tool or lightly dampened finger only when the sealant instructions allow it. Remove masking tape before a surface skin forms.
A useful starting calculation is to cut the nozzle opening to approximately the bead diameter you need. A 3/16-inch opening usually produces a small trim bead, while a 1/4-inch opening is more suitable for many general joints. Actual output depends on sealant viscosity, trigger speed, and the angle of the cut.
Durability and maintenance details
The first parts to wear are usually the release clutch, plunger seal, trigger pivot, and nozzle cutter. A bent rod or frame can create more trouble than a worn cutting blade because it makes pressure inconsistent. Steel frames resist flexing; reinforced polymer frames are lighter and can be adequate for occasional work.
- Wipe excess sealant from the plunger and frame before it cures.
- Do not leave a partially used cartridge under pressure overnight.
- Keep the rod and release mechanism free of cured material; use the sealant maker’s recommended solvent rather than guessing.
- Store opened cartridges with the nozzle capped or sealed, but check the product’s stated shelf life.
- For battery guns, remove the battery during storage and inspect the plunger for hardened material before loading a new pack.
The best choice is therefore not the highest thrust ratio. Match the mechanism to the sealant: 10:1 for light, occasional work; 18:1 for broad general use; 26:1 for dense material; sausage systems for high-volume or large-capacity applications; and battery power when consistency and reduced hand effort justify the extra weight and cost.